Power on/off, Battery power led, Level control – Lectrosonics Long Ranger IV User Manual
Page 9
Portable Wireless Sound System
TO ATTACH
Press firmly, listen for click.
Depress collar fully.
Click!
1. Install the Microphone
onto the transmitter.
TO REMOVE
Hold the
transmitter
2. Press the mic onto the
XLR connector until
case with the
you hear a “click.” The
microphone
pointed
click indicates the mic
upward.
has locked into place.
Rotate the
collar in the
3. Pull on mic to ensure
direction
shown.
that it is secure.
4. Tighten the collar by
turning it counter-clock
wise.
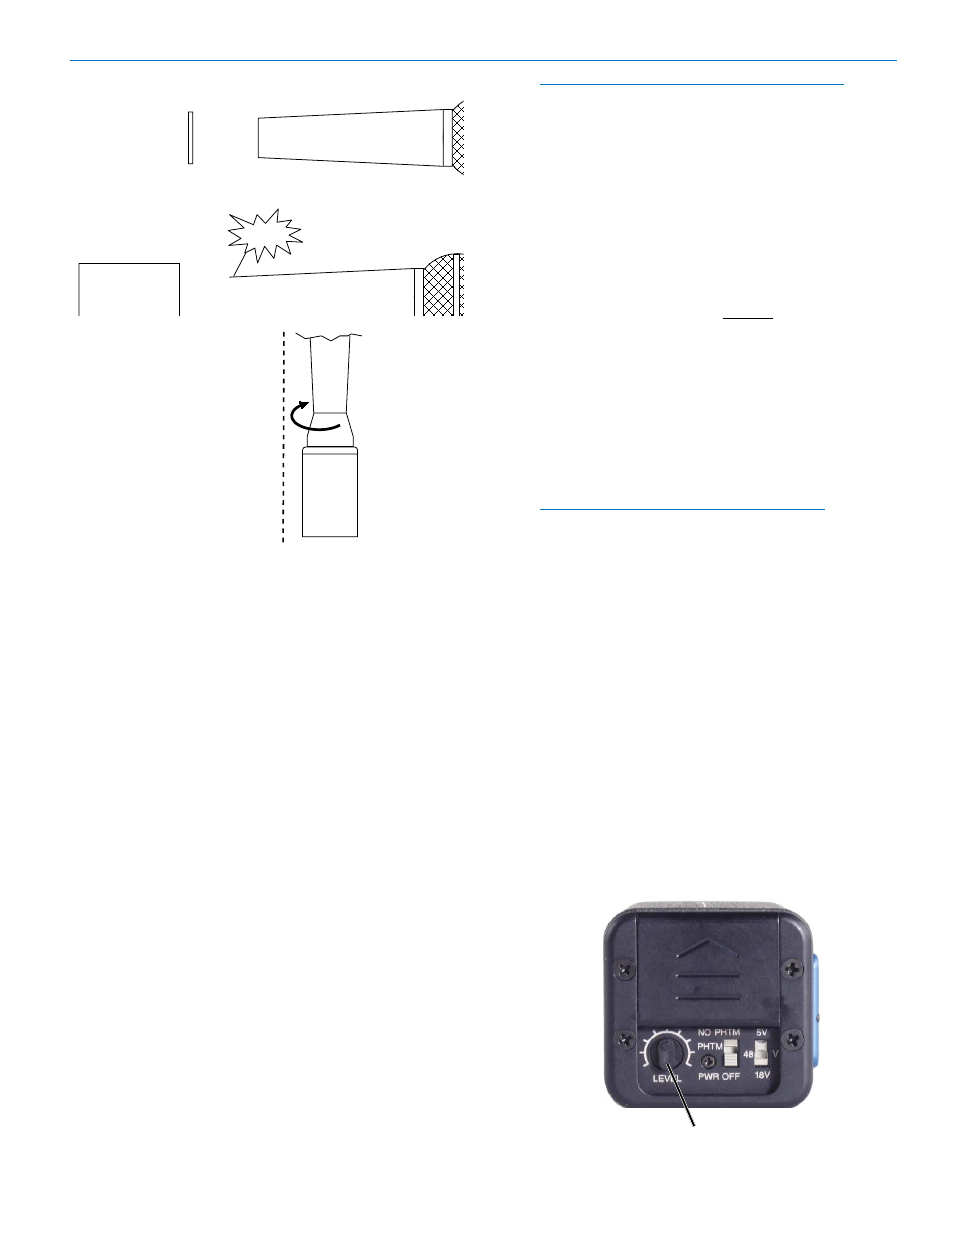
POWER ON/OFF
Turns the battery power on and off.
BATTERY POWER LED
Glows brightly when battery is good. A weak or dim
power LED means that the battery is weak, and has
about an hour of operation left. If the LED fails to light,
the battery should be replaced. The POWER LED is
connected to a precision battery test circuit that continu
ously monitors battery voltage. The LED is at full bright
ness with a new 9 Volt alkaline. As the battery voltage
drops during use, the LED brightness will also de
crease. After 12 to 15 hours the battery voltage will be
about 7 Volts. The LED will be completely extinguished.
Since the internal circuits are all tightly regulated and
the RF output stage has a separate discrete regulator,
the transmitter will continue to operate to a battery volt
age of 6.5 Volts. From 6.5 Volts to 6 Volts, the transmit
ter will still operate, but with degraded performance.
Please note that a weak battery will sometimes light the
POWER LED immediately after turn on, but soon will
discharge to the point where the LED will extinguish.
The combination of an accurate battery condition indi
cator and regulation of all internal circuits guarantees
much longer battery life, as well as consistent perfor
mance over the life of the battery.
LEVEL CONTROL
Used to adjust the audio input volume for the proper
modulation level. Rotate knob until the LEVEL LED on
the receiver flickers when there is an input signal. The
LIMIT LED on the receiver should light occasionally.
(Note: The H187, Digital Code Squelch version is
operationally identical to the standard H175.)
1) Turn on the receiver and adjust the Long Ranger
volume to minimum.
2) Turn on the transmitter. The RF LED on the receiv
er should come on.
3) Hold the microphone as you will when you will be
using it.
4) While speaking, adjust the transmitter gain until
the green MOD LEVEL lamp on the Long Ranger
control panel is lighted or flickers and the red MOD
LEVEL lamp blinks on the loudest words. Raise
and lower your voice while observing the lamps.
The red lamp should blink occasionally.
Occasional lighting of the LIMIT LED (about 10-15% of the
time) indicates proper operation and optimum signal-to
noise ratio.
Even when the transmitter is limiting, little distortion is
produced because of the high linearity of the gain con
trol circuit in the H187.
5) Adjust the Long Ranger volume level as necessary.
NOTES: The LEVEL control on the transmitter
should not be used to control the volume of your
sound system. This should be done using the level
control on the Long Ranger.
If the mic level is too high - the Red LED on the Long
Ranger will light frequently or stay on. This condition
may cause distortion.
If the mic level is too low — neither LED will light, or
the Red LED will light dimly. This condition will cause
hiss and noise. You may experience severe reduction
in apparent range if the transmitter gain is too low. It
may sound as if you are getting dropouts. What is actu
ally happening is that you are hitting your noise floor
because the S/N ratio has been reduced by the low
modulation.
The input limiter operates over a full 30dB range regard
less of the gain control setting. The Red LED should
flicker occasionally during operation
Gain adjustment knob
Rio Rancho, NM
9