Operation, Maintaining your pump, Replacement parts – BJM Pumps BABY-12Volt User Manual
Page 3: Caution
OPERATION
Place pump on flat, solid surface in at least 3/4" of water. Connect garden hose to hose adaptor
or install 1" threaded pipe directly into the discharge of the pump. Connect power supply cord to
a 12 Volt D.C. grounded receptacle.
When using pump on a dirt or sand surface, always have outer screen in place to prevent mud or
debris from entering the pump.
MAINTAINING YOUR PUMP
The motor housing of the "BABY" pump is completely sealed and requires no service. Disassembly
of the housing or the power cord will void the warranty.
The motor of this pump has a built-in thermal overload protector that will automatically shut the
pump off if the operating temperature of the motor becomes too high.
If the pump becomes clogged; disconnect the power source, remove the outer screen, and flush
thoroughly with water. If the impeller will not turn, remove the six screws that secure the pump
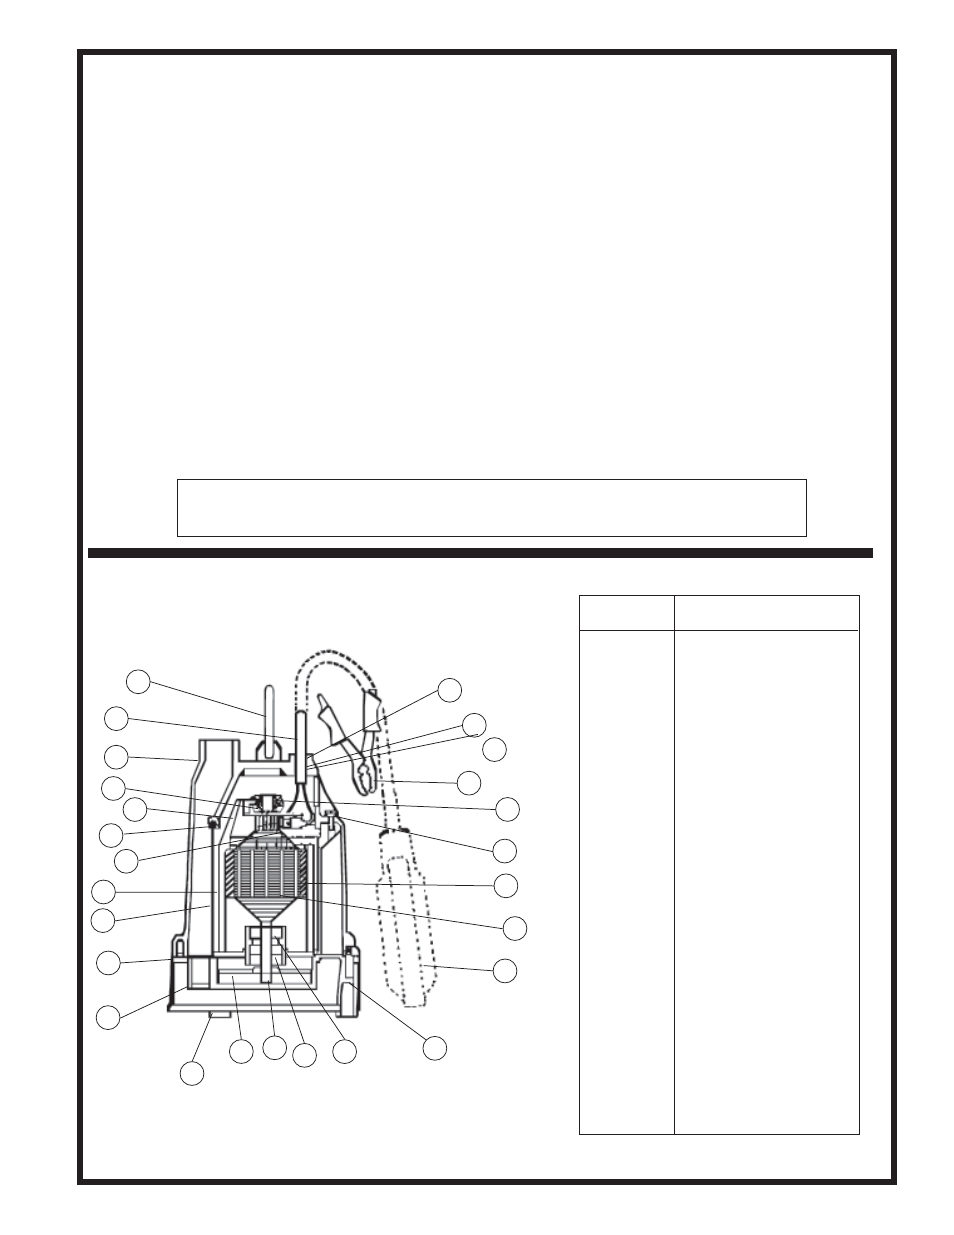
volute (Fig. 1) and check for debris that may be lodged between the impeller and volute.
7
5
4
3
2
11
6
10
8
1
9
12
13
14
15
16
17
18
19
20
21
23
24
22
25
26
REPLACEMENT PARTS
CAUTION:
Not suitable for use in corrosive or flammable liquids.
POSITION
DESCRIPTION
1
Handle
2
Power cord
3
Pump body
4
Bushing
5
Brush holder bracket
6
O-ring seal
7
Brushes
8
Magnet holder
9
Motor housing
10
Gasket
11
Strainer/Suction Cover
12
Bottom Plate
13
Impeller
14
Circlip
15
Lip seal
16
Ball bearing
17
Screw
18
Float switch (optional)
19
Rotor
20
Magnet
21
Screw
22
Spring
23
Battery clip
24
Bushing
25
Washer
26
Cable Gland
Fig.1
3 of 4