Loading the rack – CHIEF STROTR User Manual
Page 6
WROTR and STROTR-30/-36/-42
Installation Instructions
6
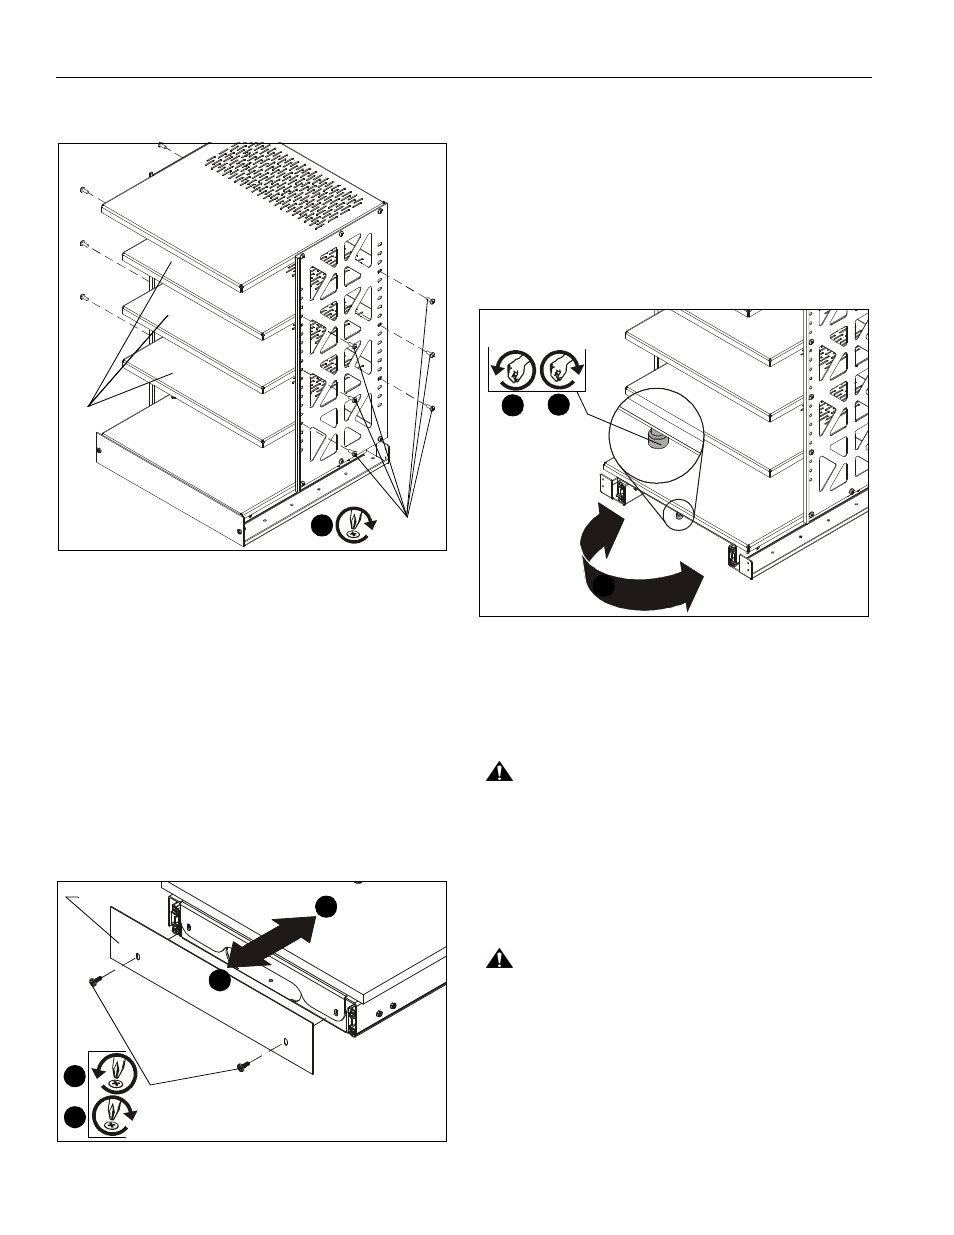
4.
Loosely assemble shelves (C) to side mounting plates (G)
using two fasteners (D - for WROTR; E - for STROTR) on
each side, four fasteners total per shelf. (See Figure 5)
Figure 5
5.
Tighten all screws after all shelves, base and top are
positioned.
6.
WROTR ONLY: Insert head caps (F) over the 7mm x 70mm
screws (D) in the WROTR.
LOADING THE RACK
IMPORTANT ! : All shelves included with the rack must
be installed.
OPTIONAL: Rotating Racks
NOTE:
Racks may be rotated to facilitate loading the rack.
1.
Remove and SAVE two screws from ST-/WROTR base (A)
front and remove the cover plate. (See Figure 6)
Figure 6
1.
Slide top of base forward, exposing bottom of base. (See
Figure 6)
2.
STROTR ONLY: Unlock the thumbscrew in the STROTR
front. (See Figure 7)
3.
Pull out and swivel the ST-/WROTR as needed to gain
access to the back.
4.
Swivel ST-/WROTR to front and close ST-/WROTR. (See
Figure 6)
5.
STROTR ONLY: Tighten thumbscrew to keep from
swiveling. (See Figure 7)
Figure 7
6.
Replace cover plate and attach with two fasteners removed
in Step 1. (See Figure 6)
Load Distribution
CAUTION:
BEGIN PLACEMENT OF LOAD AT BOTTOM
OF RACK! Load rack, moving from bottom toward top of rack.
Loading rack incorrectly may result in instability causing
possibly injury and/or damage to components.
1.
Begin placement of components into the rack at the lowest
point.
2.
Continue placing items into the rack, moving from the
bottom upward.
CAUTION:
DISTRIBUTE LOAD CORRECTLY! Load rack
with 2/3 total weight of components in the lower half of rack.
Loading rack incorrectly may result in instability causing
possible injury and/or damage to components.
(D or E)
(C)
(STROTR shown)
4
1
x 2
cover plate
1
6
6
(WROTR shown)
5
2
4