CHIEF KWGSK110 User Manual
Page 8
KWGSK110
Installation Instructions
8
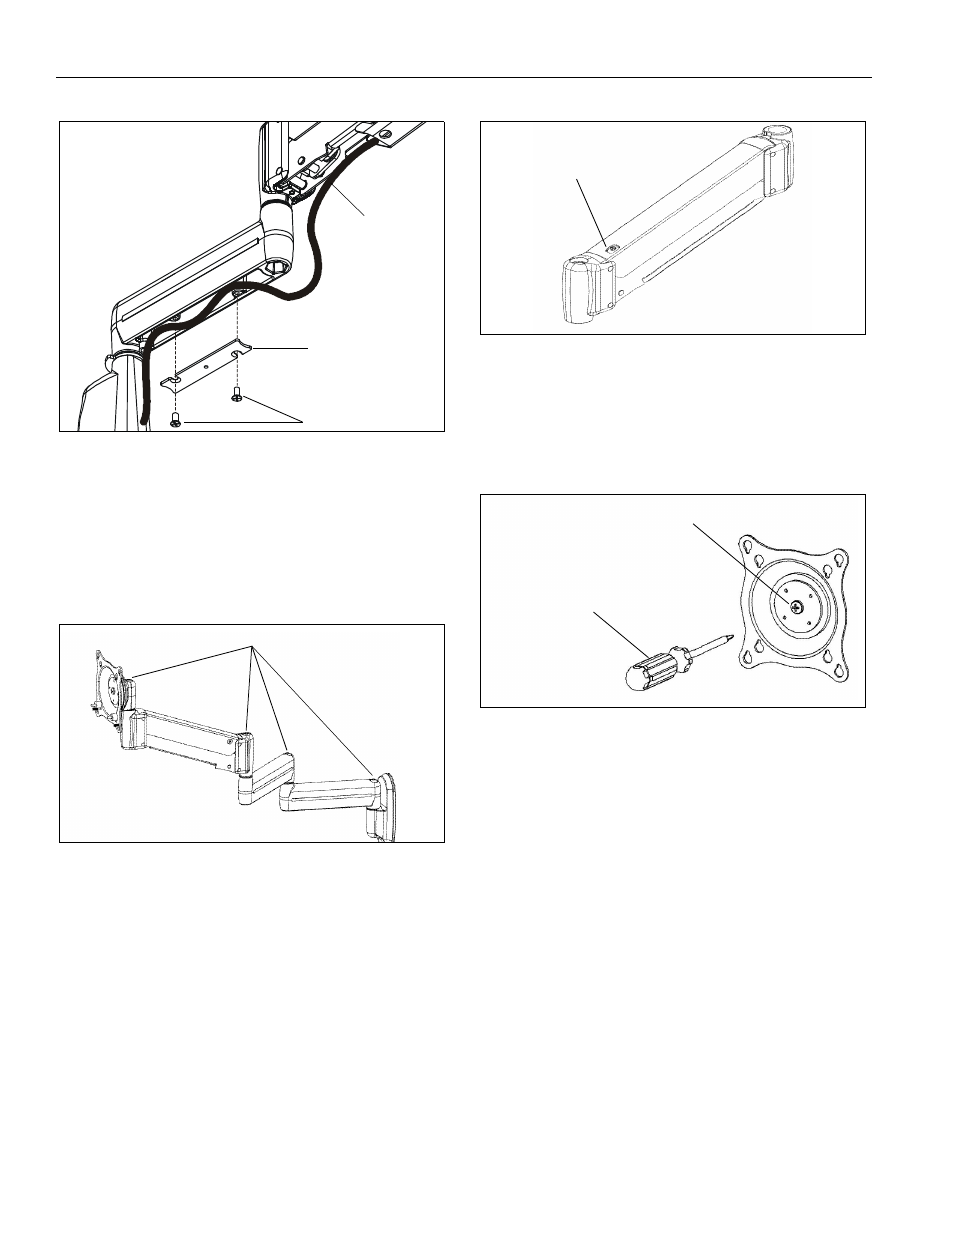
Figure 11:
ADJUSTMENTS
Swing Arm
PIVOT / SWING
1.
Using 3/16" hex key, slightly loosen or tighten the
adjustment screw(s) as necessary (See Figure 12).
Figure 12
Height Adjustable
1.
Using 5/32" hex key, slightly loosen or tighten the
adjustment screw as necessary (See Figure 13).
•
If display settles on its own, then rotate
adjustment screw counterclockwise (towards the
"+" symbol).
•
If display rises on its own, then rotate adjustment
screw clockwise (towards the "-" symbol).
NOTE: It may be necessary to raise or lower the height
adjustable arm to expose the adjustment screw.
Figure 13
Centris Head
1.
If previously attached, disconnect cables from display, then
remove display.
2.
Using Phillips screwdriver, slightly loosen or tighten the
adjustment screw as necessary (See Figure 14).
Figure 14
(E) x 3
Cable Path
(typical)
(C) x 1
Adjustment Screws
Adjustment Screw
Adjustment Screw
Phillips Screwdriver