CHIEF AN1 Series User Manual
Page 13
Installation Instructions
AN1 Series
13
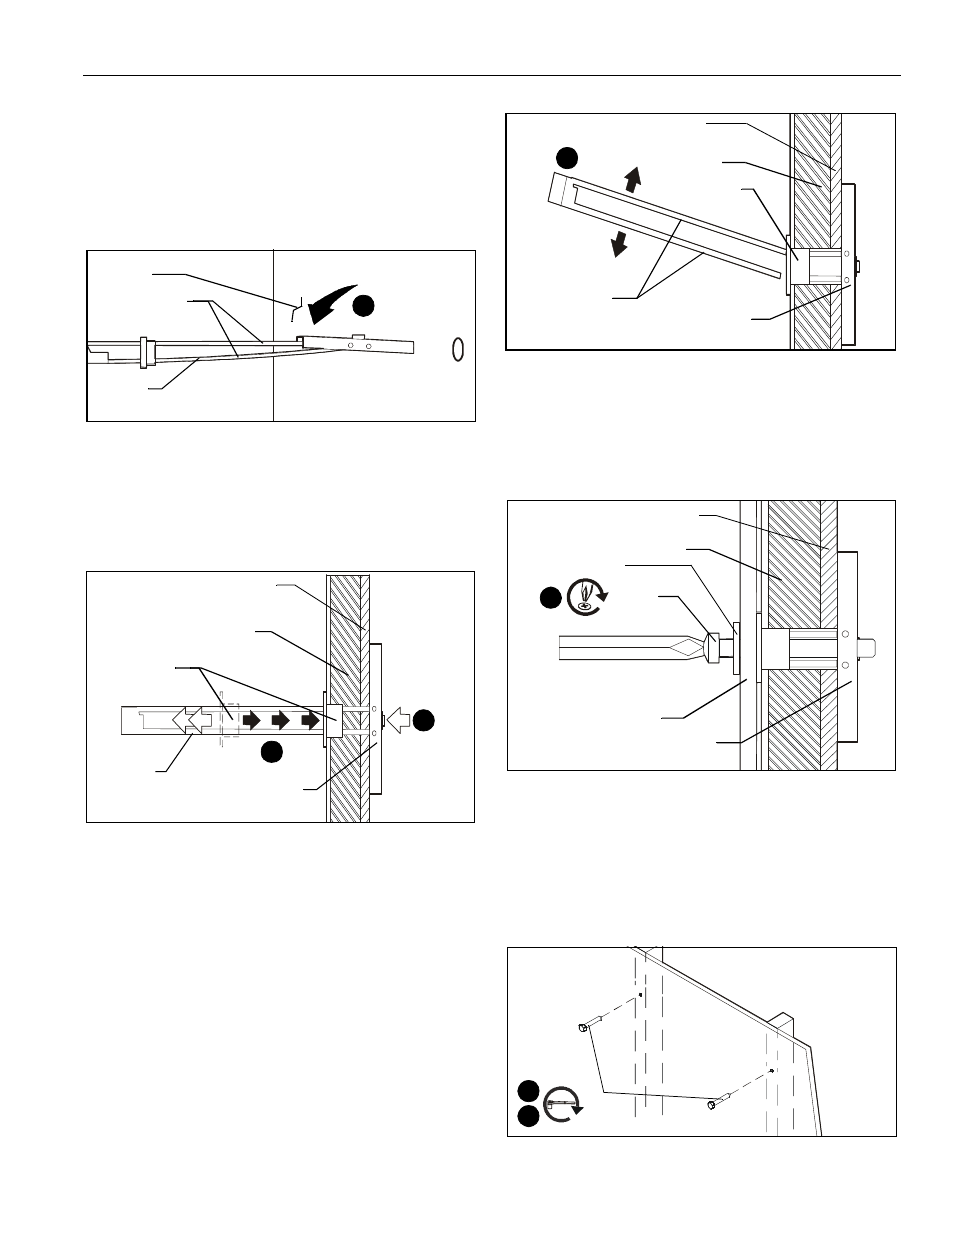
FASTENER INSTALLATION METHODS
NOTE:
Refer to Table 1 for appropriate hardware and pilot hole
sizes for various wall types.
Steel Stud / Drywall
1.
Hold metal channel on anchor (E) flat alongside plastic
straps and slide channel through hole. (See Figure 20)
Figure 20
2.
Holding plastic straps on anchor (E), pull anchor away from
wall until channel rests flush behind wall making sure anchor
channel is positioned vertically on drywall, or steel stud (if
present). (See Figure 21)
3.
Slide plastic cap on anchor (E) towards wall until flange of
cap is flush with wall. (See Figure 21)
Figure 21
4.
Snap off plastic straps on anchor at wall by pushing side to
side, snapping off straps level with flange of plastic cap.
(See Figure 22)
Figure 22
5.
Line up anchor with attachment point.
6.
Insert 1/4-20 x 1-3/4" Phillips pan head screw (C) through
1/4" washer (D), corresponding mounting hole in product
and into anchor (E), and tighten until flush against product.
DO NOT over tighten! (See Figure 23)
Figure 23
Wood Stud
NOTE:
Refer to Table 1 for appropriate hardware and pilot hole
sizes for various wall types.
1.
Use one 1/4 x 2-1/2" lag bolt (A) through product and into
pilot hole. (See Figure 24)
2.
Repeat for remaining pilot hole.
Figure 24
(E)
Drywall
Plastic straps
1
(E)
Plastic cap
Drywall
Anchor metal channel
3
Steel stud
(side view)
2
(if present)
Plastic straps
Drywall
Anchor metal channel
Plastic cap
4
Steel stud
(side view)
(if present)
Drywall
Anchor metal channel
(C) x 4
6
Steel stud
(D) x 4
(side view)
(if present)
Product
1
2
(A) x 2