CHIEF WP2XS_WP2XUS User Manual
Page 11
Installation Instructions
WP2XS, WP2XUS
11
Projector Installation (WP2XS Models Only)
WARNING:
Exceeding the weight capacity can result in
serious personal injury or damage to equipment! It is the
installer’s responsibility to make sure the weight of the
projector does not exceed 25 lbs (11.3 kg).
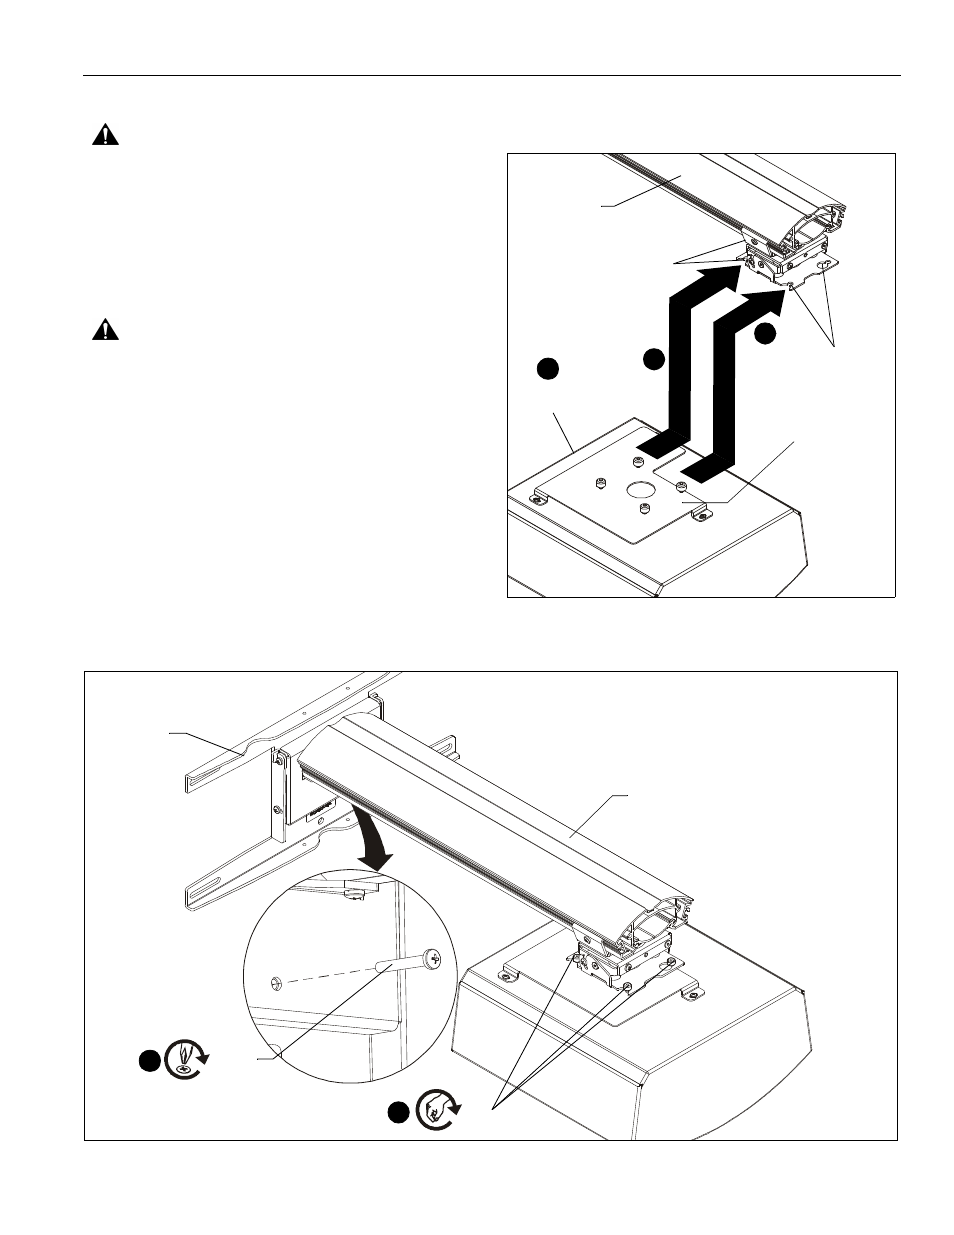
1.
Assemble and attach UL Listed RSA Series product (not
included) to short throw projector arm threaded end
following instructions included with RSA.
2.
Attach required interface bracket (not included) to projector
following instructions included with interface bracket.
WARNING:
IMPROPER INSTALLATION CAN LEAD TO
PROJECTOR FALLING RESULTING IN SERIOUS
PERSONAL INJURY OR DAMAGE TO EQUIPMENT.
Ensure that mounting slots in RSA slide under thumb screws
and that screws are seated in the back of slots.
3.
Orient projector with attached bracket so that front of
projector lines up with front of projector arm. (See Figure 13)
4.
Lift projector so that screws with thumb nuts (V) in interface
bracket are aligned with mounting slots in projector arm
base. (See Figure 13)
5.
Slide projector with interface bracket onto mounting slots in
projector arm base until screws are seated against the back
of mounting slots. (See Figure 13)
6.
Turn thumb nuts until tight to secure projector to projector
arm. (See Figure 14)
7.
Tighten the M5x35mm button head cap screw (H) on the
wall plate (E). (See Figure 14)
Figure 13
(A)
Interface
Front of
projector
Mounting
slots
Mounting
slots
3
4
5
bracket -
(not included)
Figure 14
7
(H) x 1
(A)
(E)
6
(V)