5 • installing the canopy – Hunter 22431 52 Brookline User Manual
Page 10
10
42408-01 • 06/29/10 • Hunter Fan Company
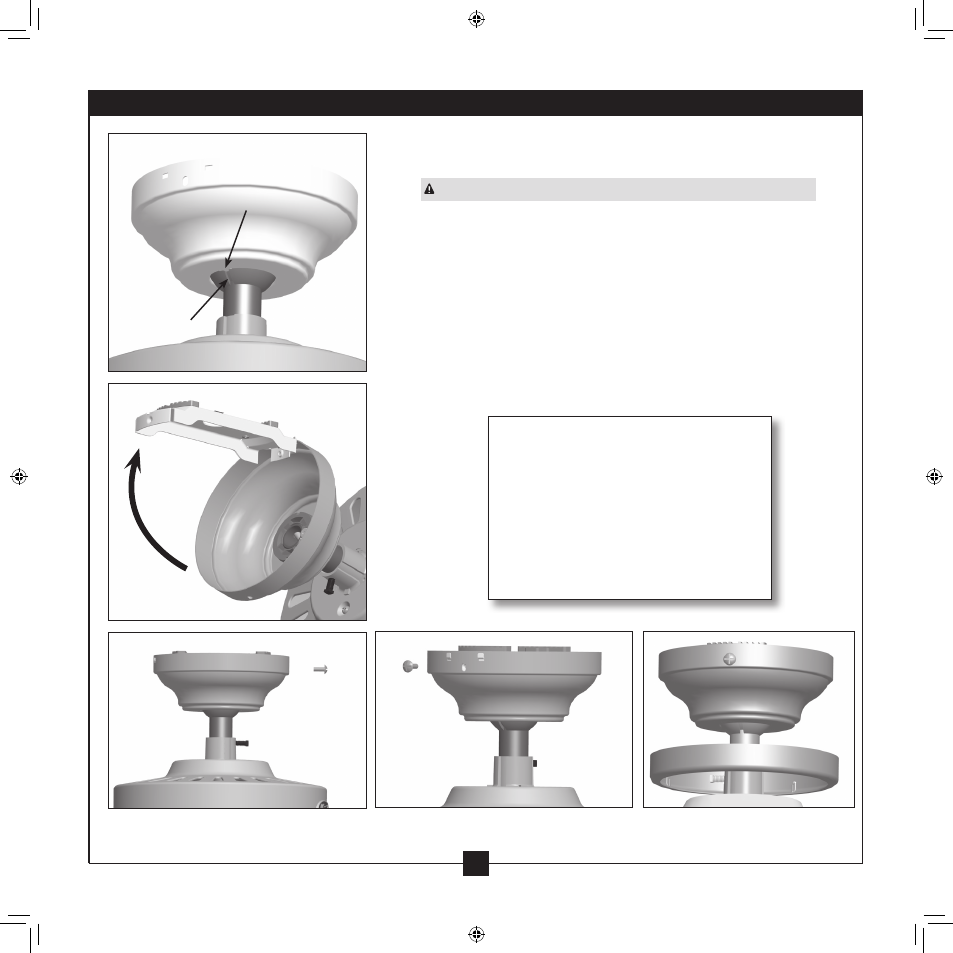
5 • Installing the Canopy
5-1. Rotate the hanger ball so the tab in the canopy is secure in the
groove in the hanger ball.
WARNING: Failure to complete this step could cause fan to fall.
5-2. Lift the fan and align the canopy screw holes with the mounting
holes on the ceiling plate.
5-3. Partially install a canopy screw into the side opposite the ceiling
plate tabs.
5-4. Partially install another canopy screw into the hole between the
two ceiling plate tabs. Securely tighten both screws.
5-5. Using both hands, push the canopy trim ring up to the top of the
canopy. The canopy trim ring will snap and lock into place.
Should you need to remove the canopy
trim ring, follow these steps:
1. Locate the tab indicators, small
bumps on top of tabs.
2. Press firmly on opposite sides of the
ring toward the canopy. The tabs will
flex out releasing the trim ring from
the canopy.
Step 5-1
Step 5-2
Groove
Tab
Step 5-3
Step 5-4
Step 5-5