Trouble-shooting – Liberty Pumps 230-Series User Manual
Page 5
©Copyright 2012 Liberty Pumps Inc. All rights reserved
- 5 -
9.
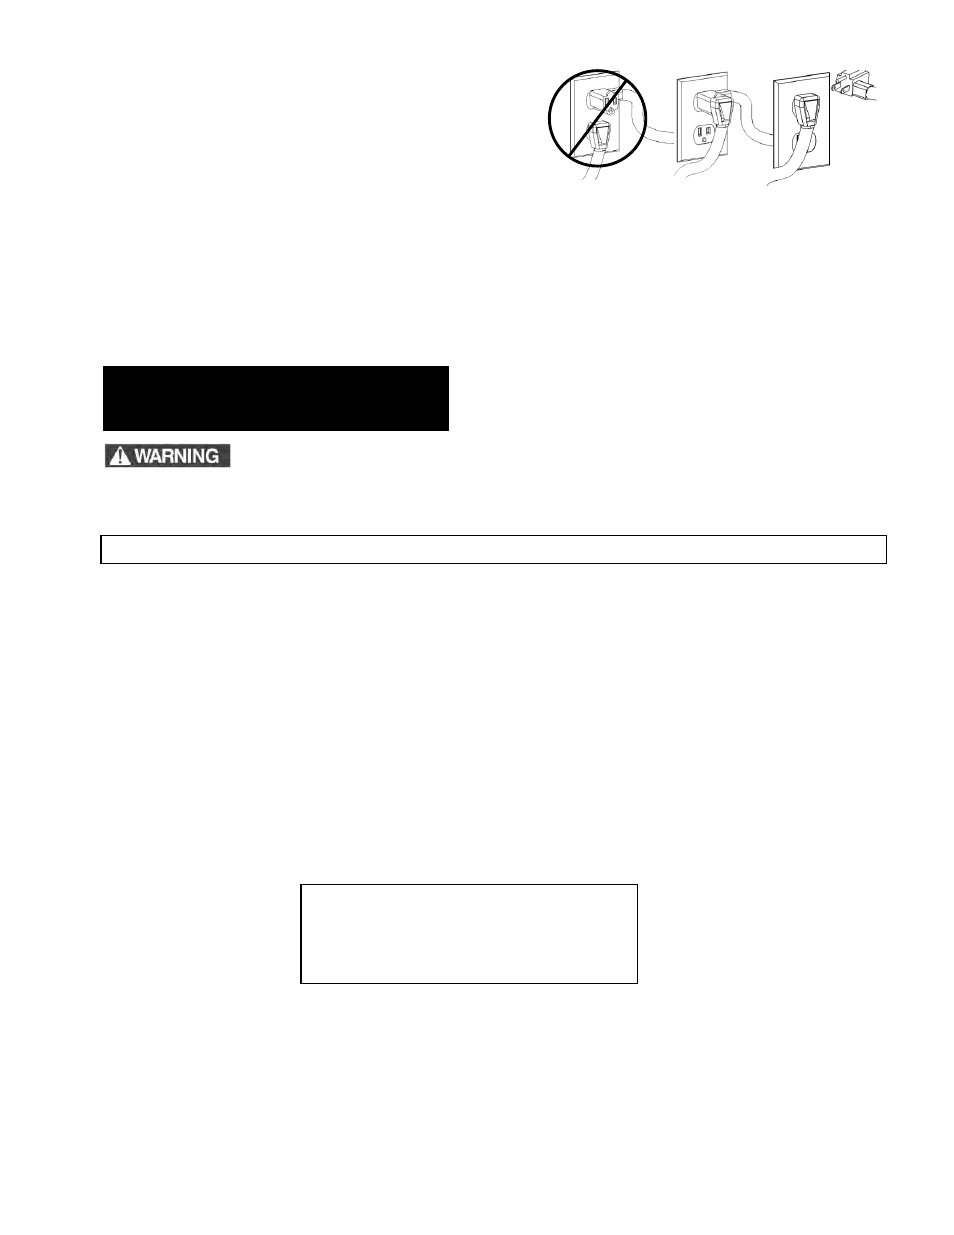
Models 243, 233, and 453 come factory-equipped with
a float switch mounted to the pump. This model has
two cords - one to the float switch and the other to the
pump motor. The switch cord has a series (piggyback)
plug enabling the pump (motor) cord to be plugged into
the back of it (see Fig. at right). The purpose of this
design is to allow temporary manual operation of the
pump if desired.
10.
For manual submersible models: Manual (switchless) models may be operated by directly plugging into an
approved electrical outlet. To prevent excessive seal wear and overheating, pumps should not be run dry for
extended periods of time. A minimum 4-1/2” water level is recommended.
If manual models are to be used with
an optional control device, follow the instructions provided with that control and make power connections per
those instructions. Set the turn-off level at 4-1/2” or greater. Do not remove float rods from VMF models for
manual use, as switch damage will result.
4.
Trouble-Shooting
Always disconnect the pump from power source before handling. This guide is designed
to help identify reasons for potential operating problems. It is not a service guide.
Dismantling of pump voids
warranty. Servicing of pump other than simple cleaning of pump inlet or impeller should be referred to the factory
or its authorized service centers.
PUMP DOES NOT RUN OR HUM.
1. Line circuit breaker may be off, tripped or loose. Have certified electrician check fuse or breaker.
2. Water level in pit may be too low to activate switch. Add more water to pit.
3. Plug on power cord may not be making contact in receptacle. Check security and connection.
4. If the pump is using the series (piggyback) cord plug, the plugs may not be connected tightly together.
5. Float may be obstructed. Make sure float is free and not interfering with the pit wall or other obstruction.
6.
If all symptoms check OK, the motor winding may be open. Consult factory.
PUMP RUNS OR HUMS BUT DOES NOT DELIVER WATER.
1. Check valve may be installed backwards or is defective. Check to make sure it is installed properly and
flapper in valve is free to move.
2. Discharge line may be blocked or frozen. Check to see if line passes through cold areas or is blocked.
3. Pump may be air-locked. Make sure that an anti-airlock hole was drilled in discharge pipe. Submersible
models are factory equipped with a bleed hole already in base of pump. Ensure that this hole is not plugged.
4. Vertical lift may be beyond pumps capability. See chart below for your pump’s maximum lift capability
.
NOTE: At the pump’s maximum lift there will be no flow.
5.
Check to see if inlet screen of pump is plugged or the impeller is jammed. Remove the pump screen and
clean inlet and impeller as needed.
6. Pump Impeller may be jammed. Check for foreign material such as construction debris, stones, etc. that might
be preventing the impeller from rotating. Reminder: Make sure pump is disconnected from power source
before checking inlet and impeller area.
PUMP RUNS AND REMOVES WATER BUT DOES NOT SHUT OFF.
1. Float is stuck in the “on” position. Check to make sure the float is free to move up and down without
obstruction.
2.
Switch may be defective. Consult factory.
NOTE: The manufacturer assumes no responsibility for damage or injury due to disassembly in the field.
MODEL
MAX. LIFT
101
17’
230-Series
21’
240-Series
20’
450-Series
34’
DON’T!
Fig. 1 Piggyback plug installation.
TEMPORARY
MANUAL
OPERATION
NORMAL