Si 26x, Ceiling speaker user’s guide, Suspended ceiling installation – Extron Electronics SI 26X User Guide User Manual
Page 2: Painting the speaker baffle
Suspended Ceiling Installation
Remove the ceiling tile where the speaker is to be installed.
An optional ceiling mount kit (Part # 70-533-01)
needs to be purchased separately. Each kit
has the hardware to mount 2 speakers.
Painting the Speaker Baffle
Tear along the smaller perforated line of the cutout
template, marked as paint guard. Push the paint guard
into the front baffle of the speaker. Paint the front.
Remove the paint guard after the paint has dried.
1
Cut the hole in the tile. See step 1 of the frame construction
ceiling section on the reverse side of this sheet.
2
V-rail
C-ring
8
Apply 4 pieces (supplied) of black putty (see the reverse
side of this sheet). Install the speaker grille.
6
Connect the wires to the speaker terminal clips (as in step 3
on the reverse side of this sheet).
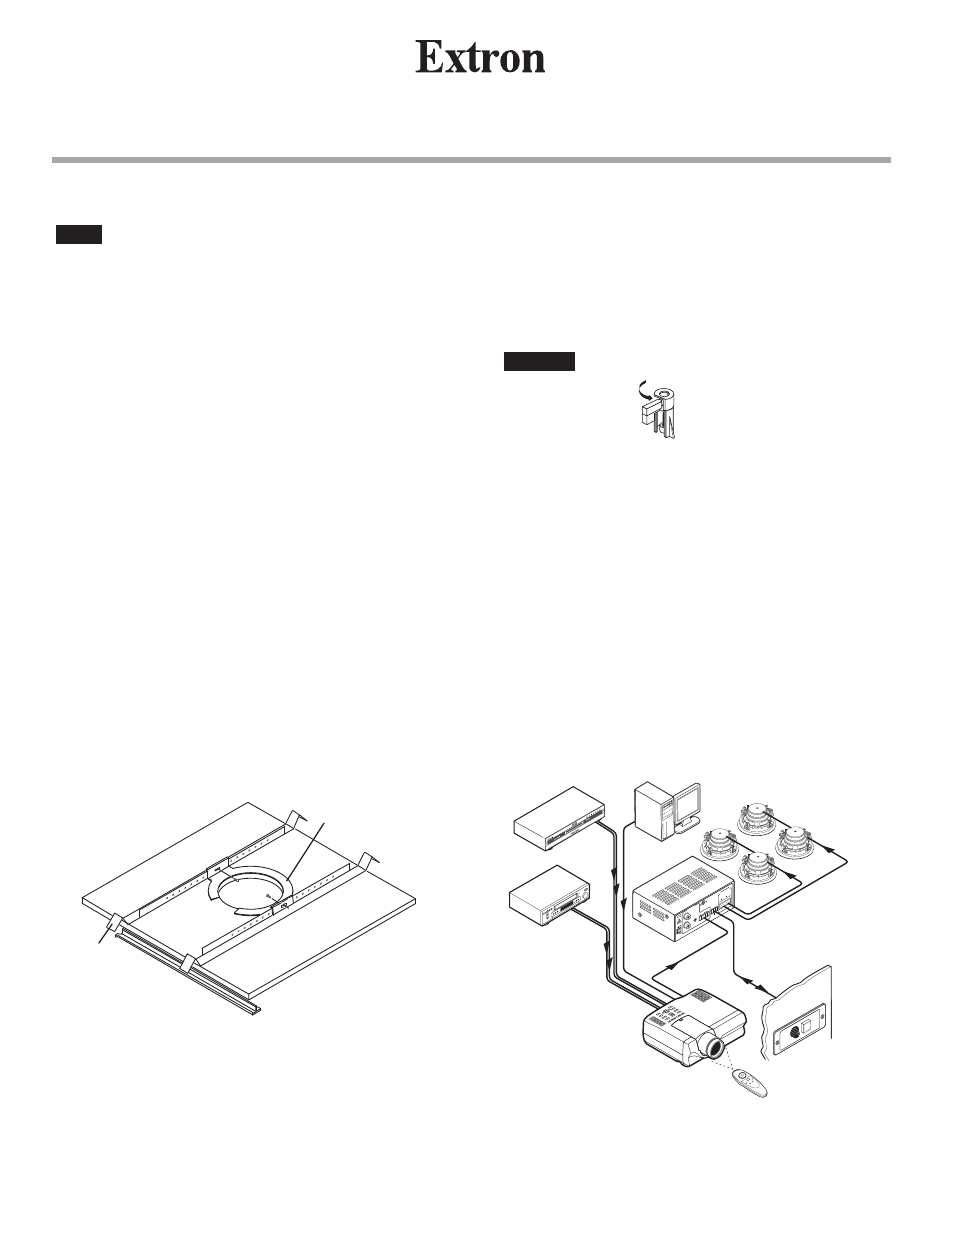
Application diagram:
3
Remove the grill from the speaker.
4
Bring the speaker cable through the hole of the cut tile,
then reinstall the tile.
5
Remove the adjacent tile. Place 2 V-rails and 1 C-ring
across the tile where the speaker is to be installed. Insert
the speaker through the bottom of the hole in the ceiling tile.
7
Do not over-tighten screws!
CAUTION
NOTE
Extron
SI 26X
Two-way Ceiling
Speakers
PO
WER
OUTPUTS
4/8 Ohms
INPUTS
L
R
L
R
REMO
TE
10V
VOL/MUTE
L
MP
A 122
R
C
US
PC
DVD
Projector
VCR
VGA w/
Audio Cable
S-video
Audio RCA
Composite
Audio RCA
Variable
Audio
Output
Extron
VCM 100 AAP
Volume/Mute Controller
Extron
MPA 122
Mini Power Amplifier
MUTE
VOLUME
VCM 100 AAP
SI 26X
Ceiling Speaker
User’s Guide
Loosen the four screws on the front baffle
(counterclockwise) ½ turn. Then tighten the screws
(clockwise) until the dog legs clamp the speaker to
the ceiling.