Step 1 - removal and replacement float, Caution – Xylem MM 713B Series 93/193 and 94/194 Replacement Floats User Manual
Page 2
2
OFF
ON
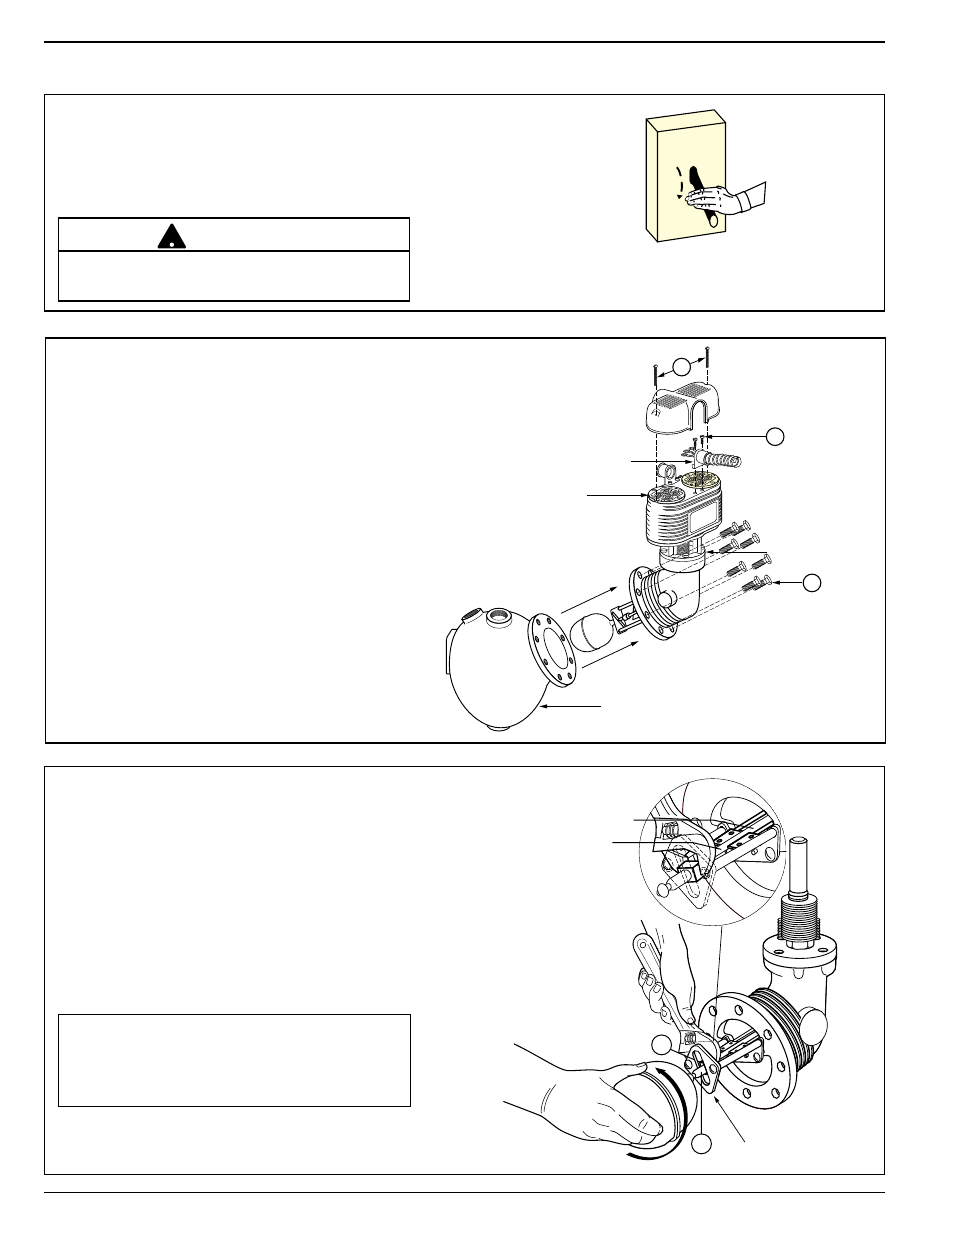
STEP 1 - Removal and Replacement Float
a. Turn power off to boiler and all controls.
Allow boiler to cool to 80˚F (27˚C) and
reduce the pressure to 0 psi (0 bar).
Drain water in the boiler to a level that is
below the float chamber.
CONDUIT FITTING
TERMINAL PANELS
HEAD ASSEMBLY
CONTROL BODY
B
A
C
b. Remove Head Assembly
• Remove two screws (
A) and lift off
switch cover.
• Identify
terminal connections for
rewiring and then disconnect all wires
from
terminal panels.
• Remove two screws (
B) and lift off
conduit fitting. Leave wires in conduit
for later reconnection.
• Remove head bolts (
C). There are eight
(8) on Series 93/193 and ten (10) on
Series 94/194. Carefully remove
head
assembly from control body.
• Carefully place
head assembly in vice
where replacement work can be
performed more conveniently.
D
FLOAT ARM SPRINGS
FLOAT ARM ROD
E
FLOAT STOP PLATE
c. Remove and Replace Float
• Place open end of adjustable wrench on
square section of float arm (
D) to keep it
from turning.
• Unscrew
float ball from arm.
• Screw new
float ball onto float arm rod
(
E), holding square section of float arm
nut (
D) with wrench and tighten securely.
IMPORTANT: Inspect condition of float
arm rod and float arm springs. If these
are damaged or bent, the entire head
assembly will need to be replaced.
There may be more than one source of power to
the boiler.
!
CAUTION