Xylem SuSix Sensor with Wiper - Wiper and Gasket Replacement Kit 206356 User Manual
Xylem Equipment
www.mjk.com
DK: +45 45 56 06 56
NO: +47 69 20 60 70
SE: +46 53 31 77 50
NL: +31 251 672171
IRL: +353 879535625
USA: +1 847 482 8655
AUS: +61 3 9758 8533
GB/DK Wiper Rep Kit 100118
1
Wiper Replacement Kit
Wiper Replacement Kit
for SuSix
®
sensor with wiper
Contents
Part no. 206356 including:
• 1 pc. screwdriver
• 1 pc. wiper mounted on shaft with two O-rings
Use
Wiper replacement of MJK SuSix
®
Sensor (part no. 206312) with cleaning system/wiper
from serial no. 51500 and higher.
Installation
1. Move the sensor from the process fluid.
2. Disconnect the sensor from the converter and all electrical connections.
3. Clean and wipe the sensor off thoroughly.
4. Position the probe in a stable, upright position.
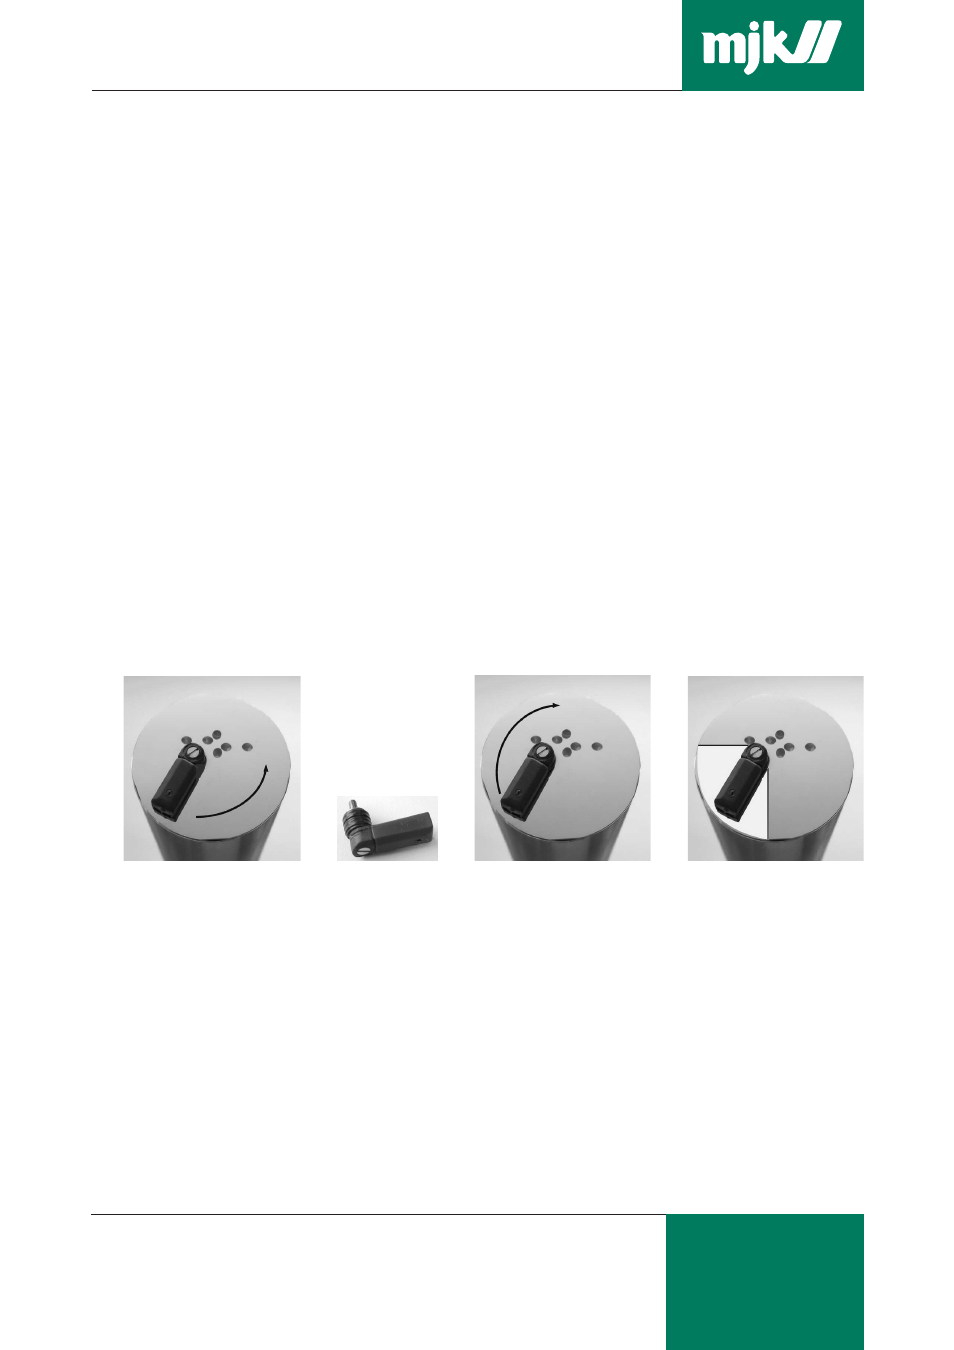
5. Unscrew by hand the wiper with shaft counter-clockwise (see figure 1).
DO NOT loosen or remove the screw!
Figure 1. Figure 2. Figure 3. Figure 4.
6. Turn by hand the replacement wiper with shaft and O-rings (figure 2) clockwise (figure 3).
7. Tighten with a torque of 15 Ncm.
8. It is very important that the wiper is secured in its resting position indicated by the white
area (see figure 4). Otherwise the wiper will block the optics and the sensor will not
measure correctly.
9. If the wiper is not secured within the white area, loosen the screw with the screwdriver,
position the wiper correctly and tighten the screw again.
10. Reconnect the sensor to the converter and put the sensor back into operation.
11. This concludes the replacement procedure.