Ao55 – Seametrics AO55 User Manual
Page 3
0
9
8
7 6 5 4
3
2
1
0
9
8
7 6 5 4
3
2
1
0
9
8
7 6 5 4
3
2
1
0
9
8
7 6 5 4
3
2
1
Power
Sensor
4-20 mA
AO55
Frequency
SETTINGS, CALIBRATION and FREQUENCY
SETTINGS
Setting Frequency.
The AO55 converts a train of off/on pulses
from the flow sensor into a continuous milliAmp signal that
ranges from 4 mA at zero flow to 20 mA at the desired maximum
flow. The desired maximum is determined by the user and
entered as a frequency as follows:
1)
2)
3)
4)
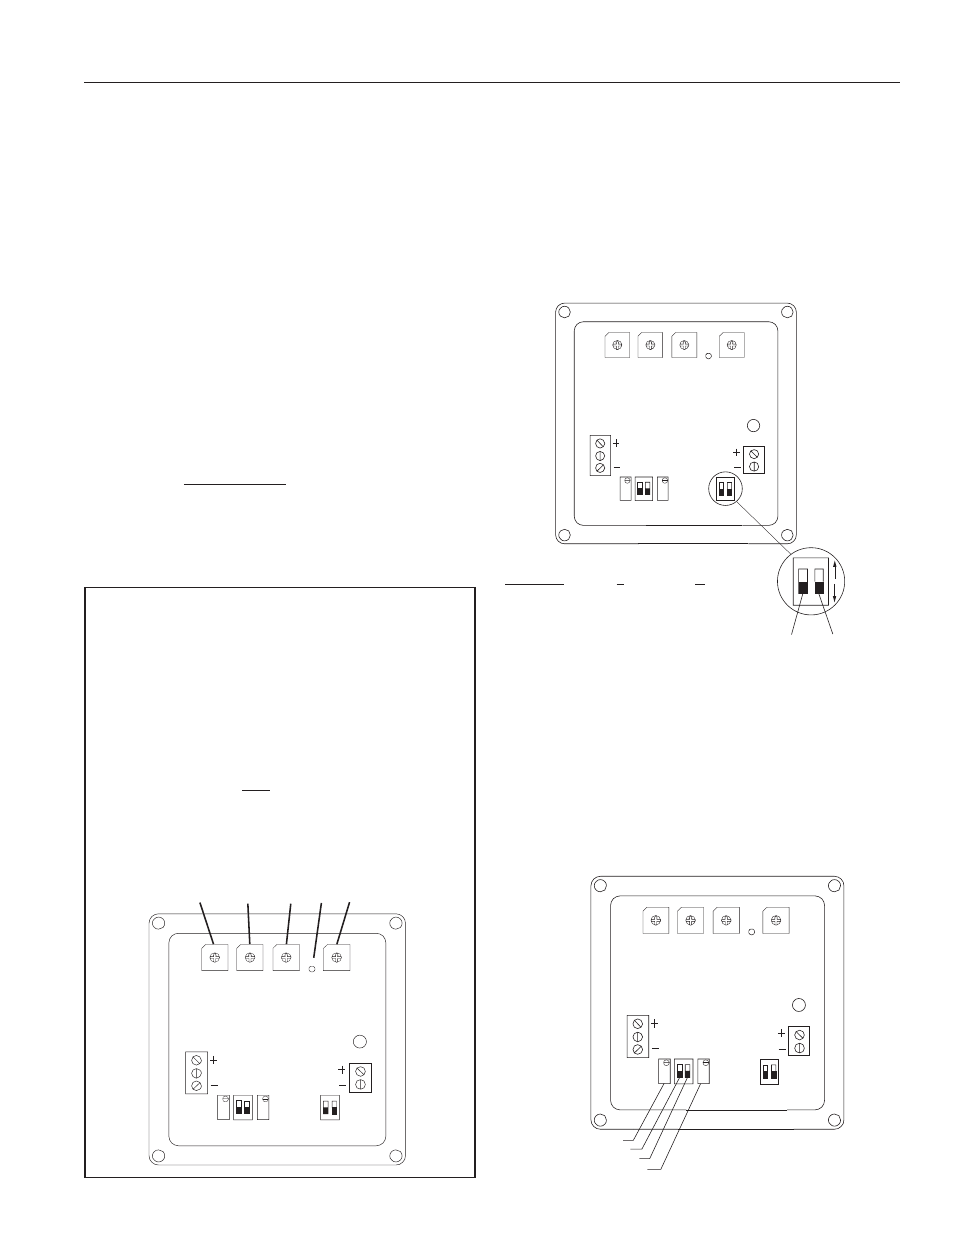
Setting Averaging Time.
For most applications, this step can
be ignored, as the standard setting will work fine. However,
when a particularly steady output signal is desired, or in
large pipe, a larger averaging period may be desirable. Note
however that the averaging period requires a tradeoff, since
a longer averaging period implies a slower response time. If
steady signal is more important than fast response, increase
the averaging time as desired. See the diagram below for the
switch positions and their corresponding times.
Decide what flow rate should represent the top of the
scale. This is ordinarily the maximum expected flow, or
a value just above it, in gallons per minute.
Locate the K-factor of the flow sensor (found on the
meter or fitting, or in the instruction manual, depending
on meter model). The K-factor is the number of pulses
the flow sensor produces per gallon of flow.
Calculate frequency, using this formula:
K-Factor x Top Flow (GPM) = Frequency
60
Enter the frequency using the four rotary Frequency
switches. Note the decimal point between the third
and fourth switches.
Checking Calibration
Normally it should not be necessary to check calibration, since
the digital design of this unit virtually eliminates drift. However,
there are two types of calibration check that can be performed.
Look at the diagram below to locate the 4 and 20 mA force
switches. To force the 4 mA output, put its switch in the up
position. Check the current output at the Power terminals, and
if necessary trim to 4.00 mA using the appropriate trimpot.
Return the switch to the down position, and repeat the process
with the 20 mA switch.
In an installation with an estimated maximum flow rate
of about 150 GPM, a flow rate of 170 GPM is selected
as the full-scale maximum, the flow at which the current
loop will register 20 mA.
In this example, the K-factor (found on the meter or
fitting, or in the manual) is “K = 54.50”.
Calculate the frequency as
1
5
4 . 4
Rounding to one decimal point, enter 154.4 on the
rotary switches by turning the rotary switch pointers
to the desired digits.
= 154.42
54.50 x 170
60
SETTING FREQUENCY EXAMPLE
1)
2)
3)
4)
0
9
8
7 6 5 4
3
2
1
0
9
8
7 6 5 4
3
2
1
0
9
8
7 6 5 4
3
2
1
0
9
8
7 6 5 4
3
2
1
AO55
Frequency
Power
Sensor
4-20 mA
UP
DOWN
L
R
0
9
8
7 6 5 4
3
2
1
0
9
8
7 6 5 4
3
2
1
0
9
8
7 6 5 4
3
2
1
0
9
8
7 6 5 4
3
2
1
AO55
Frequency
Power
Sensor
4-20 mA
4mA Adjust
Force 4 mA
Force 20 mA
20 mA Adjust
S
Switch Position
Seconds
L
R
2
down down
4
down
up
8
up
down
16
up
up