Xylem STORM 3 UPGRADE User Manual
Page 4
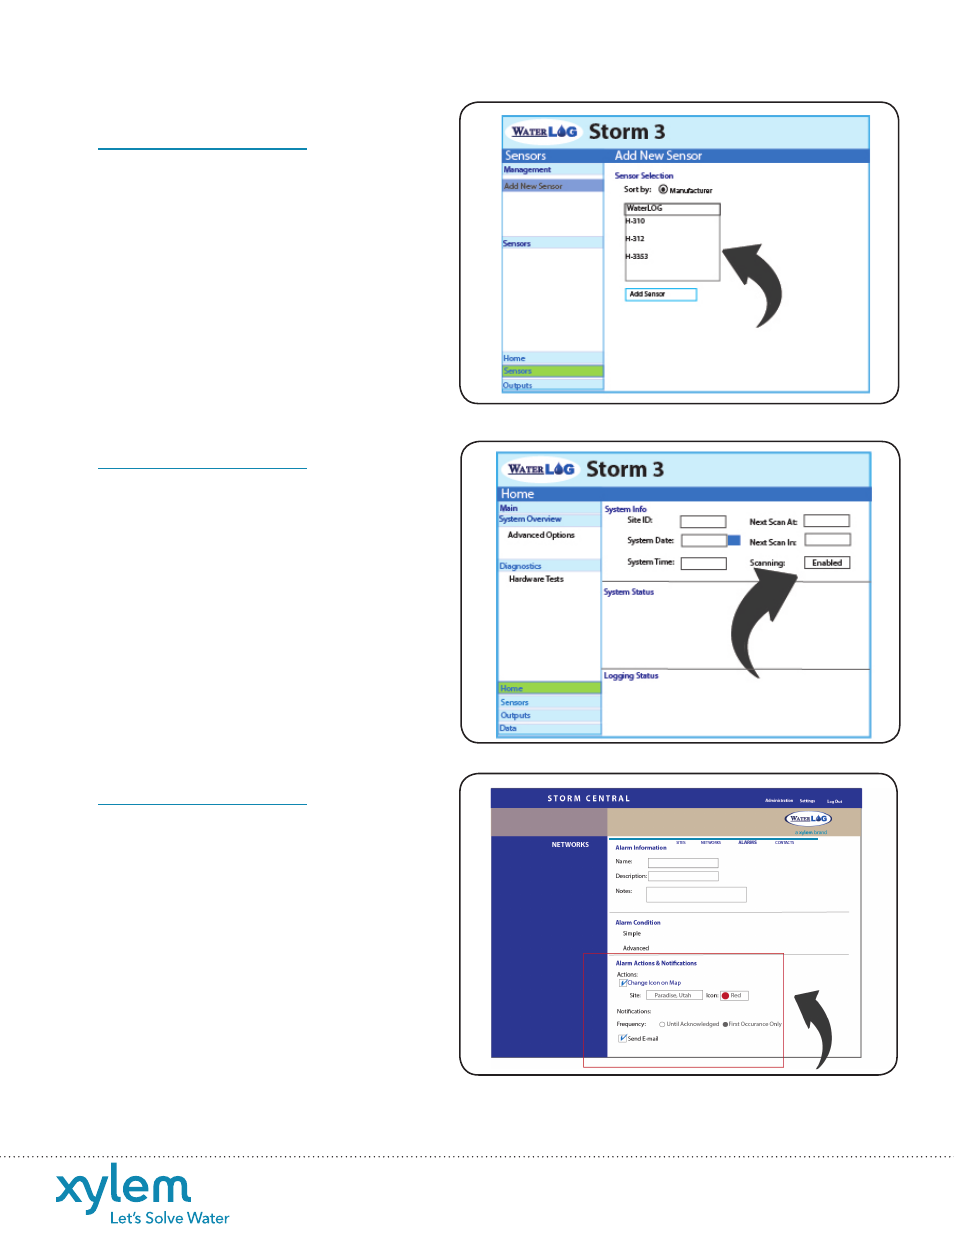
Make sure the Site ID is set. Start collecting
data by selecting “Enabled” from the
“Scanning” drop down box on the home
screen.
Go to the “Data” screen to view collected
data graphically.
Configure Storm 3 with your Registration ID
(from stormcentral.waterlog.com) to ensure
data will show up on the website.
*Refer to the ‘Storm Central Getting Started Guide’ for
detailed instruction on Storm Central.
stormcentral.waterlog.com
Review and download data collected by
Storm Central at any time using the “Site
Details” screen. Generate simple-to-complex
alarm conditions based on the data collected.
Receive notifications of alarm conditions via
email, SMS text message or through color
change of map icons.
If you have your own cellular service, be sure
to have it activated. If using a GSM service
provider, have your SIM card installed and
GSM settings specified.
www.waterlog.com
WaterLOG
95 West 100 South, Suite 150
Logan, Utah 84321 USA
Tel: (435) 753-2212
11
12
Start Data Collection
Storm Central
4
Select a sensor from the built-in sensor library
and click ‘Add Sensor’. Click the “Wiring
Diagram” button so you can see how the
sensor should be wired to the Storm 3.
10
Add a Sensor