Xylem IM245 RGS2012E1 S or E Retrofit Kit SUBMERSIBLE GRINDER PUMP User Manual
Page 3
3
3. Retighten all connections, check hardware, and
ensure that no wires or any other obstructions are
in way of pump cutters.
4. Make sure all fittings are tight.
5. Apply gasket tape to the bottom of the cover pe-
rimeter, poke holes through the tape at the cover
bolts entries.
6. Lubricate O-rings on the discharge elbow to ease
installing into the receiver.
7. Using rope lower the grinder assembly in the ba-
sin. Align cover tabs to tank slots.
8. Align discharge elbow to Receiver. Unit will rest
on the tank flange with the elbow fully inserted in
receiver.
9. Open valve to latch with the discharge elbow.
Adjustment to nut may need to be made to alter
height at this point.
10. Once in place and latched install the 6 bolts back
into the cover plate.
11. Reconnect the power adapter from the power to
the new retrofit kit adapter.
12. Check electrical resistance to make sure that the
panel is free of shorts and ground faults.
13. Check grounding connections is made properly
Licensed electricians should be present
for panel or breaker energizing. If faults
caused by damage or poor installation have not
been detected, serious damage can result when
power is applied.
14. Turn on power to breakers.
15. Fill tank to test if pump and floats operate prop-
erly. See troubleshooting chart for problems
encountered.
16. Once tested and operating properly replace the
basin cover.
18. Affix nameplate provided to the control panel so
the new unit can be identified as a RGS2012E1S or
E1E Retrofit Kit by Goulds Water Technology.
Pump specifics can be found under the standard
Goulds Water Technology product RGS2012 on the
website www.completewatersystems.com, Goulds
Water Technology Wastewater tab.
6. Check connections to make sure they are clean
and dry.
7. Inspect connection, there are two styles round con-
nectors- shown above and rectangular connectors.
Ensure that the correct Retrofit Kit has been pur-
chased for the style connection being replaced.
8. Remove bolts from cover plate of current unit
9. Close valve of current unit
10. Secure rope to hooks on cover. Lift Unit from
basin.
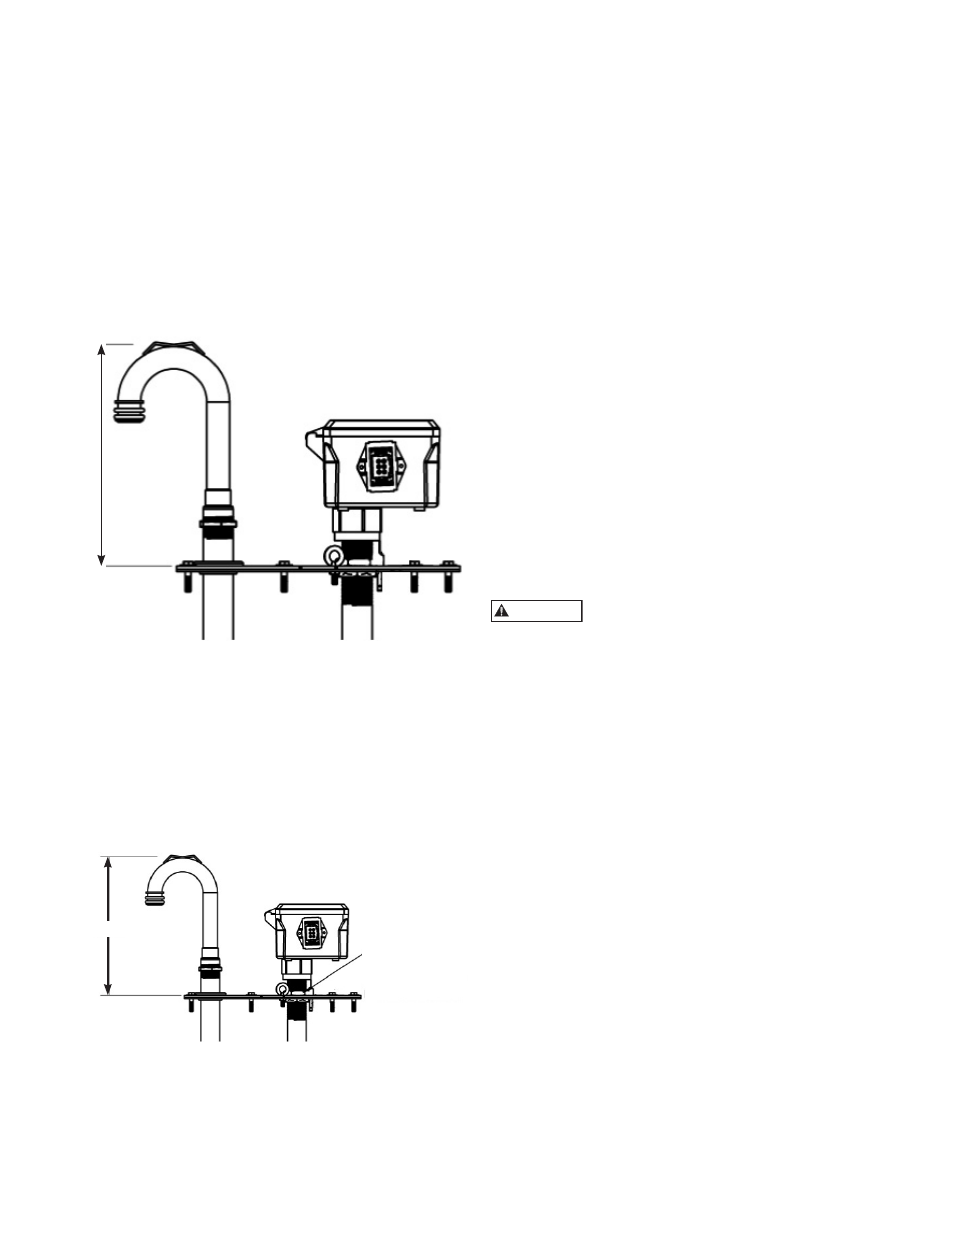
11. Measure distance on Candy cane for setting up
new retrofit – see below.
INSTALLING THE GOULDS WATER
TECHNOLOGY RETROFIT KIT
1. Adjust the center nut until the candy cane elbow
distance measured above matches the old unit.
(This is pre-set at factory to 12.38”.) Secure adjust-
able nuts with Loctite so that vibration does not
loosen the nut.
2. Check floats so that they have an unobstructed
free area in the tank. (These are pre-set at the
factory.)
12.375
ADJUSTABLE NUTS
WARNING