Installation, En-11 – Acer D241H User Manual
Page 12
EN-11
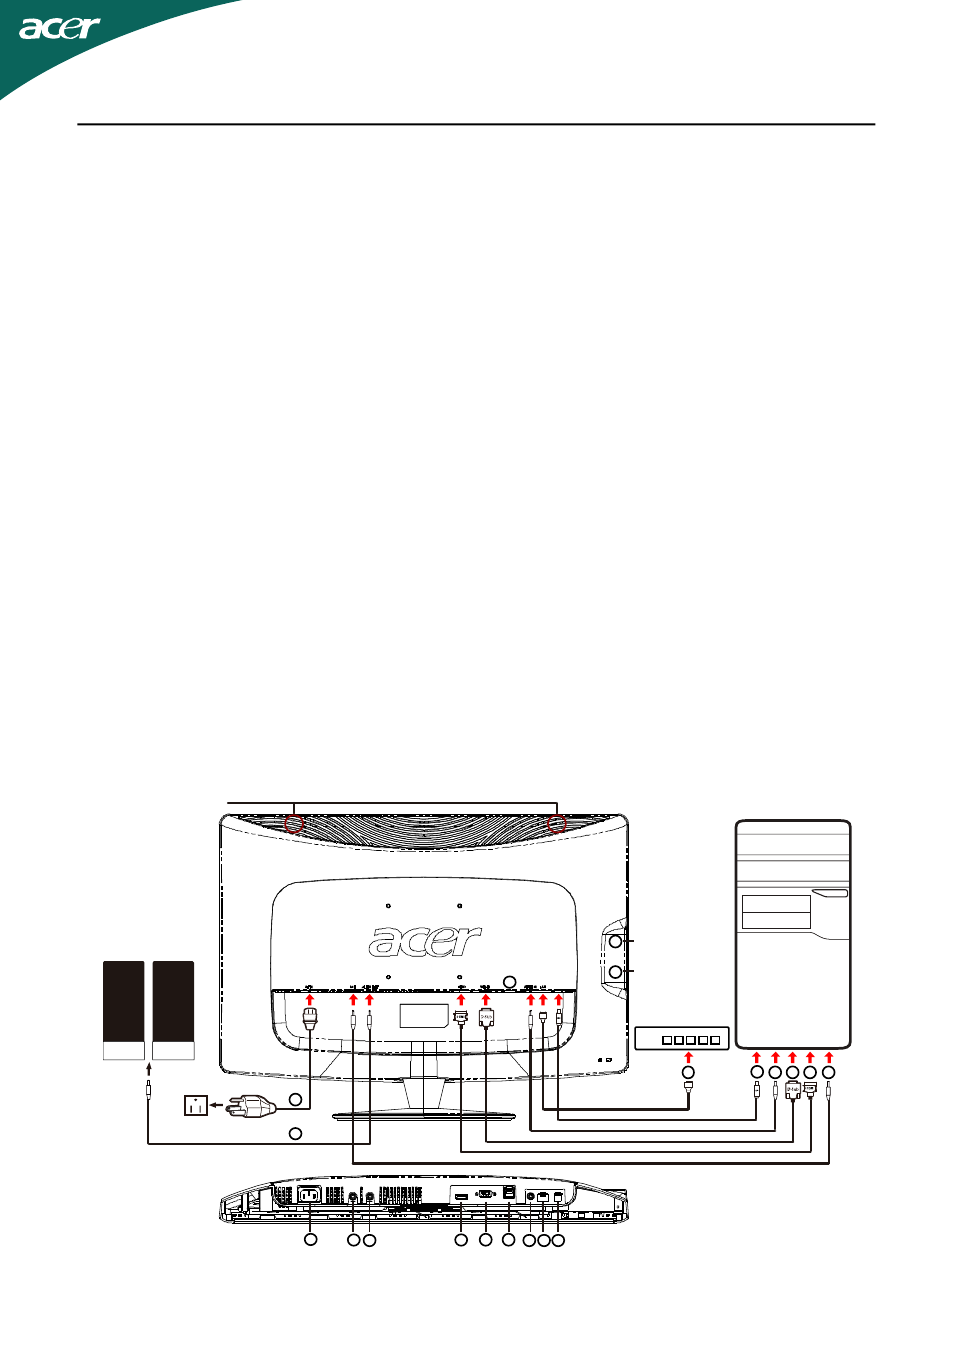
INSTALLATION
To install the monitor to your host system, please follow the steps as given
below:
Steps
1. 1-1 Connect Video Cable
a. Make sure both the monitor and computer are powered-OFF.
b. Connect the VGA video cable to the computer.
1-2 HDMI Cable (Only HDMI-Input Model)(Optional)
a. Make sure both the monitor and computer are powered-OFF.
b. Connect the HDMI cable to the computer.
2. Connect the Audio Cable to PC Analog Audio output (Lime green connec-
tor) (Only Audio-Input Model).
3. Connect the LAN Cable (LAN Cable is for Display+ only, no function in PC
mode).
4. Connect the USB Cable to PC Host.
5. USB HUB: For USB Device connect.
6. Connect to the PC Microphone Audio Input (Pink connector).
7. Connect to the Earphone or External Speaker (Optional).
8. Card Reader for SD, MMC, MS, MS PRO and XD card.
9. Connect power cord: Connect the power cord to the monitor, then to a
properly grounded AC outlet.
10.Power-ON Monitor and Computer
Power-ON the monitor first, then power-ON the computer.
This sequence is very important.
11.If the monitor still does not function properly, please refer to the
troubleshooting section to diagnose the problem.
1-1
1-2
5
5
8
7
9
9
6
7
5
4
2
3
Speaker
USB HUB
LAN HUB
USB HUB
Card Reader
speaker
speaker
1X
2X
3X
4X
5X
3
4
2
1-1
1-2
6