Acer P7203B User Manual
A. hardware connection, B. software installation, En gl ish
En
gl
ish
A. Hardware connection:
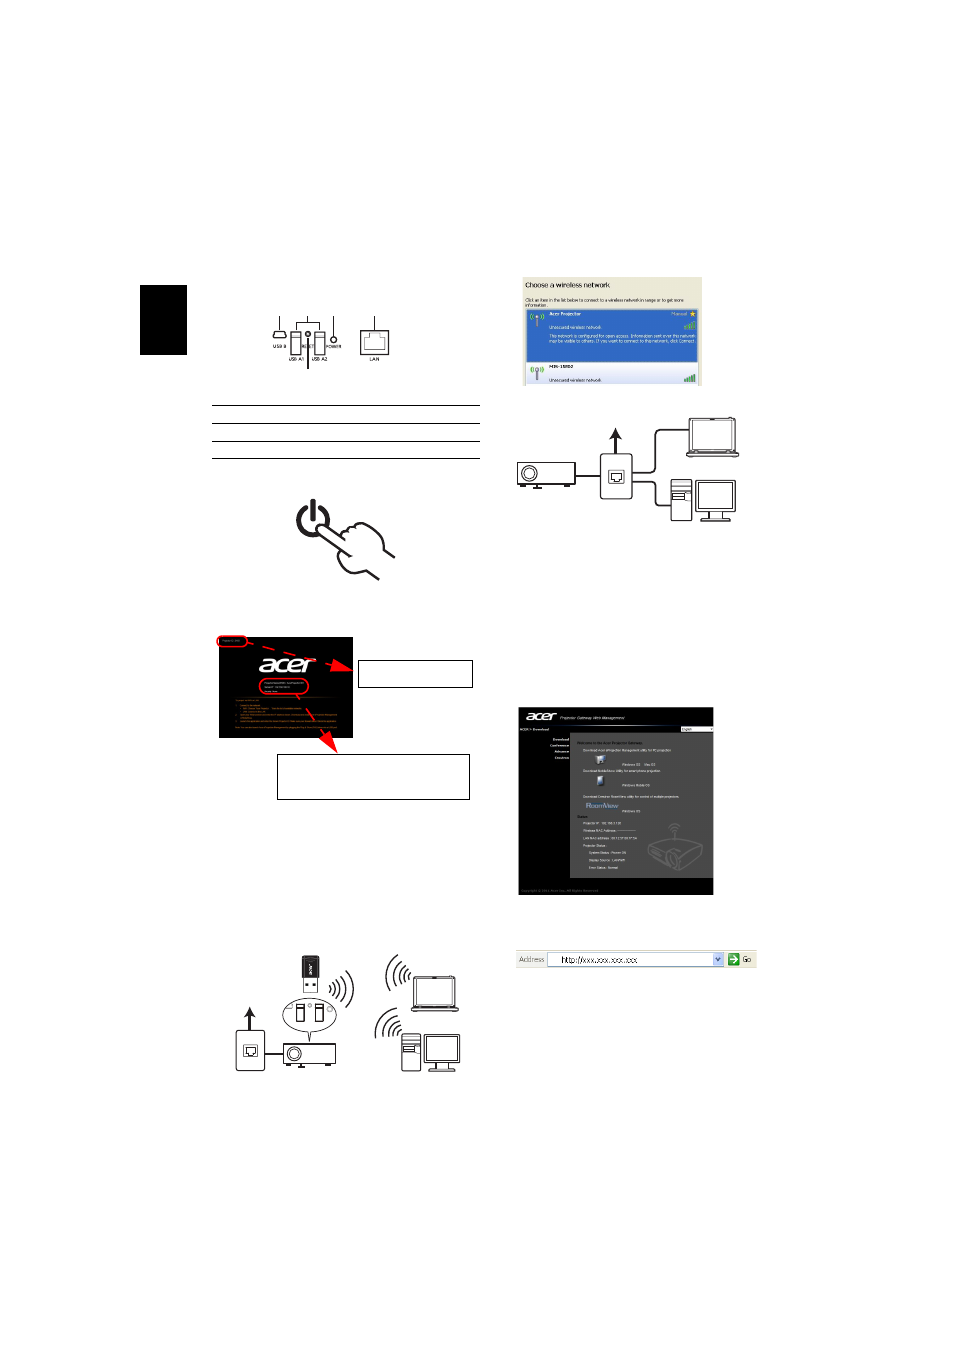
1. Guide to components
2. Turn on the projector
3. Check the information on the splash
screen
Check Projector ID, Projector Name (SSID),
Server IP and Security on the splash screen.
The Server IP will be assigned by the network
with DHCP enabled. Ask your supervisor for
the wireless connection Security when
Security is enabled.
4. Connect to network
a
Switch on your system, and activate your
wireless LAN (USB WiFi adapter).
b
Scan for avaliable WLAN APs using your
preferred WLAN manager.
c
Select and connect to the access point labeled
AcerProjector, or AcerProjectorXXXX.
d
Connect the projector to your LAN for a wired
connection.
B. Software installation:
1. The software is stored on the Acer
Projector Gateway.
Please follow the steps below to
download and install:
a
Open the internet browser.
b
You will automatically be taken to the
welcome page.
c
Enter the Server IP address into your browser’s
address bar if you do not see the welcome
page.
1
Mini USB
4
Power indicator
2
USB Type A
5
LAN port
3
Reset button
1
2
3
5
4
Projector ID: 3465
Projector Name (SSID) : AcerProjector 001
Server IP
: 192.168.100.10
Security
: None
POWER
RESET
USB A1
USB A2
USB B