Babyliss ST70E iPro 230 iCurl User Manual
Page 8
8
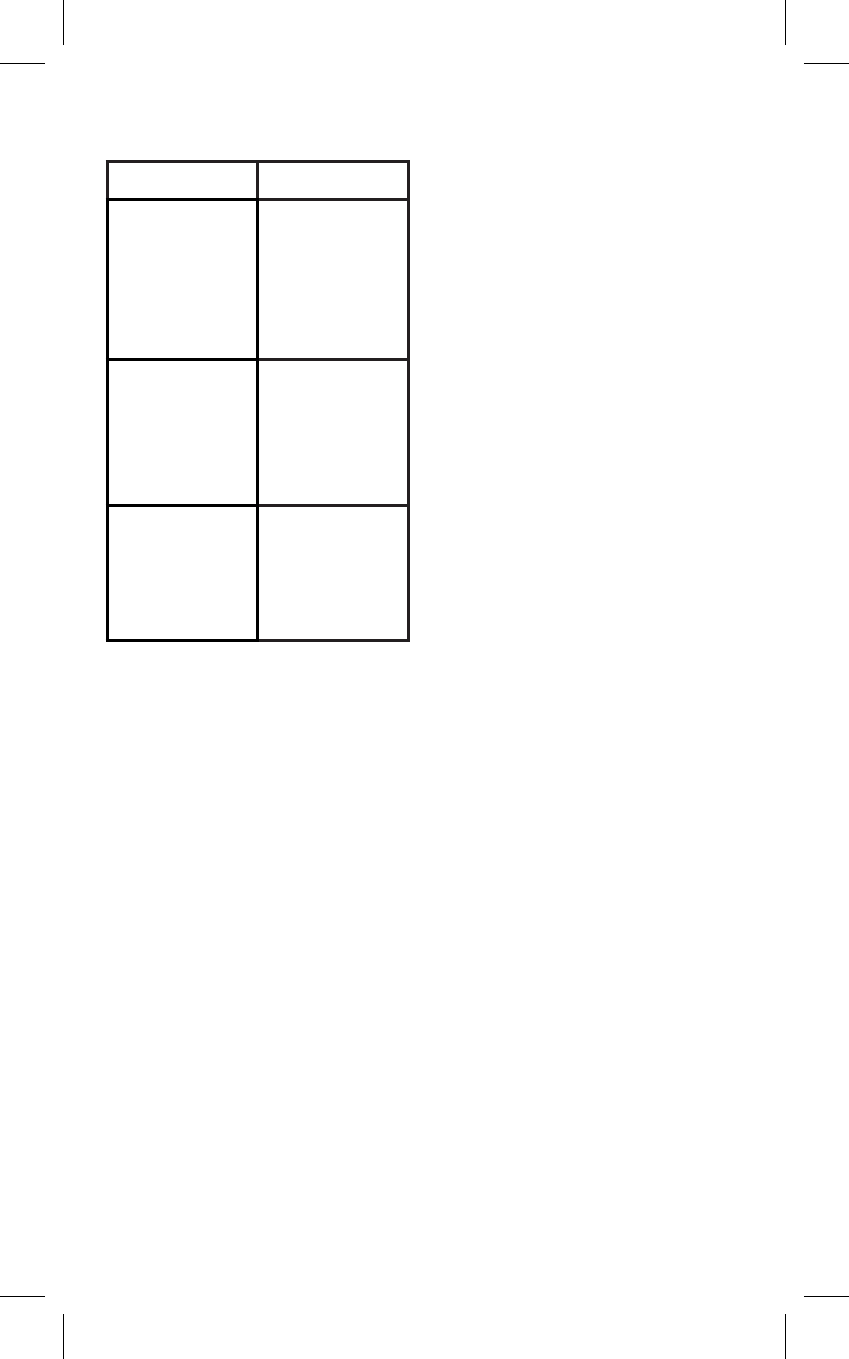
Temperature
Hair type
• 150°C
Straightening
fine, bleached
and/or
sensitised hair
Soft curls
• • 180°C
Straightening
normal, colou-
red and/or wavy
hair
Tight curls
• • • 230°C
Straightening
thick and
difficult to style
hair
The red LED will flash until it has
reached the desired temperature, it
will then remain lit while the unit is
in use.
Note! When you use the unit, you
may hear some sizzling and notice a
little steam. This is normal and may
result from the evaporation of sebum,
residual hair products (leave-in care,
hair spray, etc.) or from excess water
that is evaporating from your hair.
Curling your hair
• Dry your washed hair using a hair
dryer and untangle using a wide
tooth comb.
• Divide your hair into sections about
3 cm wide.
Select the • (150°C) temperature if
you wish to create soft curls. If you
wish to create tight curls, set the
unit to the • • (180°C) temperature.
Create natural curls, turned under
• Take up a section of hair and place
the BaByliss i curl at the roots with
the curved plates facing the scalp.
(1)
• Turn the i curl 90° downwards
so that the curved plates face
outwards. (2)
• You can hold the stay-cool tip with
your other hand so that it is easier
to handle the i curl and maintain an
even pressure on the section. (3)
• Slowly slide the i curl down the
whole length of the section, from
the roots to the tips. (4) + (5)
Note, the more even and the slower
the stroke, the more marked the curl!
The curved plates release a cool shot
that will set the curl.
• Remove the i curl and use your
fingers to twist the section again so
that it takes its natural position. (6)
• Repeat if necessary.
• You may wish to set the curls using
a light misting of hairspray.
Create more sophisticated curls
that point out
• Take up a section and place the
BaByliss i curl at the roots with the
curved plates facing your scalp. (7)
• Turn the i curl 90° upwards so
that the curved plates now point
outwards. (8)
• You can use your other hand to hold
the stay-cool tip to make handling
the i curl easier and to maintain an
even pressure on the section. (9)
• Slowly glide the i curl over the
length of the section, from the
roots to the tips. (10) + (11)
Note, the more even and the slower
the stroke, the more marked the curl!