8 g.p. diagnosis card installation (optional), 1 g.p. diagnosis card layout, 2 installing g.p. diagnosis card – Asus P7F-M WS User Manual
Page 47: G.p. diagnosis card layout -29, Installing g.p. diagnosis card -29
ASUS P7F-M WS
2-29
2.8
G.P. Diagnosis card installation
(optional)
2.8.1
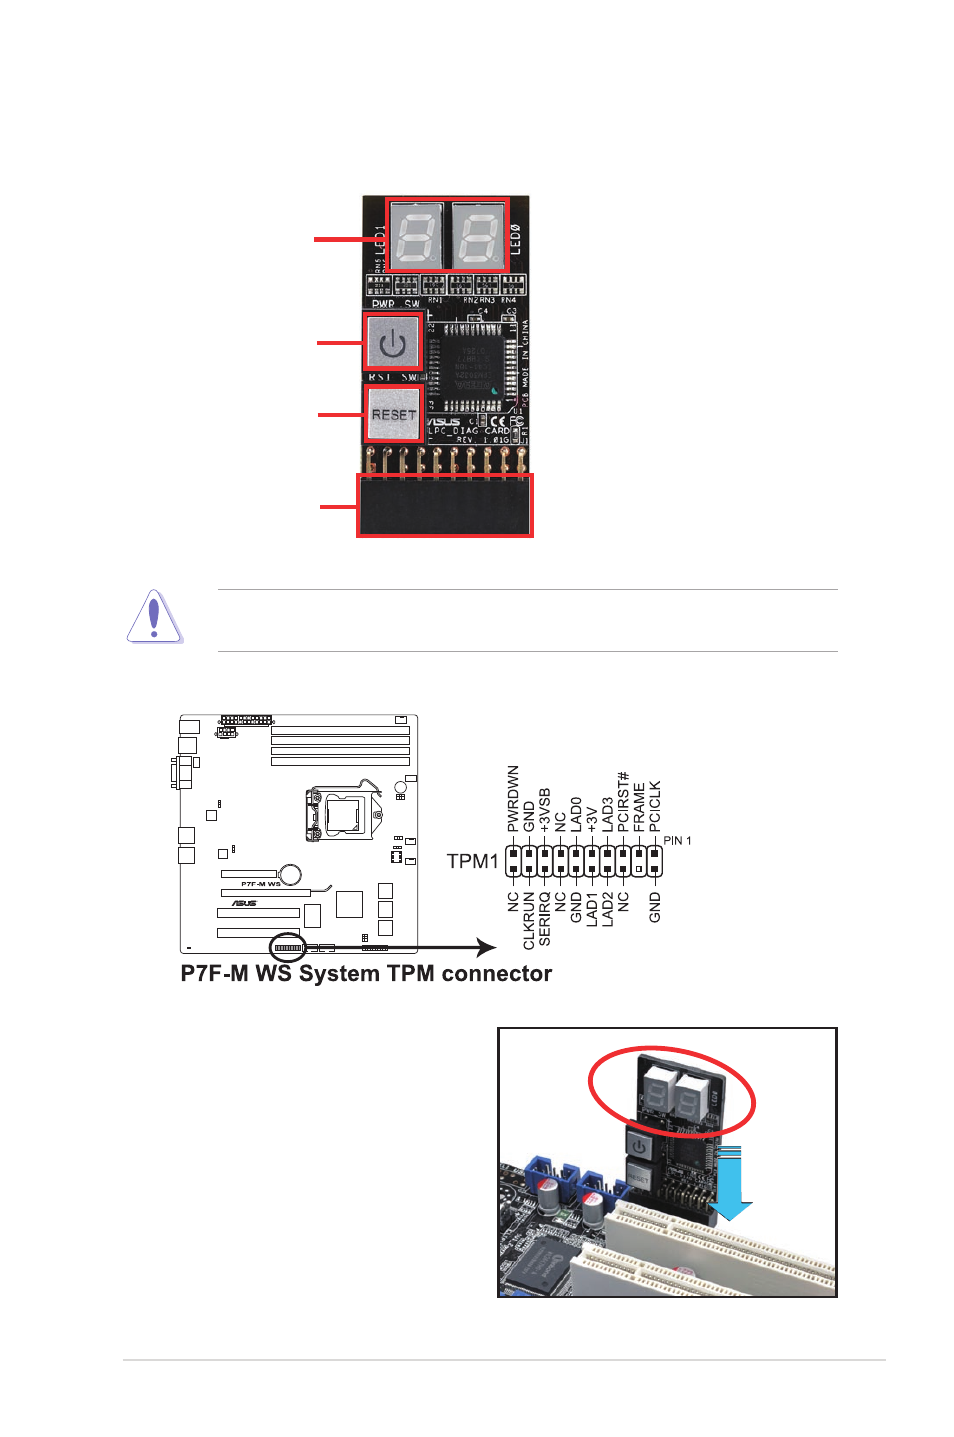
G.P. Diagnosis card layout
1. Locate the TPM connector (20-1 pin TPM) on the motherboard.
2. With the LEDs of the diagnosis
card facing to the PCI slots, align
the card connector with the TPM
connector and press firmly until
the card sits on the connector
completely.
Ensure to turn off the power supply unit before installing the diagnosis card to
avoid electrical shock hazard.
2.8.2
Installing G.P. Diagnosis card
LED 0 and 1
Card connector
Power Switch. Press
to turn ON or OFF the
computer.
Reset Button.
Press to restart the
computer.
See also other documents in the category Asus Computer hardware:
- AP2500 (40 pages)
- AP1700-S5 (58 pages)
- RS700-E6/ERS4 (138 pages)
- AP1600R-E2(AA2) (150 pages)
- P7F-E (162 pages)
- RS161-E4/PA2 (126 pages)
- RS163-E4/RX4 (11 pages)
- M2N-LR (113 pages)
- P5BV/SAS (184 pages)
- K8N-DRE (142 pages)
- RS161-E5/PA2 (124 pages)
- LSI SAS3442X-R (68 pages)
- ESC4000/FDR G2 (200 pages)
- PIKE 2208 (16 pages)
- ESC4000 (162 pages)
- ESC4000 (22 pages)
- PSCH-SR/IDE (102 pages)
- P9D-M (156 pages)
- RS740-E7-RS24-EG (212 pages)
- P5M2-E/4L (12 pages)
- ESC2000 G2 (226 pages)
- TS700-E6/RS8 (166 pages)
- RS160-E3/PS4 (140 pages)
- PU-DLS (134 pages)
- TR-DLSR (100 pages)
- P5BV-C/2L (161 pages)
- TS100-E5/PI4 (166 pages)
- ESC1000 Personal SuperComputer (184 pages)
- NRL-LS (120 pages)
- PCI-DA2200 (369 pages)
- P8C WS (140 pages)
- RS120-E4/PA4 (174 pages)
- P5MT-M (150 pages)
- TS Mini (2 pages)
- TS Mini (112 pages)
- TS Mini (114 pages)
- P5MT-MX/C (156 pages)
- AP140R-E1 (52 pages)
- AP140R-E1 (132 pages)
- ASMB6-iKVM (114 pages)
- DSBF-D16/SAS (200 pages)
- DSBF-D16 (202 pages)
- RS160-E5 (164 pages)
- Z8PE-D12X (170 pages)
- Z8PE-D12X (168 pages)