System bios settings (cont.), Appendix, Raid function support (on selected model) – Asus X61Z User Manual
Page 63
Appendix
A
A-9
System BIOS Settings (cont.)
RAID Function Support (on selected model)
For models support RAID function, you must set the RAID item in the BIOS Setup before you can
create a RAID set from the built-in hard disk drives.
WARNING! Building a RAID set will clear all your data on both the primary disk
drive and the secondary disk drive. Ensure that you’ve made a backup before creat-
ing a RAID set.
The recovery partition will be deleted after you create a RAID set. You can only
install the system OS with the recovery DVD or a retail OS disc.
Only models with two disk drives may support this RAID function.
To enable the RAID function
1. Press
2� GototheAdvanced menu.
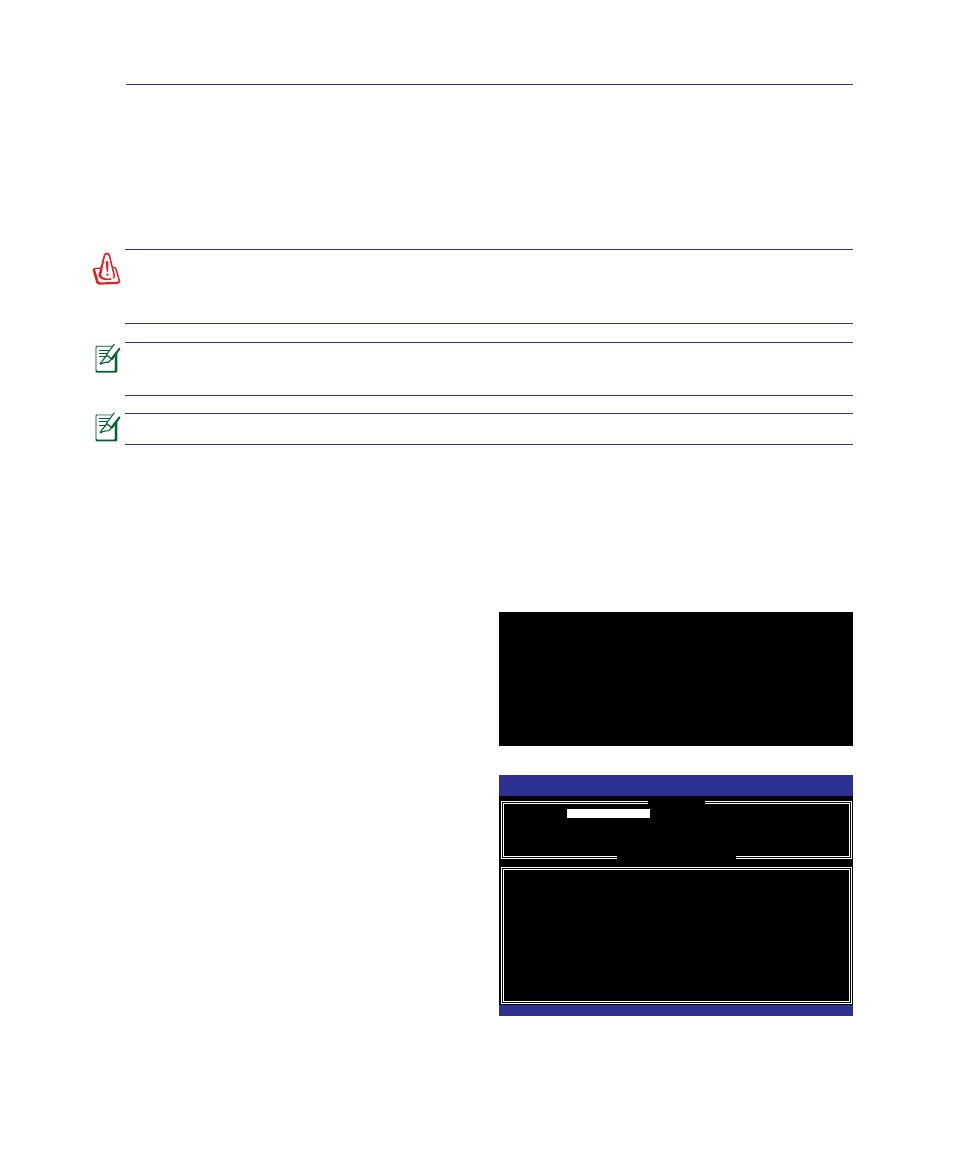
Intel(R) Matrix Storage Manager option ROM v7.0.0.1020 ICH8M-E
Copyright(C) 2003-07 Intel Corporation. All Rights Reserved.
RAID Volumes:
None defined.
Physical Disks:
Port Drive Model Serial # Size Type/Status(Vol ID)
0
Hitachi HTS72202 02DP0410DTG564WP
186.3GB
Non-RAID Disk
1
Hitachi HTS72202 02DP1400DEG1XRGN
186.3GB
Non-RAID Disk
Press
3� SetSATA Operation Mode to [RAID].
4. Press
BIOS setup.
To build a RAID set
1. Restart the system and press
2. Press
Intel(R) Matrix Storage Manager option ROM v7.0.0.1020 ICH8M-E
Copyright(C) 2003-07 Intel Corporation. All Rights Reserved.
[
MAIN MENU
]
1. Create RAID Volume
3. Reset Disks to Non-RAID
[
DISK/VOLUME INFORMATION
]
RAID Volumes:
None defined.
Physical Disks:
Port Drive Model Serial # Size Type/Status(Vol ID)
0 Hitachi HTS72202 02DP0410DTG564WP 186.3GB
Non-RAID Disk
1 Hitachi HTS72202 02DP1400DEG1XRGN 186.3GB
Non-RAID Disk
[↑↓]-Select [ESC]-Exit [ENTER]-Select Menu
2. Delete RAID Volume
4. Recovery Volume Options
5. Exit
3. Select a desired RAID set to create.
4. Restart the system and reinstall the system OS.