3) wall mount option, 2) back panel – Asus WL-320gE User Manual
Page 6
WL-320gE Access Point Quick Start Guide
3) Wall mount option
The ASUS WL-320gE Access Point is designed to sit on a a raised flat surface like a file
cabinet or book shelf. The unit may also be converted for mounting to a wall or ceiling.
Follow these steps to mount the ASUS Wireless
Router to a wall:
1. Look on the underside for the two mounting
hooks.
2. Mark upper holes in a flat surface.
3. Tighten two screws until only 1/4'' is showing.
4. Latch the hooks of the ASUS Access Point
onto the screws.
Note: Re-adjust the screws if you cannot latch the ASUS Wireless Router onto the
screws or if it is too loose.
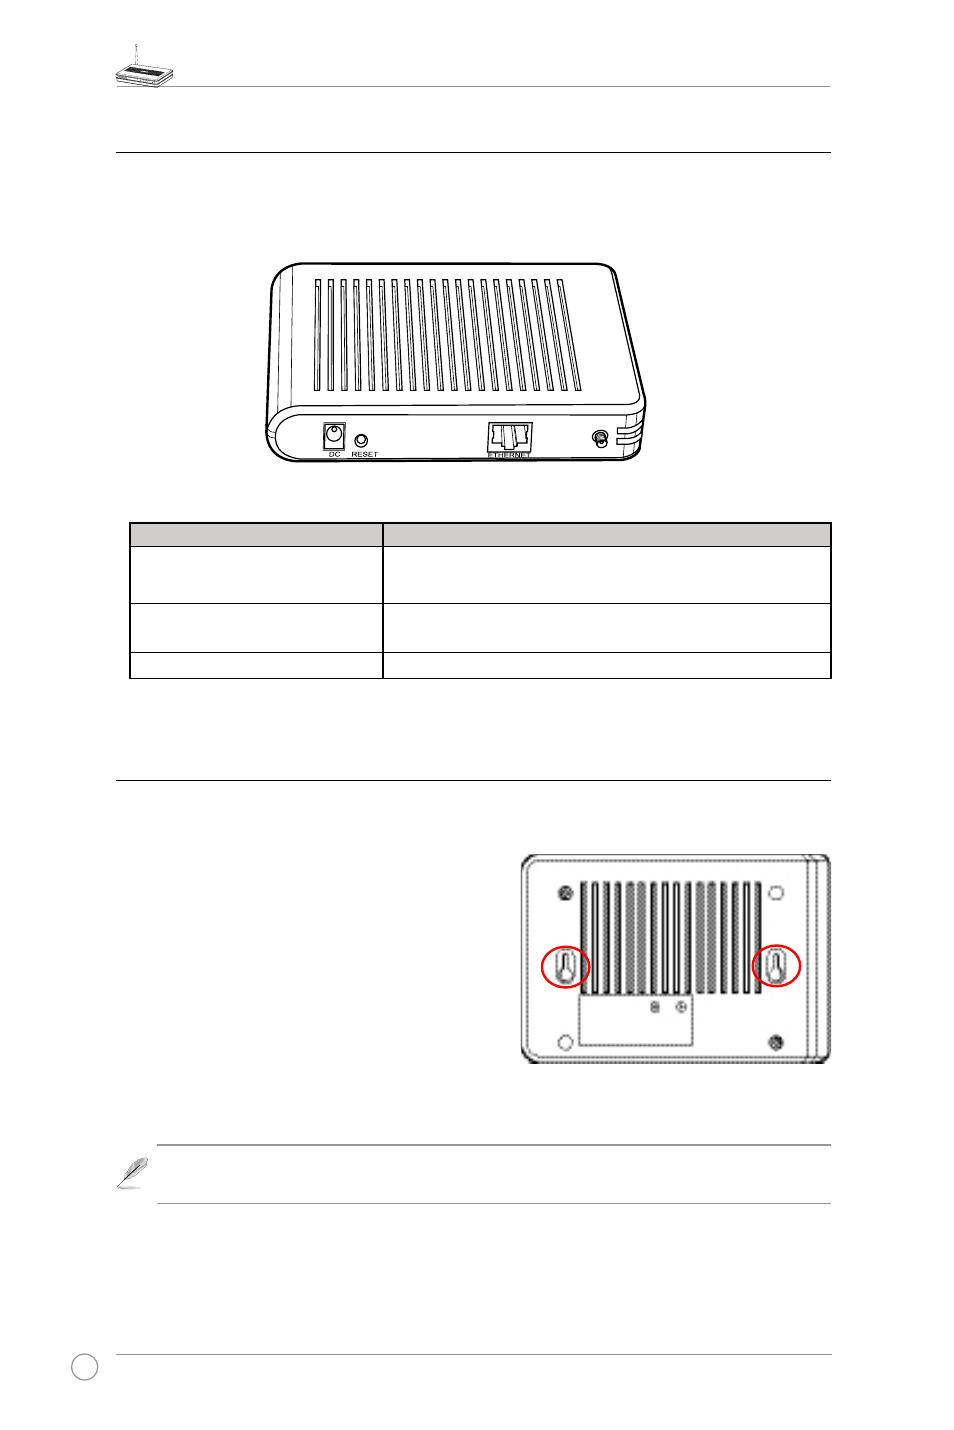
2) Back panel
The rear panel contains the Ethernet, the DC port, and the Reset button.
LABEL
Description
ETHERNET
The Ethernet port connects to an Ethernet device, such
as to a switch or a router.
RESET
Press the Reset button to restore to factory default
settings.
DC
The DC port connects the Access Point power adapter.