Daily use, 1 using the detergent, 2 setting and starting a programme setting mode – AEG F55002VI0P User Manual
Page 25: Starting a programme without delay start, Starting a programme with delay start
7. DAILY USE
1. Open the water tap.
2. Press the on/off button to activate
the appliance. Make sure that the ap-
pliance is in setting mode, refer
to ’Setting and starting a pro-
gramme’.
• If the salt indicator is on, fill the salt
container.
• If the rinse aid indicator is on, fill
the rinse aid dispenser.
3. Load the baskets.
4. Add the detergent.
• If you use the combi detergent
tablets, activate the multitab op-
tion.
5. Set and start the correct programme
for the type of load and the degree
of soil.
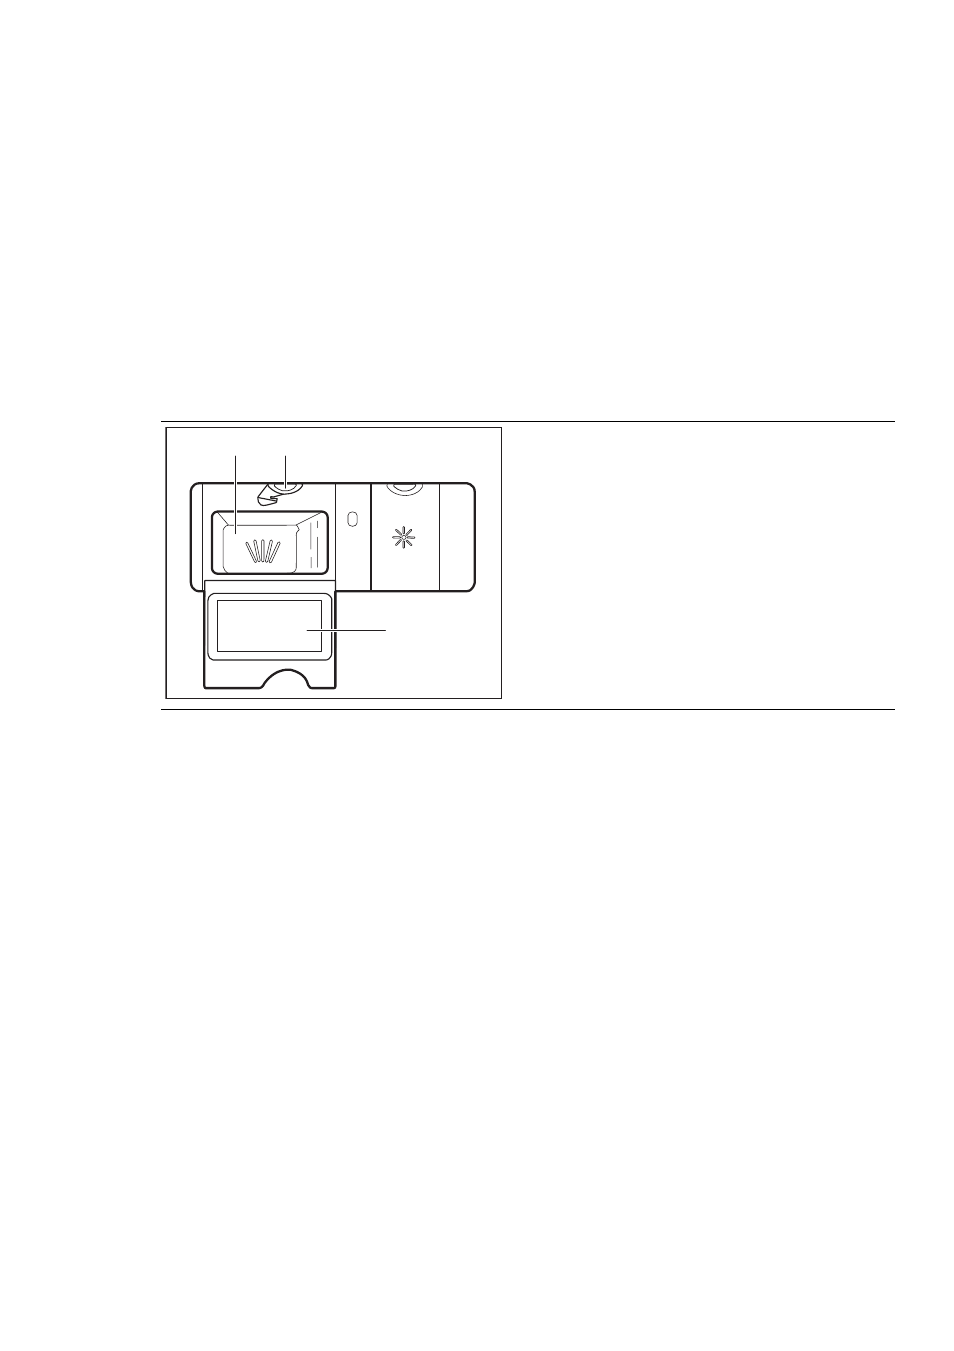
7.1 Using the detergent
20
30
M AX
1
2
3
4
+
-
A
B
C
1.
Press the release button (B) to open
the lid (C).
2.
Put the detergent in the compart-
ment (A) .
3.
If the programme has a prewash
phase, put a small quantity of deter-
gent on the inner part of the appli-
ance door.
4.
If you use detergent tablets, put the
tablet in the compartment (A).
5.
Close the lid. Make sure that the re-
lease button locks into position.
7.2 Setting and starting a
programme
Setting mode
The appliance must be in setting mode
to accept some operations.
The appliance is in setting mode when,
after the activation:
• All the programme indicators come
on.
If the control panel shows other condi-
tions, press and hold function buttons
(B) and (C) at the same time until the ap-
pliance is in setting mode.
Starting a programme without
delay start
1. Open the water tap.
2. Press the on/off button to activate
the appliance.
3. Make sure that the appliance is in
setting mode.
4. Set the programme.
• The related programme indicator
comes on.
• The programme duration flashes in
the display.
5. Close the appliance door. The pro-
gramme starts.
• If you open the door, the display
shows the programme duration
that decreases with steps of 1 mi-
nute.
Starting a programme with
delay start
1. Set the programme.
2. Press the delay button again and
again until the display shows the de-
lay time you want to set (from 1 to 24
hours).
• The delay time flashes in the dis-
play.
• The delay indicator is on.
3. Close the appliance door. The count-
down starts.
ENGLISH
25