Accessories, Refrigerator compartment, Freezer compartment – Hotpoint Ariston Combiné NMBL 1921 FW-HA User Manual
Page 17
GB
17
*
Available only on certain models.
Accessories
Refrigerator compartment
SHELVES: with or without grill.
Due to the special guides the shelves are removable
and the height is adjustable, allowing easy storage of
large containers and food.
FRESH BOX
*
: for fresh meat and fish. Due to the
compartments low temperature (the coldest in the
refrigerator) and to the clear door that provides
protection against oxidation and blackening, food can
be stored for even up to one week. It can also be
used for cold meals.
ODOUR FILTER
*
: Some
models are fitted with a new
odour filter with active
carbons, which ensures better
air quality inside the
refrigerator. The filter is
located on the bottom left side,
inside the FRUIT and
VEGETABLE compartment.
TEMPERATURE Indicator light
*
: to identify the
coldest area in the refrigerator.
1. Check that OK appears clearly on the indicator light
(see diagram).
2. If the word OK does not appear it means that the
temperature is too high: adjust the REFRIGERATOR
OPERATION knob to a higher position (colder) and
wait approximately 10 hours until the temperature
has been stabilised.
3. Check the indicator light again: if necessary,
readjust it following the initial process. If large
quantities of food have been added or if the
refrigerator door has been opened frequently, it is
normal for the indicator not to show OK. Wait at
least 10 hours before adjusting the REFRIGERATOR
OPERATION knob to a higher setting.
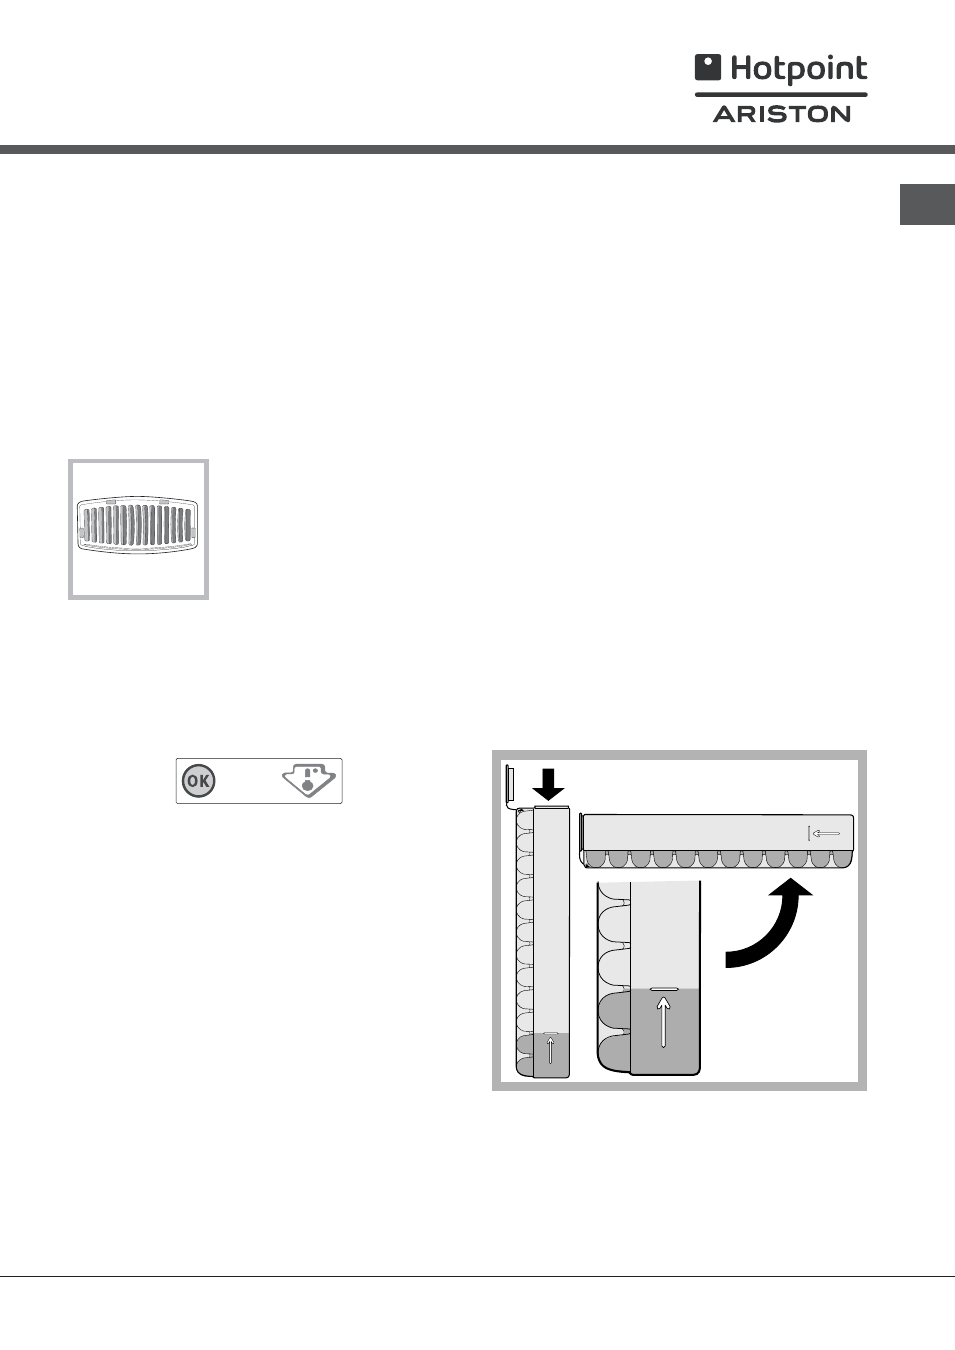
Freezer compartment
ICE CARE tray
The fact that they are situated on the top part of the
freezer drawers ensures greater cleanliness: the ice
no longer comes into contact with the food placed
inside the freezer compartment; furthermore, the
dripping of the water during filling is avoided (a lid to
cover up the hole after filling with water is also
provided).
1. Pull out the tray by pushing it up.
Check that the tray is ompletely empty and fill it with
water through the opening provided.
2. Take care not to exceed the level indicated (MAX
WATER LEVEL). Excess water prevents the ice
cubes from dispensing (if this happens, wait for the
ice to melt and empty the tray).
3. Turn the tray 90°: due to the connected
compartments each mould fills with water (see
diagram).
4. Close the opening with the lid provided and put the
tray back.
5. When the ice has formed (minimum time
approximately 8 hours) knock the tray against a
hard surface and wet the outside so that the ice
cubes come loose and take them out through the
opening.
WATER LEVEL
MAX
W
A
TER LEVEL
MAX
W
A
TER LEVEL
MAX