3B Scientific Ultrasound Transducer, 40 kHz, Equipment Kit User Manual
Page 2
Elwe Didactic GmbH ▪ Steinfelsstr. 5 ▪ 08248 Klingenthal ▪ Germany ▪ www.elwedidactic.com
3B Scientific GmbH ▪ Rudorffweg 8 ▪ 21031 Hamburg ▪ Germany ▪ www.3bscientific.com
Subject to technical amendments
© Copyright 2012 3B Scientific GmbH
4. Additionally required equipment
1 Function generator FG 100 (230 V, 50/60 Hz)
1009957
or
1 Function generator FG 100 (115 V, 50/60 Hz)
1009956
1 Analogue oscilloscope 2x30 MHz
1002727
3 Stand bases, 0.5 kg
1001046
1 HF cable
1002746
1 T-Piece, BNC
1002752
1 Adapter, BNC Jack/4-mm-Plugs
1002751
5. Operation
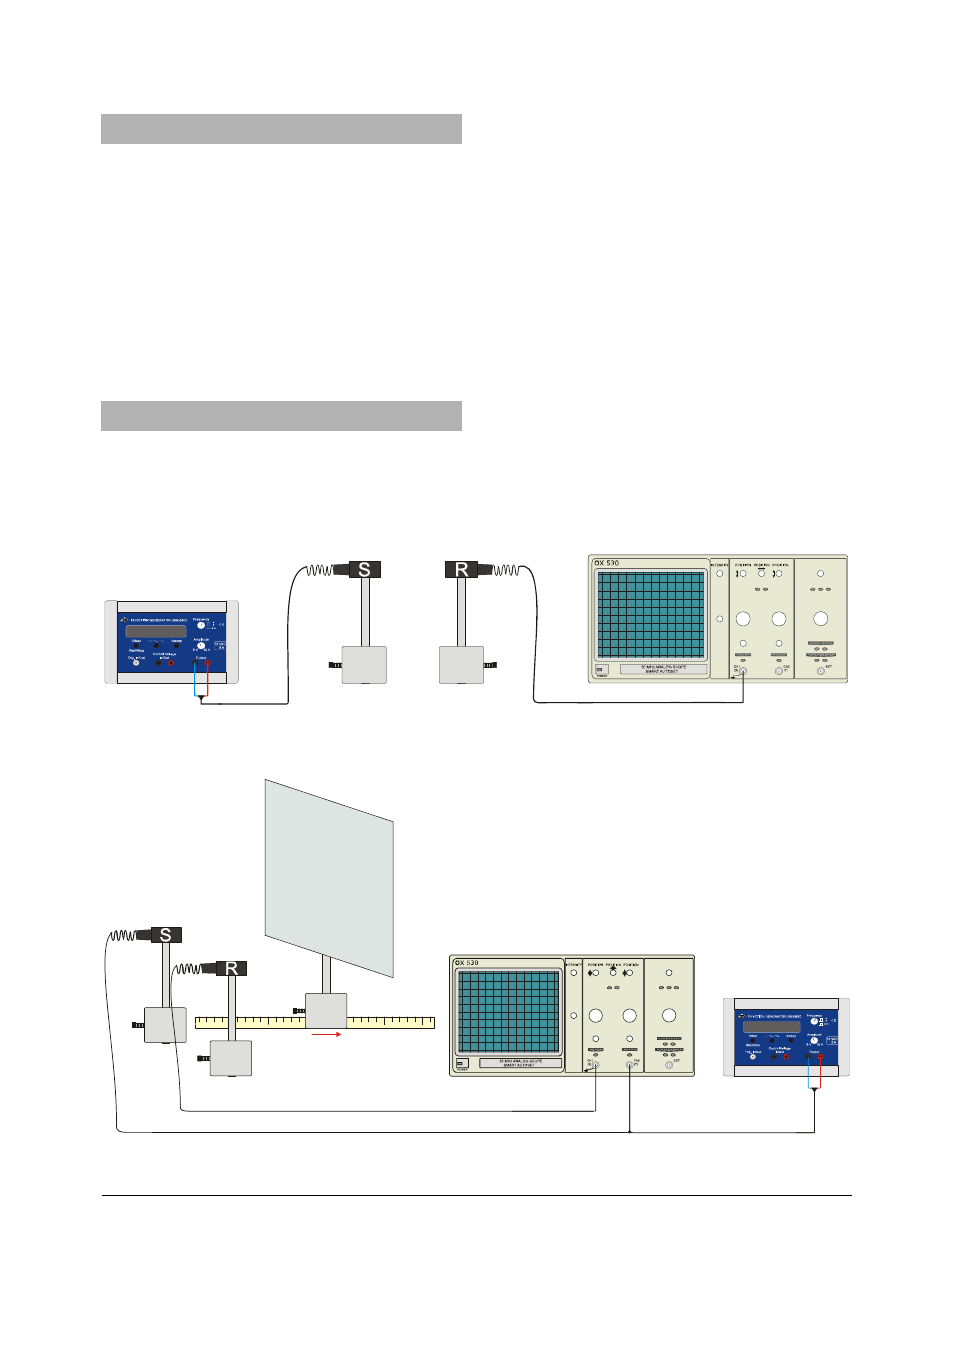
5.1 Calibration of resonant frequency
•
Set up the ultrasonic transmitter and receiver
close together and facing one another.
•
Connect the transmitter to the output of the
function generator and set the frequency to
40 kHz.
•
Connect the receiver to an oscilloscope.
•
Observe the received signal and make fine
adjustments to the frequency to maximise the
signal amplitude.
5.2 Sample
experiment
•
Set up the ultrasonic transmitter and receiver
alongside one another in front of the
projection screen.
•
Connect the transmitter to the output of the
function generator and set the frequency to
the resonant frequency (see 5.1).
•
Connect the receiver to the oscilloscope.
•
Move the projection screen and observe the
phase differences between the signals.
Fig. 1 Experiment set-up for calibrating resonant frequency
Fig. 2 Experiment set-up for the reflection of ultrasonic waves by a projection screen