Technical data, Operation, 1 setting up and removing hot cathode tubes – 3B Scientific Teltron Tube Holder D User Manual
Page 2: 2 setting up the helmholtz coils d (100644), 3 setting up the auxiliary coil (1000645)
3B Scientific GmbH • Rudorffweg 8 • 21031 Hamburg • Germany • www.3bscientific.com
Subject to technical amendments
© Copyright 2012 3B Scientific GmbH
3. Technical data
Dimensions: 230x175x320
mm
3
approx.
Separation of
holes for coils:
76 mm approx.
Weight:
1.5 kg approx.
4. Operation
4.1 Setting up and removing hot cathode
tubes
Tubes should not be mounted or removed
unless all power supplies are disconnected.
Push the jaw clamp sliders on the stanchion
of the tube holder right back so that the jaws
open.
Push the bosses of the tube into the jaws.
Push the jaw clamps forward on the stan-
chions to secure the tube within the jaws.
To remove the tube, push the jaw clamps
right back again and take the tube out of the
jaws.
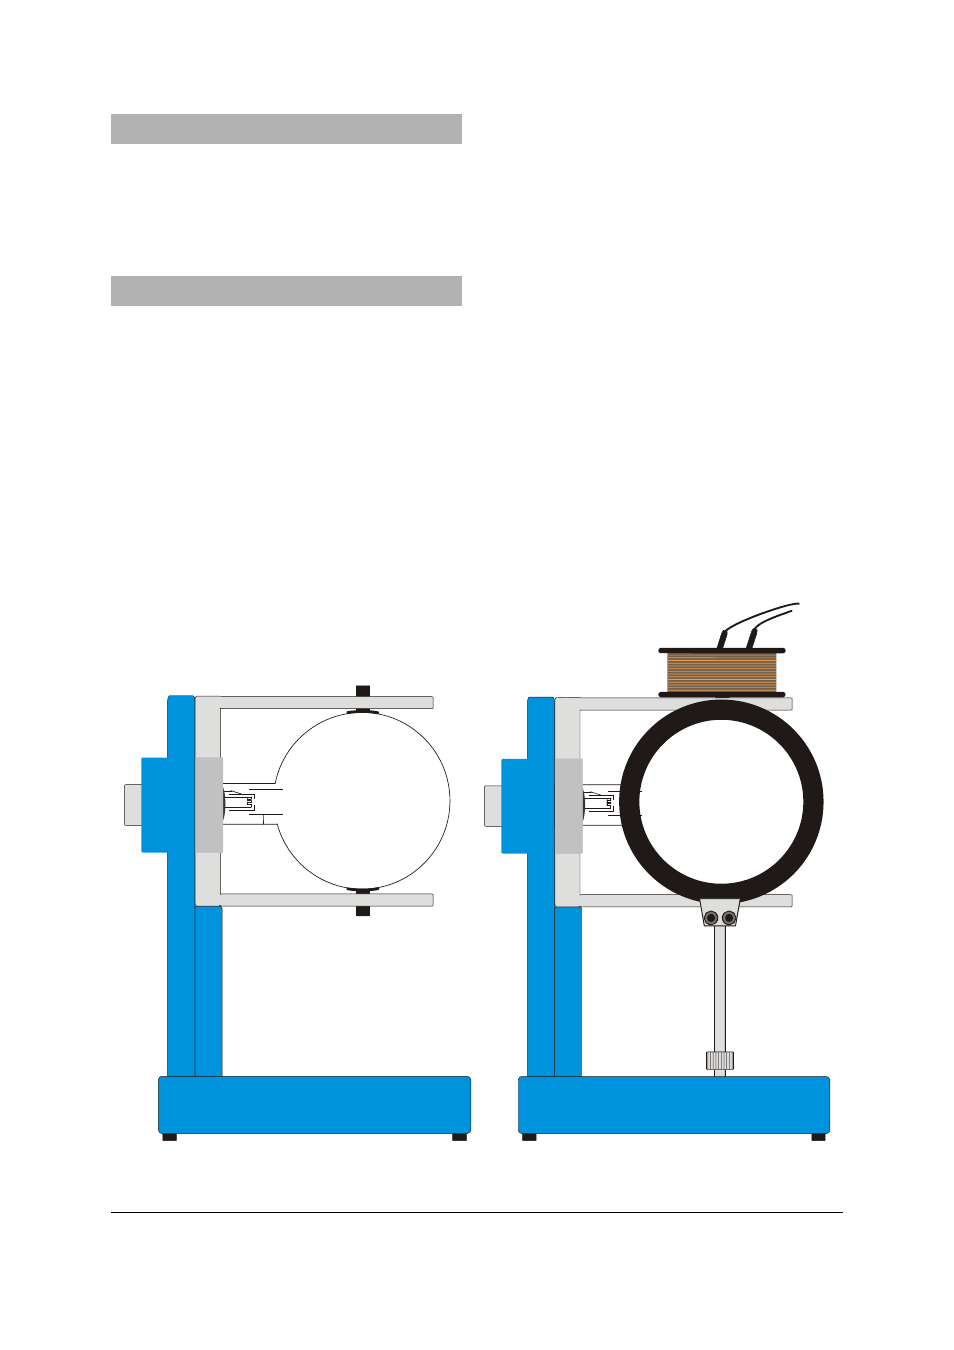
4.2 Setting up the Helmholtz coils D (100644)
Place the tube in the holder as described
above.
Insert the Helmholtz tubes into the holes
with the connections facing outwards. Push
the sleeves on the rod upwards and insert
the rod at an angle.
Push the sleeves into the holes to secure
the coils.
4.3 Setting up the auxiliary coil (1000645)
Place the coil on the upper fork.
Push the retaining slider over the lip of the
auxiliary coil to secure the coil in place.
4.4 Setting up the optical analogue equip-
ment (1000656)
Insert the aluminium disc with the grating
into the stanchion from behind.
-
-
Fig. 1 Setting up a tube (left), a tube, the Helmholtz coils and the auxiliary coil (right)