3B Scientific Electroscope S User Manual
Page 2
3B Scientific GmbH ▪ Rudorffweg 8 ▪ 21031 Hamburg ▪ Germany ▪ www.3bscientific.com
Subject to technical amendments
© Copyright 2013 3B Scientific GmbH
4. Operation
To perform experiments, the following equip-
ment is also required:
Friction rods
1002709
Friction
rod
Rubbing mate-
rial
Charge po-
larity
PVC
Plastic foil
+
Acrylic
glass
Plastic foil
-
To indicate the charge polarity the following
equipment is recommended:
Charge Indicator
1009962
4.1 Electroscope set-up
•
Insert the frame into the base.
•
Slide the aluminium rod vertically into the
frame.
•
Attach the electroscope unit to the magnetic
holder.
•
Place the pointer needle in such a way that
it automatically points to zero.
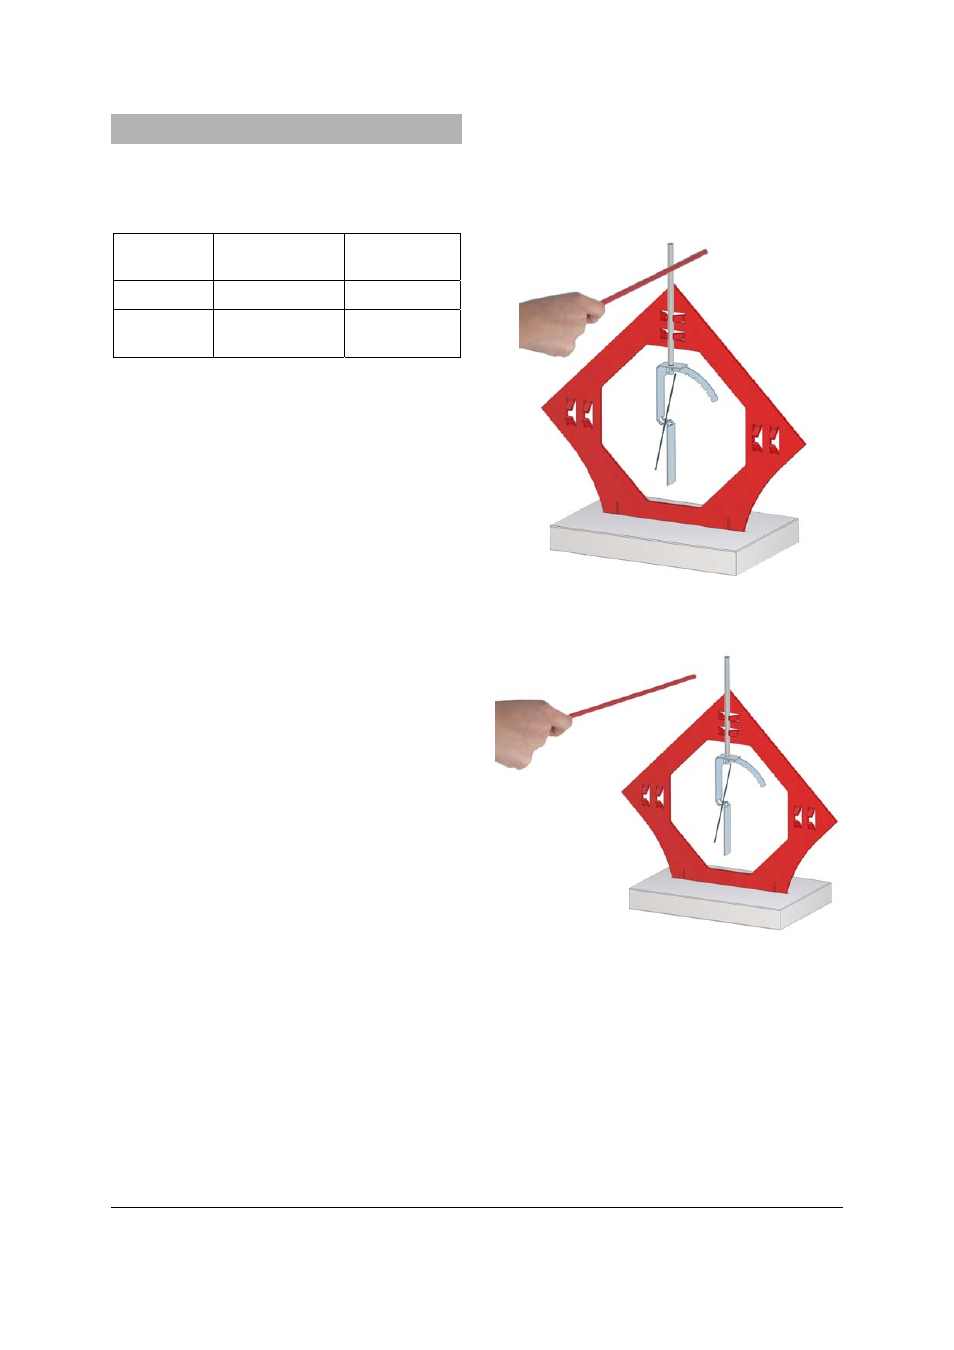
4.2 Charging up the electroscope by touch-
ing it with a statically charged body
•
Rub the friction rod with the suitable mate-
rial.
•
Touch the aluminium rod with the charged
rod. The pointer deflects.
•
Remove the friction rod, the pointer remains
deflected.
•
Touch aluminium rod with your hand. The
pointer returns to normal.
•
Repeat the experiment with the second fric-
tion rod.
•
Determine the sign of the charge using the
charge indicator.
4.3 Using electrostatic induction to charge
up the electroscope
•
Approach but do not touch the aluminium
rod with the statically charged friction rod.
The pointer deflects.
•
Remove the friction rod. The pointer returns
to normal.
•
Again approach the aluminium rod with the
statically charged friction rod. Once again
the pointer deflects.
•
Briefly touch the aluminium rod with your
finger to discharge it. The pointer deflection
disappears and returns to normal.
•
Now remove the friction rod. The pointer
again shows deflection.
Fig. 1 Charging the electroscope using a statically-
charged friction rod
Fig. 2 Charging the electroscope using electrostatic
induction