GPK UPPERTONE User Manual
Page 3
B.
Crankshaft Assembly
(Figures 4 & 5)
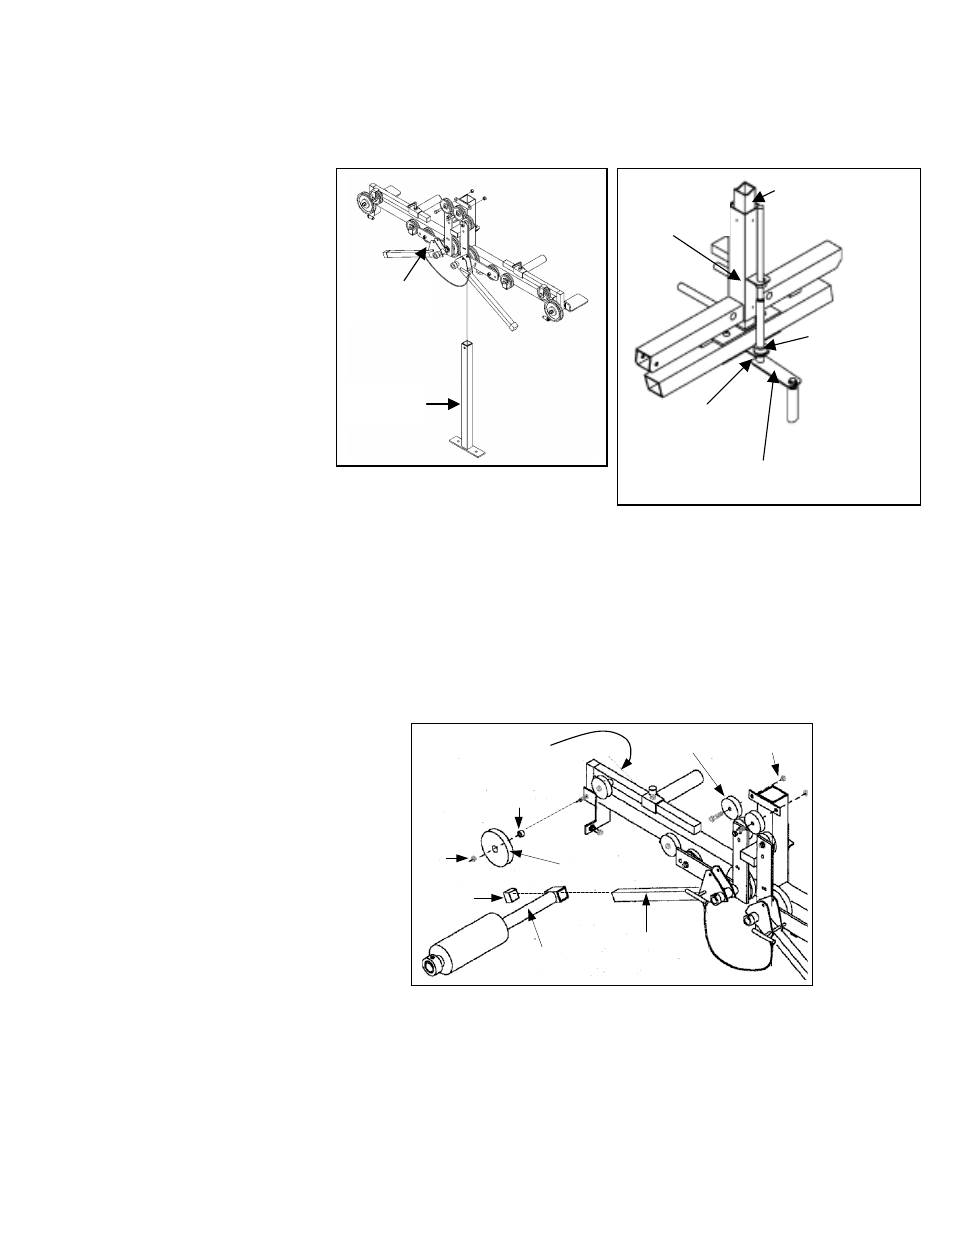
1. Slide the
Deltoid/Lat Slider (6) down the Frame Post (3) (Figure 4). The pulleys should face the inside
of the machine.
2. Remove the Shaft
Collar (25) and Washer
(24) from the
Crankshaft (22).
3. Insert the Crankshaft
(22) through the square
tab on the Frame Post
(3) replacing the
Washer (24) and Shaft
Collar (25), in that
order (Figure 5).
4. Now completely thread
the Crankshaft through
the tab on the
Deltoid/Lat Slider (6)
until the Crankshaft
handle is against the square tab on the
Frame Post (3).
5. Check that the Washer (24) and the
Shaft Collar (25) are resting on the square tab welded to the Post Bracket.
6. Tighten the Shaft Collar (25) on the Crankshaft using the Allen wrench on the black
set screw in the shaft collar.
7. Now test the Crankshaft by turning it counter-clockwise. The Deltoid/Lat Slider will rise off the Main
Frame if the Crankshaft is working properly.
8. Finally, place the provided 1.5” square cap on top of the Frame Post.
C. Deltoid/Lat Slider Assembly
(Figure 6)
1. Slide the Deltoid/Lat Handle (28)
onto Deltoid/Lat Arm (27).
2. Push the square Cap (35) onto the
end of each Deltoid/Lat Arm.
3. Remove the Lock Nuts (42) on the
bolts at both ends of the Deltoid/Lat
Slider (6).
4. Mount the separately packaged
Large Pulleys (16) making sure that
the black spacers (56) that were on
the bolts are behind each pulley.
5. Replace the nuts and tighten them
so that they are loose enough for the
Curl Elbow Pivot Bracket (30b) to
pivot freely.
6. Mount the Small Pulleys (14w) on
the center of the Deltoid/Lat Slider.
Cap (35)
Deltoid/Lat
Handle (28)
Deltoid/Lat
Arm (27)
Black Spacer (56)
Figure 6
Large Pulley (16)
42
Small Pulley (14w)
42
Curl Elbow Pivot
Bracket (30b)
Frame Post (3)
Deltoid/Lat
Slider (6)
Crankshaft (22)
Washer (24)
Shaft
Collar (25)
Frame
Post (3)
Delt/lat
Slider (6)
Figure 4
Figure 5