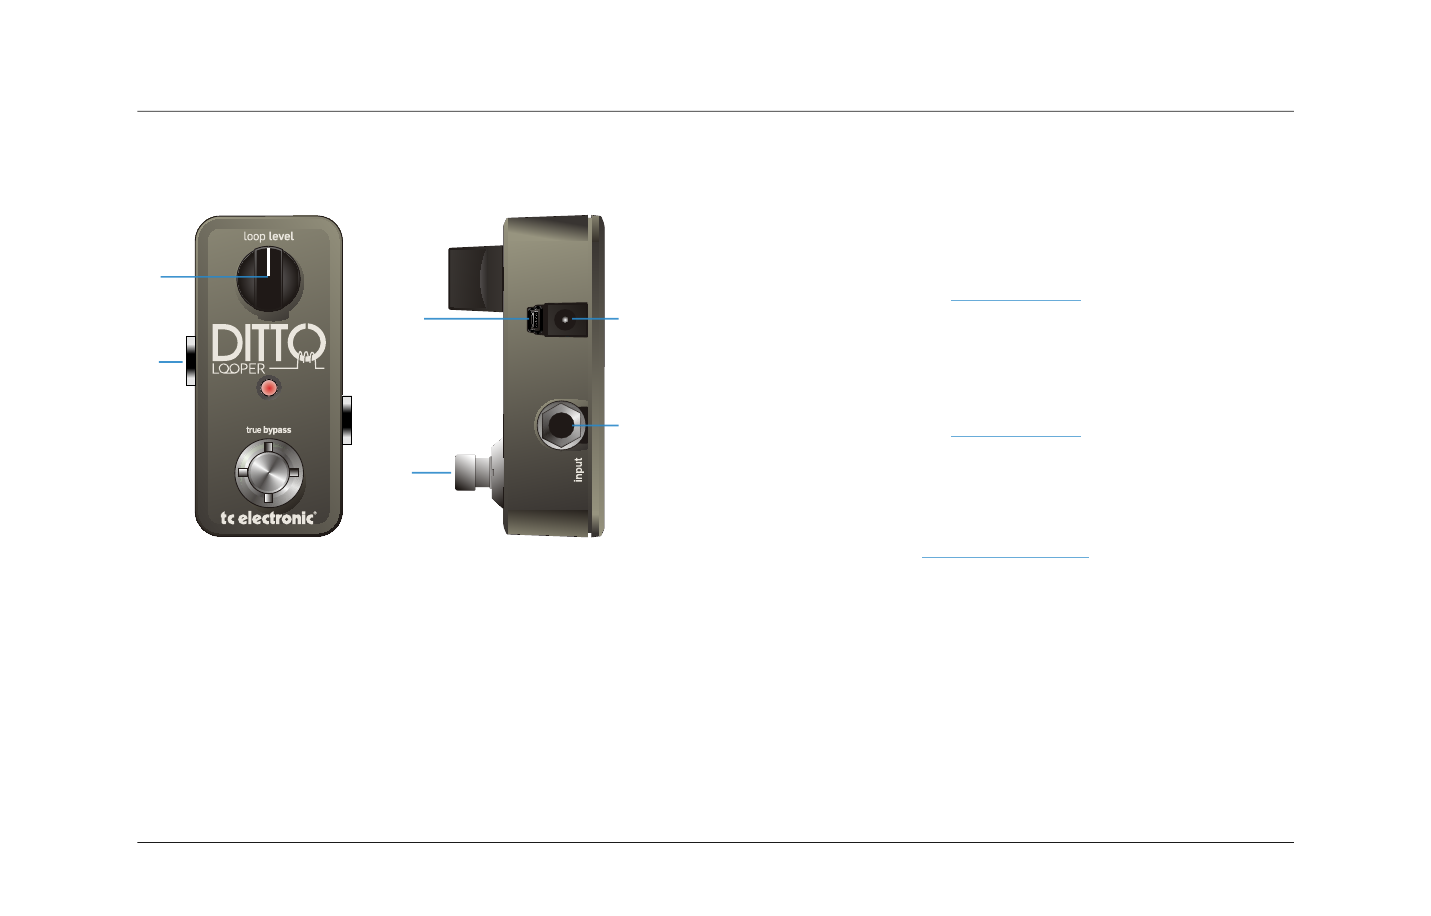
Input, output, controls, 1 – power input, 2 – audio input – TC Electronic Ditto Looper User Manual
Page 8: 3 – audio output, 4 – footswitch, 5 – loop level knob, 6 – usb connector, Power input, Audio input, Audio output
6
Input, output, controls
2 – Audio input
This is a standard ¼” input jack (mono/TS).
Connect your guitar here using a regular ¼” mono cable.
For other setups, see the “Setup examples” section of this manual.
3 – Audio output
This is a standard ¼” output jack (mono/TS).
Connect this jack to your amplifier using a regular ¼” mono cable.
For other setups, see the “Setup examples” section of this manual.
4 – Footswitch
Use this footswitch to control all loop-related functions of the
pedal (record, playback, undo/redo, delete). See the following sec-
tion of this manual (“Working with loops”).
5 – Loop Level knob
Use this knob to control the level of your loops.
(You didn’t see this one coming, did you?)
6 – USB connector
This is a USB Mini-B type socket. It can be used to transfer soft-
ware updates to this product from a computer.
Input, output, controls
2
4
6
1
3
5
1 – Power input
This is a standard 5.5/2.1 mm DC plug (centre = negative). To
power up Ditto Looper, connect a power supply to its power
input socket. Ditto Looper requires a 9 V power supply providing
100 mA or more (not supplied).
To minimize hum, use a power supply with isolated outputs.