Configure midi, Confirm connections and test, Editor/hardware interaction – Moog Music Voyager Plug SE (VST-AU) User Manual
Page 6: Record/playback midi data, Record/playback automation data
Moog Voyager PlugSE
3
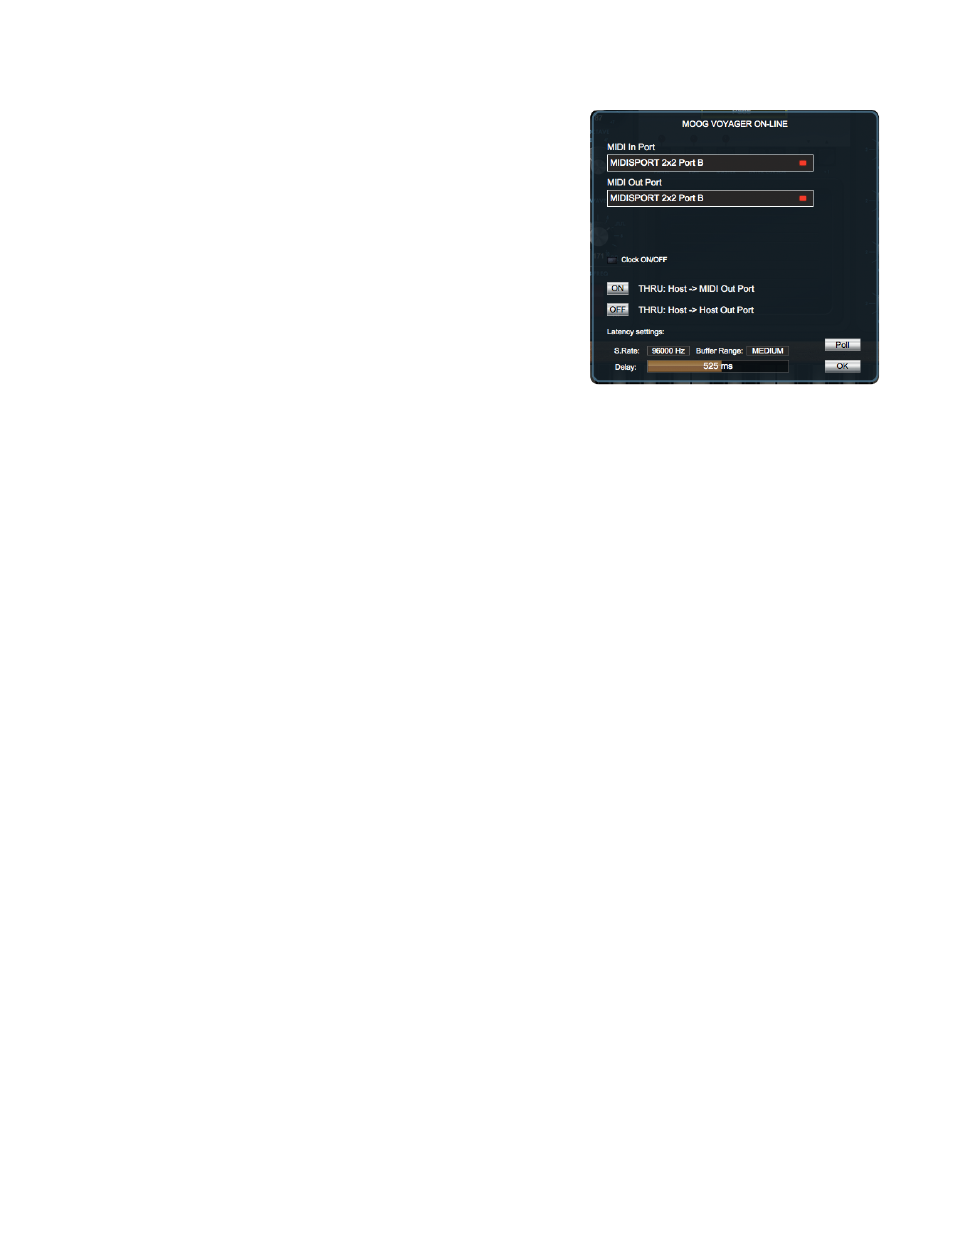
Configure MIDI
It isn’t practical to provide specific instructions covering all the
possible MIDI interfaces or configurations that are available. Instead,
we will provide an example of a typical MIDI configuration using a
MIDISport 2x2 MIDI interface.
Make sure the Voyager’s MIDI In and MIDI Out are connected to the
MIDISport interface. Returning to the PlugSE™ Editor, click the MIDI
button at the top of the Editor window.
In the MIDI In Port and MIDI Out Port select the MIDI interface
and the port that the Voyager is connected to. Once the appropriate
input and output ports are selected, click the Poll button. An ON-
LINE message will appear at the top of this window confirming
proper connection. Finally, click the THRU button to ON, and then
click the OK button to exit.
For information about additional features found in MIDI Configuration panel please see
section below.
Confirm Connections and Test
Editor/Hardware Interaction
Confirm that changes made using the PlugSE™ Editor affect the Voyager by adjusting a few controls in the
Editor window; these changes should be reflected on the Voyager hardware.
Record/Playback MIDI Data
Create a new MIDI track in your DAW. Select the MIDI interface port that the Voyager is connected to as your
MIDI destination. Record and playback a few test notes.
Record/Playback Automation Data
Test the writing and reading automation data as you would any other VI in your software. Enable the track
to Write, start playback and tweak some controls on the PlugSE™ Editor or twist some data controls on the
Voyager. Rewind, put the automation track into Read and start playback and confirm that automation data is
communicating with the Voyager.