Installing the 6–hole intermediate purlins, Chapter 7: roof assembly – Grain Systems Tanks PNEG-4075 User Manual
Page 106
Installing the 6–Hole Intermediate Purlins
Intermediate purlins must be installed to connect each A-frame roof rafter assembly together. The inter-
mediate purlins at 11.6 ft radius (near the center collar) and 19.4 ft radius (second from the center collar)
connecting each A-frame roof rafter assembly are unique than the other intermediate purlins installed at
other diameters of the roof.
Before You Begin
All A-frame roof rafter assemblies must be installed and secured to both the center collar and the eave
brackets.
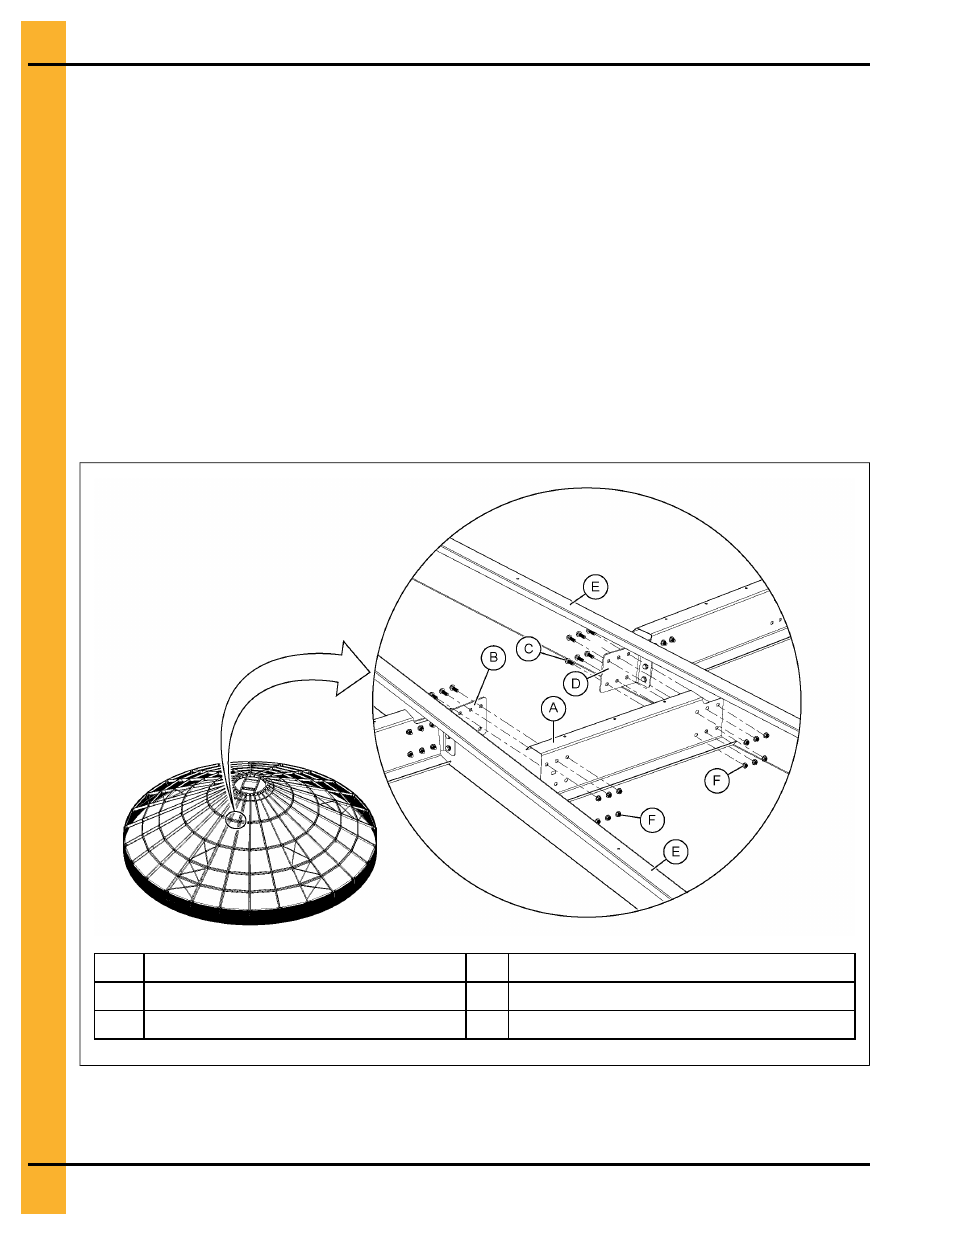
1. Install the intermediate purlin (A) to the purlin clips (B and D) located outside of each A-frame roof
rafter assembly (E).
2. Install six flange bolts (C) and six flange nuts (F) to each end of the purlin (A) securing the intermedi-
ate purlin to the purlin clips.
3. Tighten the hardware to the recommended torque specifications. See
.
Figure 7-28 Exploded view of the 6–hole intermediate purlin
A
Purlin (CTR-0213)
D
Left Purlin clip (CTR-0099)
B
Right Purlin clip (CTR-0100)
E
A-frame roof assembly
C
1/2 x 1-3/4 in. flange bolt (S-10252)
F
1/2 in. flange nut (S-10253)
After You Finish
Repeat this procedure only for the remaining 6–hole intermediate purlins (near the center collar) at 11.6 ft
radius and 19.4 ft radius of the roof assembly.
106
Pneg-4075 75 Ft Diameter 40-Series Bin