Banks Power Toyota Trucks: (Gas ’07 - 09 4.0L FJ) Exhaust- Monster Exhaust, Single out the back '07-09 User Manual
Page 6
6
97083 v.2.0
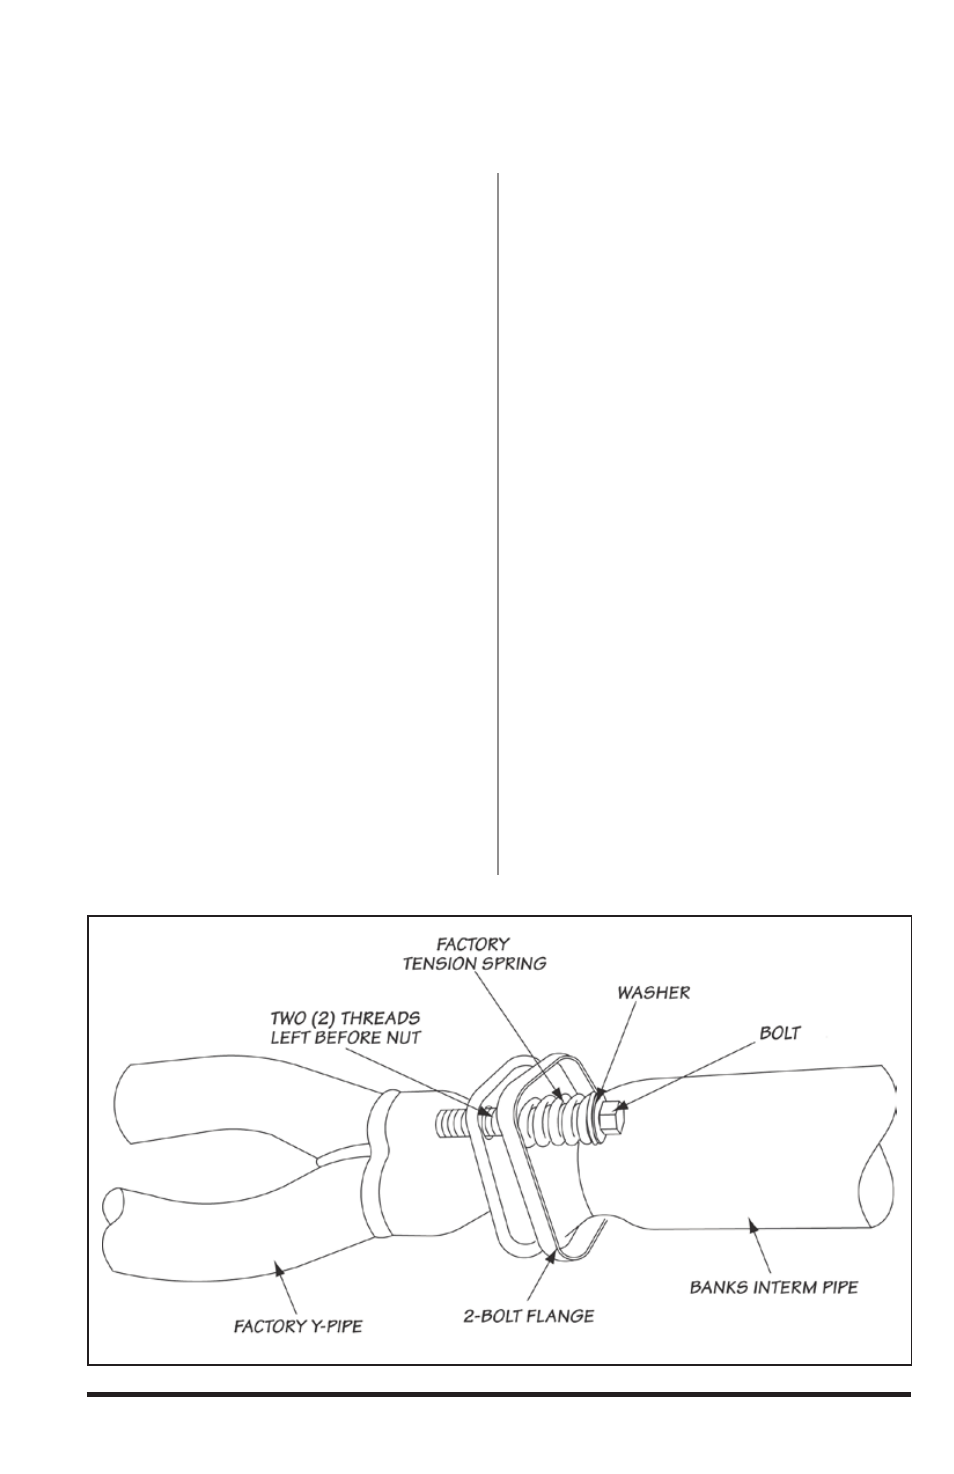
hardware, tighten the bolt such that
2-threads remain on the bolt before
bottoming to the flange. The tension
spring will keep the bolt secured (see
Figure 3).
8.
Install the single pin hanger clamp
onto the outlet of the Intermediate
pipe such that the hanger pin is facing
the front. Insert the hanger pin into
the vehicles corresponding rubber
grommet.
NOTE: Once the pipe / muffler has
been completely engaged in the slip
joint, mark the pipe with scribe or
tape for reference when tightening the
clamps later in the installation. Mark
each slip joint in this fashion.
9.
Install the Banks Monster Muffler
inlet onto the intermediate pipe (Note
the inlet labeling of the muffler). Orient
the Monster logo such that is visible
from the passenger side and parallel
with the frame rail. Align the hanger
clamp onto the muffler inlet.
NOTE: All clamps should be positioned
at the beginning of the slots (on the
1⁄2 circle punch) and evenly tightened.
10.
Install the 3” dual pin hanger
clamp onto the Banks Muffler outlet
such that the hanger pins are facing
the rear of the vehicle. Install the
two (2) hanger pins into the vehicles
corresponding rubber grommets (see
Figure 4).
11.
From the vehicle rear, route the
tailpipe over the rear cross member.
Start the tailpipe hanger pin into the
corresponding vehicle rubber hanger.
Install the tailpipe into the Banks
Muffler outlet. Lightly tighten the rear
muffler hanger clamp to secure the
tailpipe (see Figure 5).
12.
Adjust the Tailpipe Tip 1⁄2” under
the rear bumper such that the tip
position is aesthetically pleasing.
13.
With the exhaust positioned
properly, begin to tighten the clamps
starting with the ones closest to the
front of the vehicle and working your
way back. Torque the exhaust clamps
evenly to 35 ft-lbs. Make sure that
each slip is fully inserted (+/- 1⁄4”).
14.
Remove the protective covering
from the tailpipe tip.
Figure 3