Mounting the units, Description of the lcd – Velleman WS1170 User Manual
Page 4
WS1170
Rev. 04
07.03.2011
©Velleman nv
4
• Wait ± 3 minutes until the temperature is displayed on the weather station. Do not press any keys before
the weather station has received data.
• Mount both units (see “6. Mounting the Units”) at a distance where the weather station is still able to pick
up the signal from the sensor.
Every time the outdoor sensor is powered up (after e.g. a battery replacement), a random security code will
be transmitted. This code must be synchronized to the base station in order to receive weather data. The
station base must also be powered up when replacing the batteries in the outdoor sensor.
When the weather station is powered up, a short beep will sound and all LCD segments will light for 3
seconds before the station enters into the learning mode. After the learning mode the station will start DCF
radio-controlled time reception and RCC time reception for ± 10 minutes during which it will not be able to
receive any weather data. If the RCC signal cannot be found within 1 minute, the signal search will be
cancelled and will automatically resume every two hours until the signal is successfully captured. Regular RF
link will be established once the RCC reception routine is finished.
Do not press any key during the learning period (± 3 minutes). After both indoor and outdoor data is
displayed you can install the remote outdoor sensor and set the time (if no RCC reception is available). If
there is no temperature reading on the outdoor station make sure both units are within transmission range
or check the batteries. If you press a key before the weather station receives the temperature signal, take
out the batteries and reinstall them after ± 10 seconds.
Time and date are provided by a highly accurate atomic clock. Note that, whenever reception is possible, the
weather station will scan for the DCF radio signal and overwrite a manually set time and date.
6. Mounting the units
a. The Base Station
Place the base station onto a flat surface by deploying the foldable legs at
the back of the unit. The unit can also be wall-mounted. It is important to
check that the radio signal can be received before permanently mounting
both units.
b. The Outdoor Station
To achieve true temperature reading, avoid mounting the remote sensor in
direct sunlight. We recommend mounting the sensor on an outdoor north-
facing wall. Obstacles such as walls, concrete and large metal objects will
reduce the transmission range.
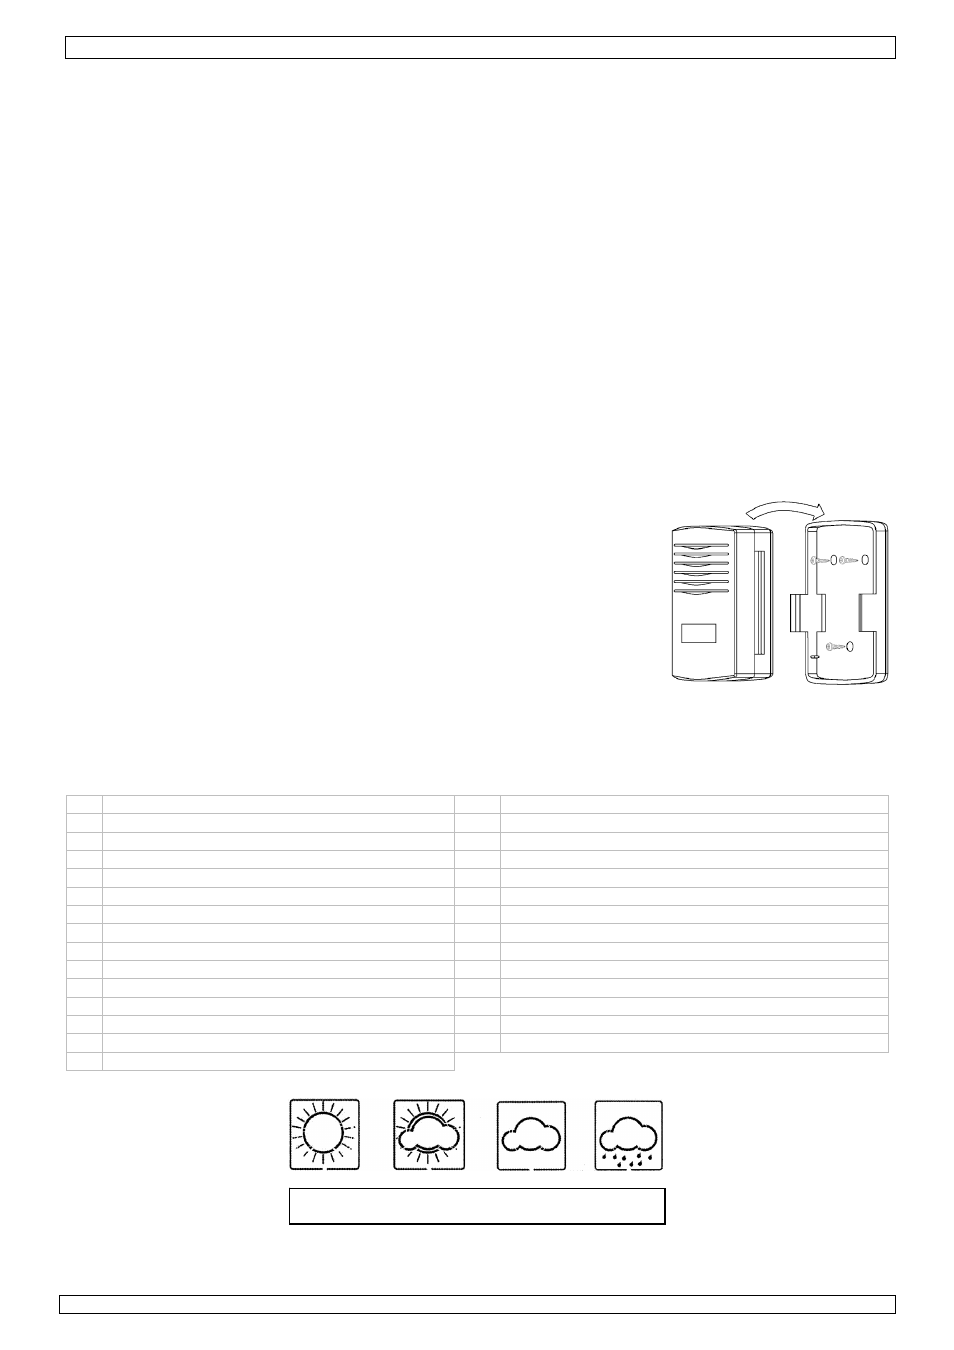
To wall-mount the sensor, fix the bracket on the wall using the three
screws. Fix the unit onto the bracket as shown.
7. Description of the LCD
a. Overview
Refer to the illustration on page 2 of this manual.
1 DST (Daylight Saving Time)
16 outdoor humidity
2 DCF77 radio signal
17 outdoor temperature and humidity HI / LO alarm
3 time
18 temperature scale
4 radio-controlled time icon
19 outdoor temperature
5 alarm on icon
20 general outdoor alarm
6 day of the week / time zone
21 weather forecast
7 date
22 weather tendency
8 indoor humidity
23 pressure HI alarm
9 indoor temperature and humidity HI / LO alarm 24 absolute or relative atmospheric pressure selection
10 indoor temperature
25 pressure LO alarm
11 temperature scale
26 atmospheric pressure with 24-hour history graph
12 indoor temperature and humidity alarm on
27 atmospheric pressure
13 outdoor sensor signal transmission
28 atmospheric pressure scale
14 MIN / MAX
29 atmospheric pressure alarm
15 dew point temperature
b. Weather icons
The four weather icons (sunny, partly cloudy, cloudy and rainy) represent the weather icons. These icons are
based upon change of atmospheric pressure.
sunny partly
cloudy
cloudy
rainy