Velleman projects K6400 Assembly instructions User Manual
Page 9
9
Final assembly
CHECK THE WHOLE MOUNTING ONCE
MORE THOROUGHLY AND DON'T
FORGET THE CODE, BECAUSE AFTER
THE FOLLOWING ASSEMBLY IT
WON'T BE ACCESSIBLE ANY MORE.
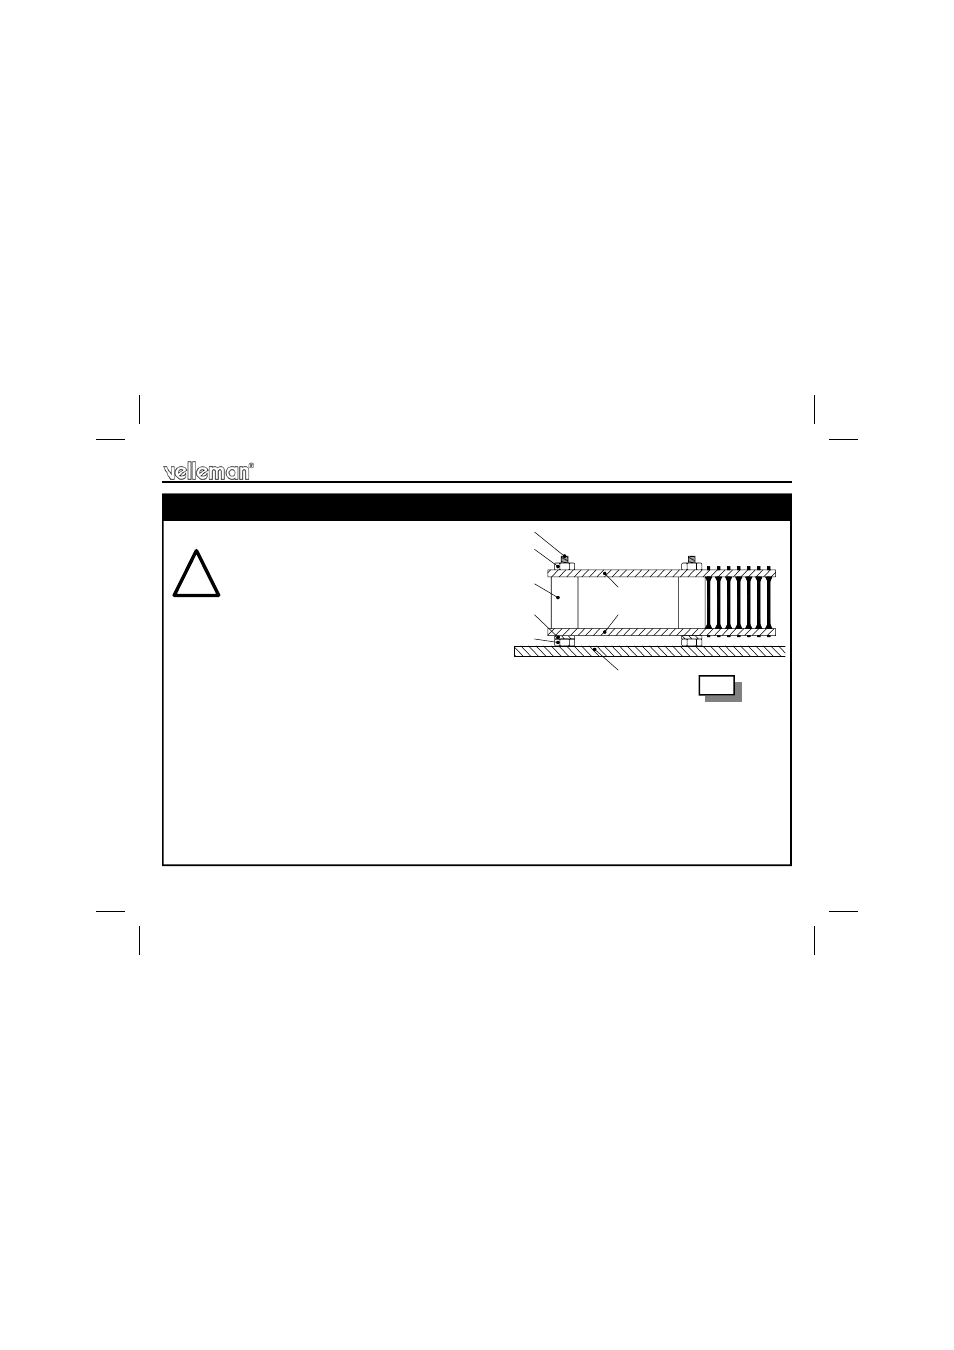
Pass two 2mm bolts through the front panel and
fix them using a nut.
Then pass a lock washer over the bolts followed by
the keyboard module. Take care that the LED is in the front panel.
Normally, neither the LED nor the push buttons may pass through the front panel. The push buttons
must be flush with the front side.
Pass a 10mm distance tube over the two bolts, followed by the master module. Also take care that the
through connections pass through the master module.
Now fix both modules using two nuts, where after you can solder the through connections (pay attention
to short-circuits).
Final Assembly
!
P6400S
P6400B
M2 BOLT
M2 NUT
10mm
SPACER
M2 NUT
ALU FRONT
LOCK
WASHER
Fig. 4