Bosch GCM 12 SD Professional User Manual
Page 45
English | 45
Bosch Power Tools
1 609 929 X01 | (1/7/10)
Starting Operation
f
Observe correct mains voltage! The voltage
of the power source must agree with the
voltage specified on the nameplate of the
machine. Power tools marked with 230 V
can also be operated with 220 V.
Switching On (see figure M)
– To start the machine, press the On/Off
switch 27 and keep it pressed.
Note: For safety reasons, the On/Off switch 27
cannot be locked; it must remain pressed during
the entire operation.
The locking lever 43 will only disengage the re-
tracting blade guard 10 after pressing button 8,
so that the tool arm can be lowered.
– For sawing, you must press button 8 in addi-
tion to actuating the On/Off switch.
Switching Off
– To switch off the machine, release the
On/Off switch 27.
Working Advice
General Sawing Instructions
f
For all cuts, it must first be ensured that the
saw blade at no time can come in contact
with the fence, screw clamps or other ma-
chine parts. Remove possibly mounted aux-
iliary stops or adjust them accordingly.
Protect the saw blade against impact and shock.
Do not subject the saw blade to lateral pressure.
Do not saw warped/bent workpieces. The work-
piece must always have a straight edge to face
against the fence.
Long workpieces must be underlaid or support-
ed at their free end.
Position of the Operator (see figure N)
f
Do not stand in a line with the saw blade in
front of the machine. Always stand aside of
the saw blade. This protects your body
against possible kickback.
– Keep hands, fingers and arms away from the
rotating saw blade.
– Do not cross your arms when operating the
tool arm.
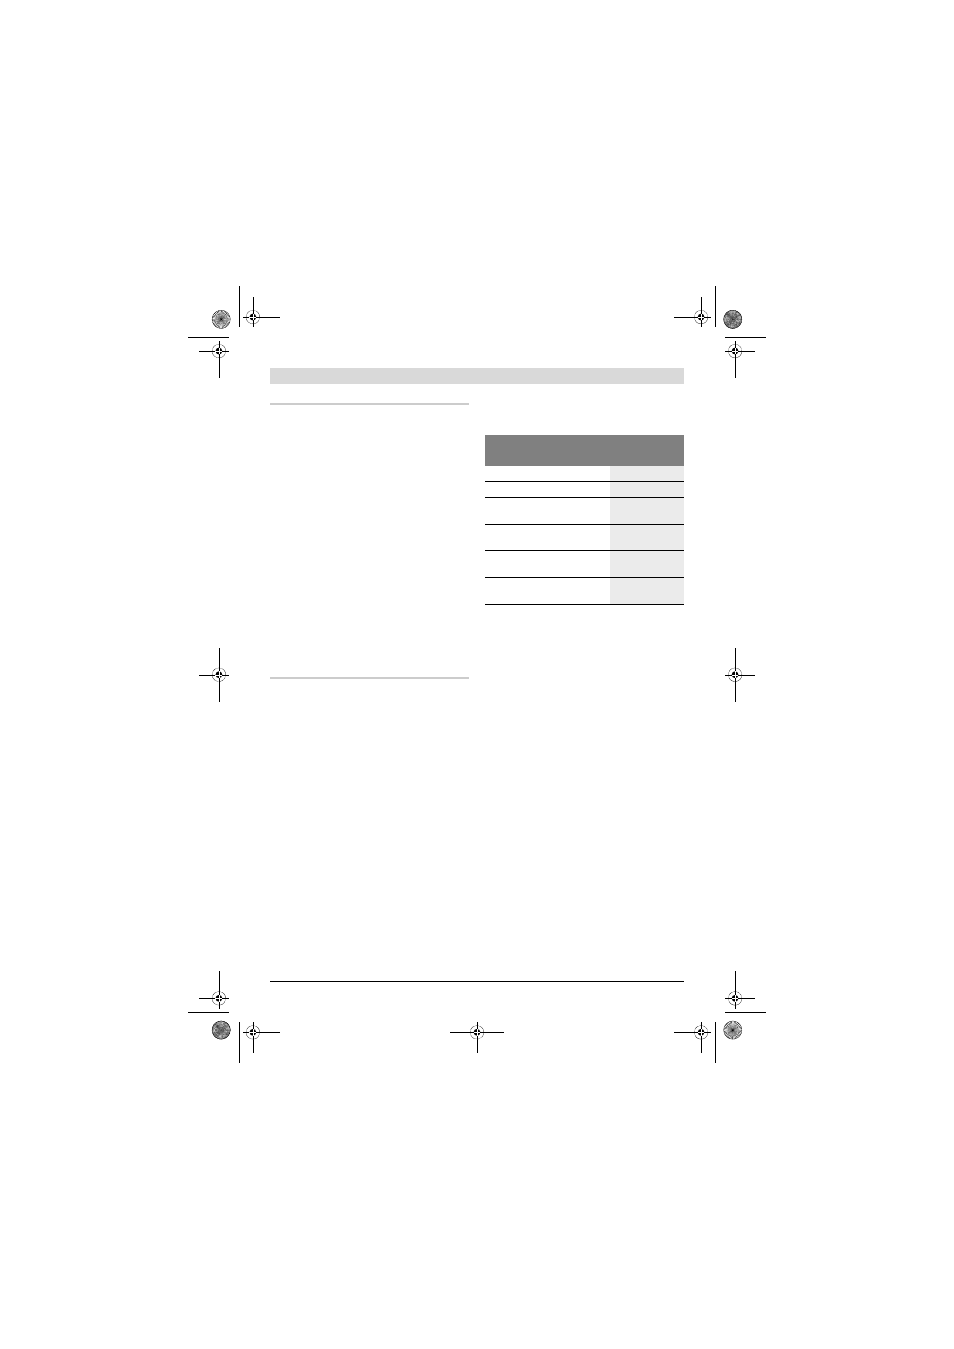
Permissible Workpiece Dimensions
Maximal workpiece sizes:
Minimal workpiece sizes
(= all workpieces that can be clamped left or
right from the saw blade with the provided
quick-action clamp 23):
185 x 40 mm (length x width)
Cutting capacity, max. (0°/0°): 110 mm
Replacing Insert Plates (see figure O)
The red insert plates 12 can become worn after
long use of the machine.
Replace defective insert plates.
– Bring the power tool into the working posi-
tion.
– Unscrew the screws 55 using the provided
Phillips screwdriver and remove the old in-
sert plates.
– Insert the new insert plates.
– Set the bevel angle to 47° (leftward).
– Push locking lever 43 and completely lower
the tool arm.
– Position the insert plate approx. 2 mm away
from the saw blade. Make sure that the saw
blade does not come in contact with the in-
sert plates throughout the complete possible
ripping length.
– Refasten the insert plate with the screws.
– Repeat the work steps for the other insert
plate in the same manner.
Mitre/Bevel Angle
Height x Width
[mm]
Horizontal
Vertical
0°
0°
110 x 305
45°
0°
110 x 217
0°
45°
(leftward)
63 x 305
0°
45°
(rightward)
38 x 305
45°
45°
(leftward)
63 x 217
45°
45°
(rightward)
38 x 217
OBJ_BUCH-1130-002.book Page 45 Thursday, July 1, 2010 11:44 AM