Candy FRCPDA241GB User Manual
Page 5
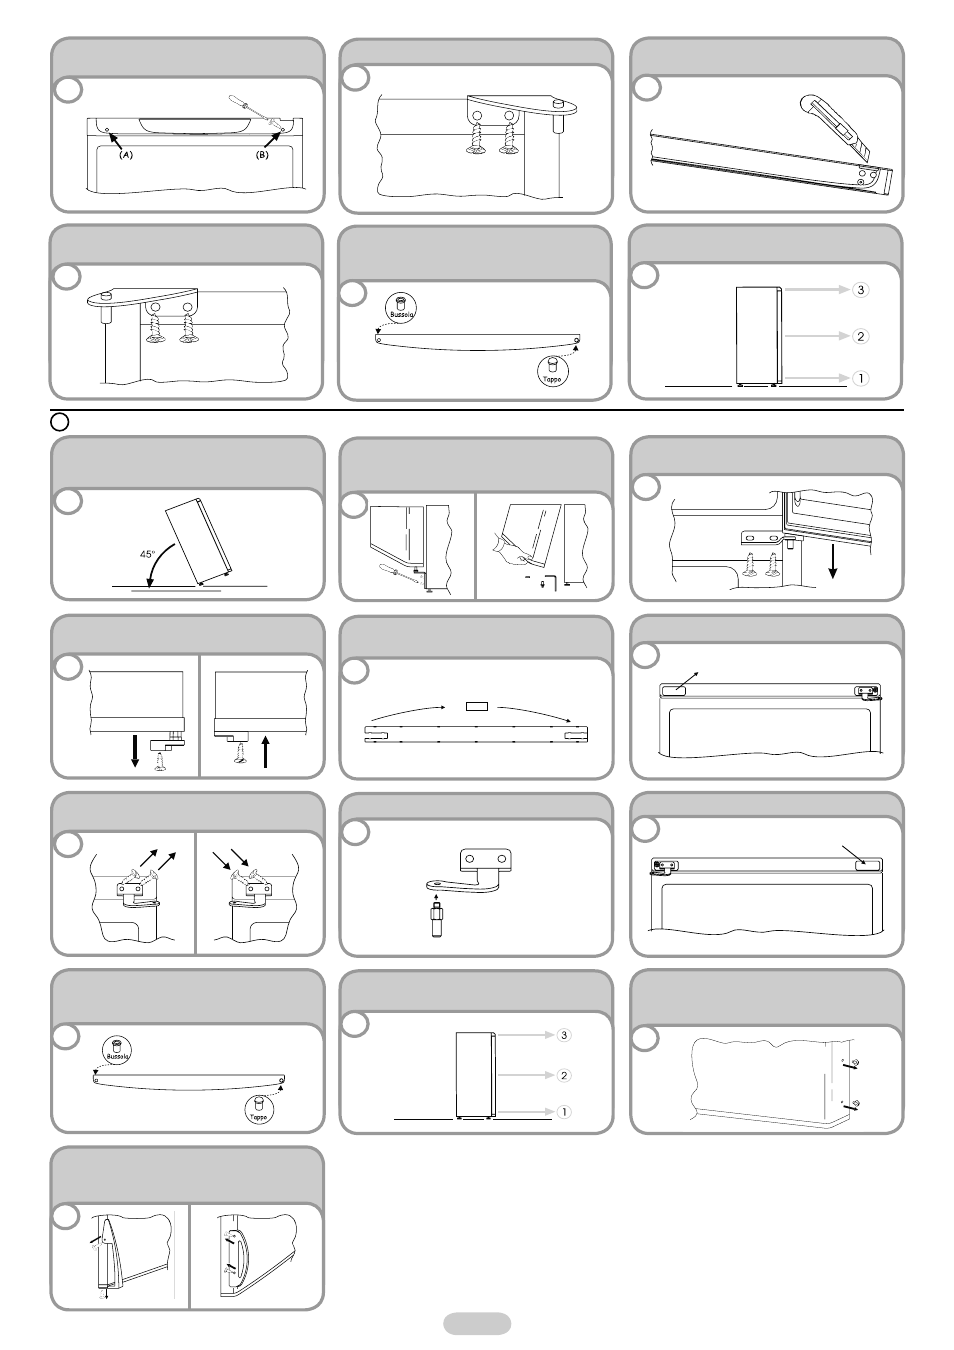
B
Remove the caps (A) and (B), loosen the screws
and partially remove the panel.
Unscrew the right hinge
5
Mark and break the left-hand slot on the panel,
in the insert area
Flip the top left-hand hinge found in the
accessories kit
7
Remove the plug on the left-hand side and
insert it on the right hand-side of the central
and lower inserts.
8
Reassemble the hinges and doors working from
bottom to top, 1 2 3
9
Place or tilt the fridge at a 45° angle, since
it is necessary to work on the bottom of the
appliance
1
Remove the bottom hinge by removing the
screws, the plug and washers, then remove the
bottom door.
2
Unscrew the central hinge and remove the top
door
3
Unscrew the hinge from the fridge door and
mount the one supplied on the other side
4
Invert the position of the closure plug of the
insert
5
Remove the closure plug of the panel
6
Flip the top left-hand hinge found in the
accessories kit
7
Insert the pin in the hinge.
8
Place the closure plug of the panel
9
Remove the plug on the left-hand side and
insert it on the right hand-side of the central
and lower inserts.
10
Reassemble the hinges and doors working from
bottom to top. 1 2 3
11
To reverse the handles: Remove the outer caps
from the right-hand side of the doors
12
Unscrew the handles from the left hand-side and
move them to the right hand-side of the product.
Position the outer caps on the left hand-side.
13
4
6
4 EN