Mulching, Cutting height adjustment, Handle height adjustment – Yard Machines 580 Series User Manual
Page 11: General recommendations
11
Mulching
For effective mulching, do not cut wet grass because it
tends to stick to the underside of the deck, preventing
proper mulching of grass clippings. New or thick grass
may require a narrower cut. The ground speed should
be adjusted to the condition of the lawn. If mowing has
been delayed and the grass has been allowed to grow
in excess of 4”, mulching is not recommended. Mow
using the side discharge to reduce the grass height to 3
1/4” maximum before mulching.
SECTION 6: MAKING ADJUSTMENTS
WARNING: Do not at any time make any
adjustments without first stopping engine
and disconnecting spark plug wire.
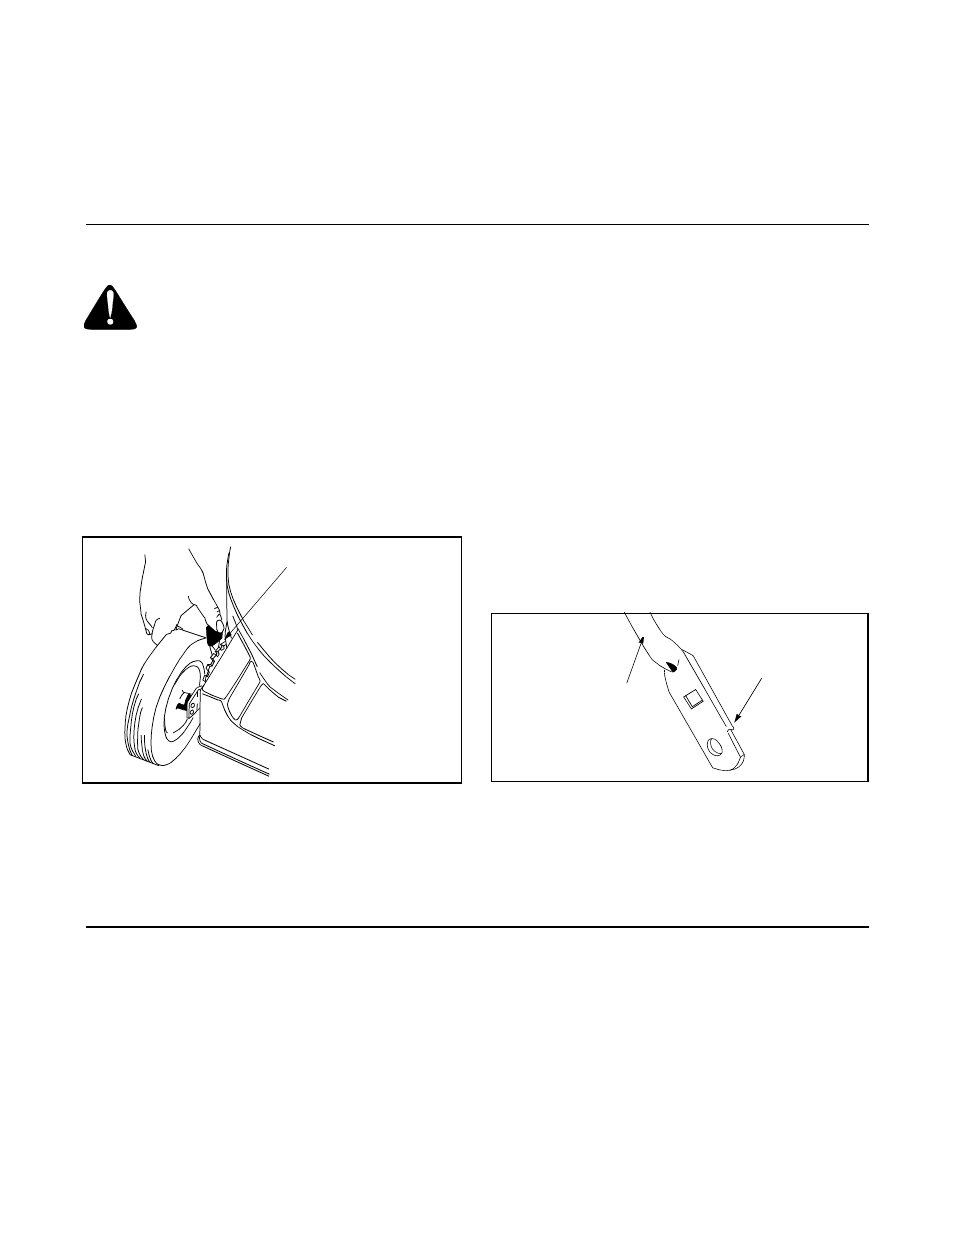
Cutting Height Adjustment
An adjusting plate and spring lever at each wheel
position provides cutting height adjustment. Each
adjusting plate has assorted height positions. When the
spring lever is moved from one location to another the
height of cut will be changed. Simply depress the lever
towards wheel and move lever assembly to desired
position. See Figure 12.
Figure 12
IMPORTANT:
All wheels must be placed in the same
relative position. For rough or uneven lawns, move the
height adjustment lever to a higher position. This will
help stop scalping of the grass.
Handle Height Adjustment
Your mower is shipped with the handle in the higher
height position. To lower the height proceed as follows:
•
Remove the starter rope from the rope guide.
•
Remove the upper handle by removing the hand
knobs and carriage bolts. Lay the upper handle out
of the way, being careful not to bend or kink the
cables.
•
Remove the hairpin clips from the weld pins on the
handle brackets. Press out on the legs of the lower
handle. Remove lower handle from the mower.
•
Turn lower handle around so the notch on the
bottom of the lower handle is facing forward.
Reassemble, placing the bottom holes in the
handle over the weld pins in the handle mounting
bracket. See Figure 13.
Figure 13
•
Reassemble the upper handle to the lower handle.
•
Place the hairpin clips in the inner holes in the weld
pins and attach the starter rope as instructed in the
Assembly Section.
SECTION 7: MAINTAINING YOUR LAWN MOWER
General Recommendations
•
Always observe safety rules when performing any
maintenance.
•
The warranty on this lawn mower does not cover
items that have been subjected to operator abuse
or negligence. To receive full value from the
warranty, operator must maintain the lawn mower
as instructed in this manual.
•
Changing of engine governed speed will void
engine warranty.
•
Some adjustments will have to be made
periodically to maintain your unit properly. All
adjustments in the Making Adjustments section of
this manual should be checked at least once each
season.
Height Adjustment
Lever
Notch
Lower Handle