Yard Machines 400 User Manual
Page 10
10
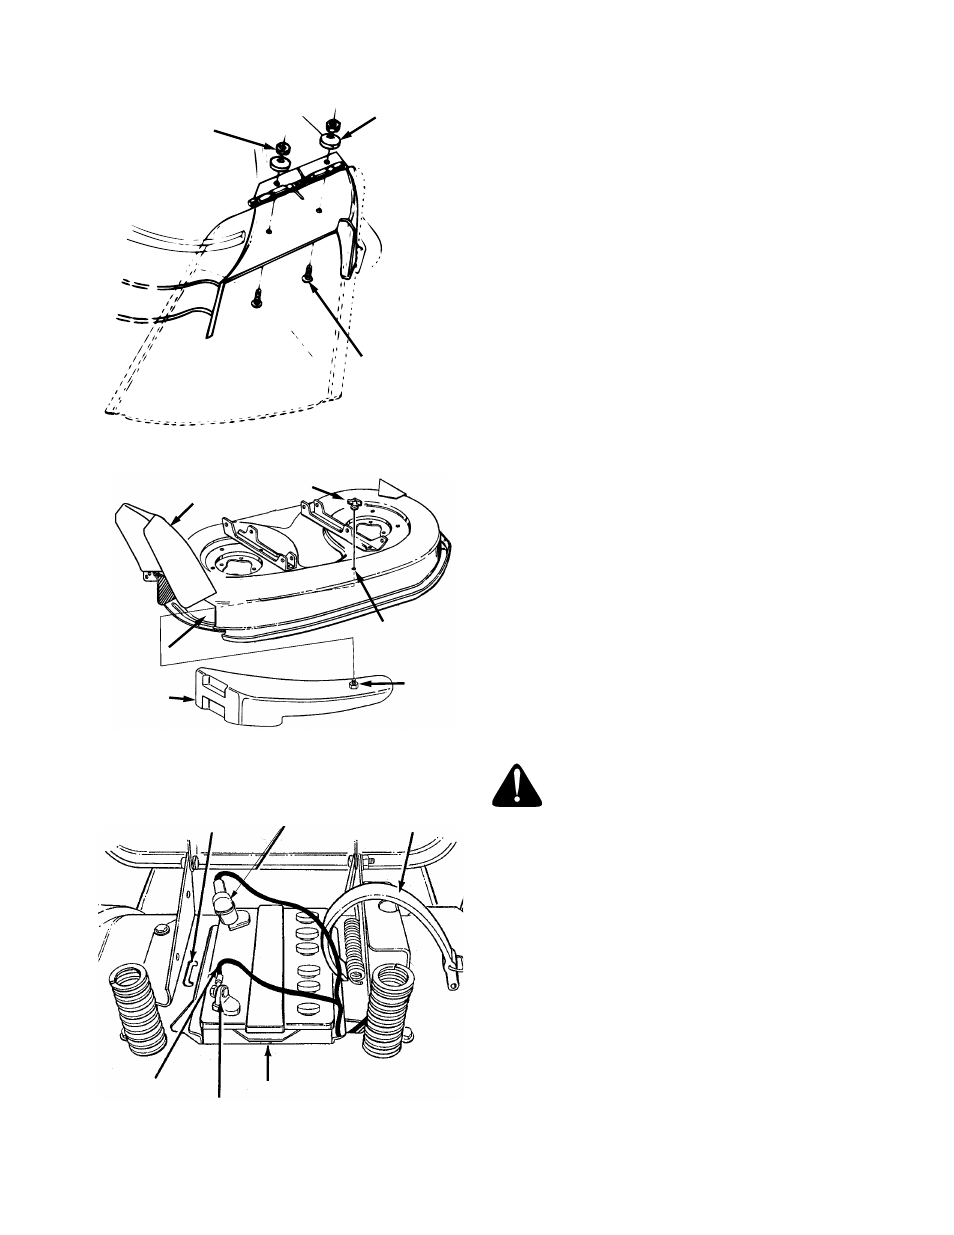
Figure 7
Figure 8
Figure 9
NOTE:
Your mowing deck may be equipped with
an optional mulching plug. Remove the mulching
plug by removing the wing nut on top of the deck.
Grasp the mulching plug and pull out of the deck.
2.
Remove the hex head cap screws, cupped
washers and hex nuts which are attached to the
deck next to the chute opening.
3.
Place the chute deflector in position as shown
in Figure 7. Secure with hardware just removed.
Cupped sides of washers go against the chute
deflector.
INSTALLING THE MULCHING PLUG
(Optional Equipment)
1.
Remove the mulching plug from the box packed
with your lawn tractor (If not already removed
from the deck).
2.
Remove the wing nut from the bolt on the
mulching plug.
3.
Lift up the chute deflector and insert the
mulching plug through chute opening.
See Figure 8.
4.
Line up the bolt on the mulching plug with the
hole in the top of the deck. Push up on the end
of the mulching plug and secure with the wing
nut.
TIRE PRESSURE
The tires on your unit may be over-inflated for
shipping purposes. Reduce the tire pressure before
operating the unit. Recommended operating tire
pressure is approximately 10 p.s.i. Check sidewall
of tire for maximum p.s.i.
WARNING:
Maximum tire pressure
under any circumstances is 30 p.s.i. Equal
tire pressure should be maintained on all
tires.
INSTALLING THE BATTERY
(TYPE “A” BATTERY)
NOTE:
If battery is put into service after date shown
on top of battery, charge for minimum of 1 hour at 6-
10 amps.
1.
Lift the seat.
2.
Remove the plastic cover from the negative
terminal.
3.
Remove the hex bolt and nut from the negative
(black) cable. Attach negative cable to the
negative terminal with this bolt and nut.
Cupped
Washers
Hex Nuts
Hex Head
Cap Screws
Chute
Deflector
Wing Nut
Mulching
Plug
Hole in
Deck
Chute
Opening
Bolt
Battery
Compartment
Battery
Strap
Positive Terminal
(inside Rubber Boot)
Slot in
Frame
Negative
Cable
Negative
Terminal