Set up – Zenoah BCZ2610DL User Manual
Page 8
GB-8
BCZ2610DL
MIN
SP
ACING
About 48 cm
SUSPENSION POINT
arrow mark
6. Set up
SUSPENSION POINT
NOTE
Be the SUSPENSION POINT in
the location of the arrow mark.
INSTALLING HANDLE
NOTE
The handle is put during the arrow mark.
• Mount the handle to
the shaft tube and
suspension point it
at a location that is
comfortable to you.
INSTALLING CUTTING ATTACHMENT GUARD
FOR LINE HEAD
• Attach the cutting attachment
guard with the bolts provided
while inserting the spacer
between the guard and the
pipe.
INSTALLING LINE HEAD
1. While locking the gear shaft by inserting the angled
bar(1) into the holder(A)(2) on the angle transmission,
loosen and remove the nut (left-handed).
2. Fit the line head assembly to the gear shaft. Tighten it
securely by hand.
INSTALLING CUTTING ATTACHMENT GUARD
FOR METAL BLADE
• When using metal blade, make sure to remove the
guard skirt.
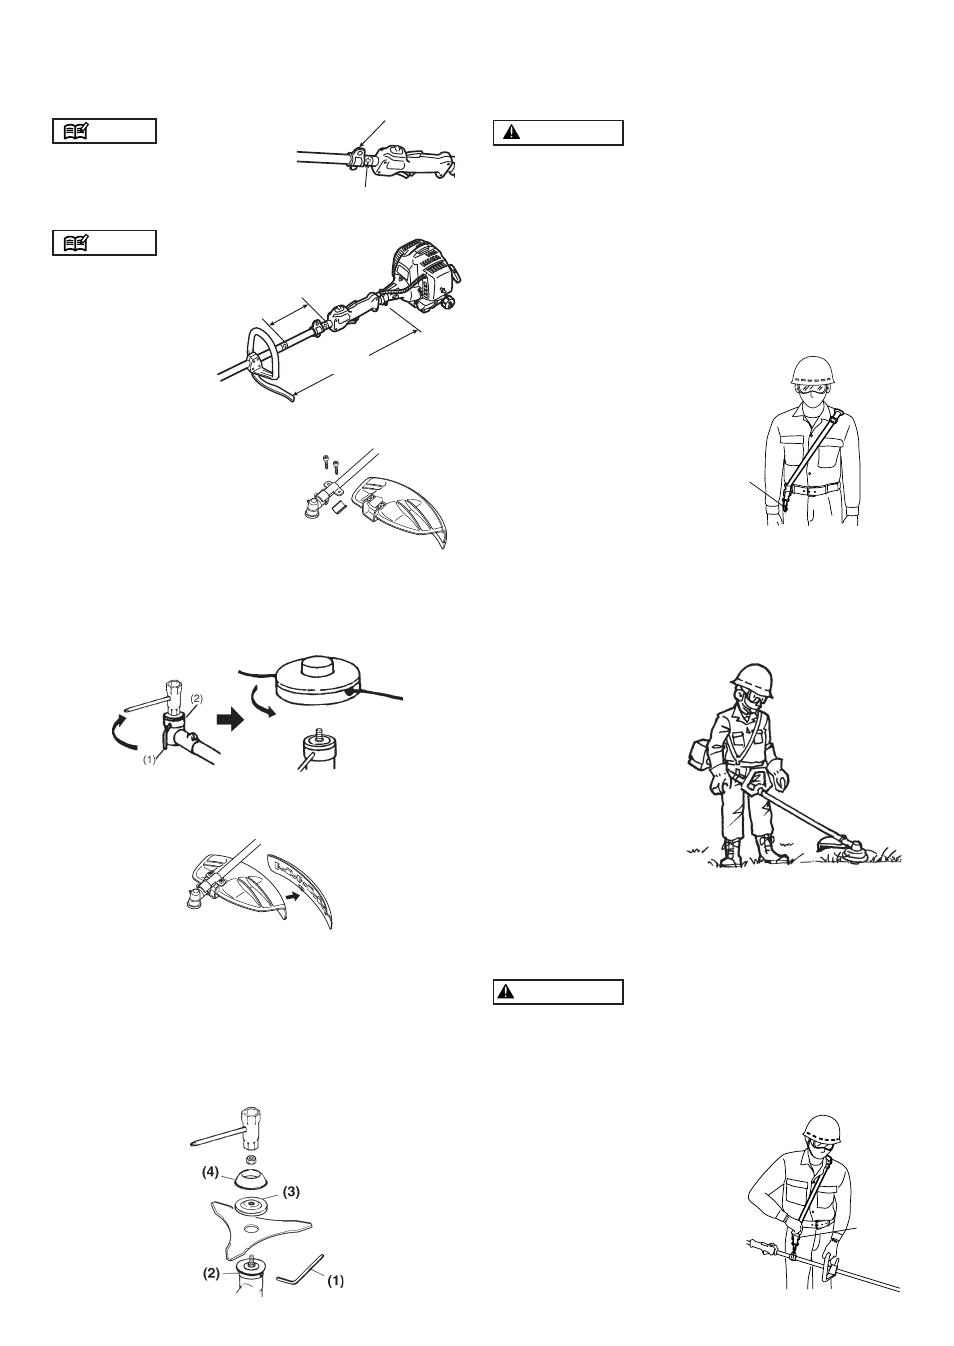
BLADE
1. Put the angled bar(1) into the side holes of the
holder(A)(2) and the angle transmission.
2. Remove the nut (left-handed) and the holder(B)(3)
from the gear shaft.
3. Put the blade onto the holder(A)(2). Make the marked
side face the holder.
4. Put the holder(B)(3) onto the gear shaft making the
recessed side face the blade.
5. Fasten the blade by the nut and the cover(4).
(1)
WARNING
ALWAYS WEAR THE PROVIDED HARNESS WHEN
USING THE MACHINE!
Always make sure the machine is hooked securely
to the harness.
If you don't, you will be unable to control the machine
safely. This can result in injury to yourself or others.
Never use a harness with a defective quick release
or any other damage.
HOW TO WEAR
1. Wear the provided harness without twisted bands, with
the hanger on your right side.
(1) Hanger
BALANCE THE UNIT
1. Hook your machine to the hanger.
2. Adjust the bands of the harness to have the blade
parallel to the ground when standing in your normal
working position to provide you most effectiveness
and comfort on operating the machine.
3. In order to prevent the hanger position to change
during operation, turn up the extra part of the band
from the buckle.
4. When correctly adjusted,
check the correct working
of the harnesses'
QUICK RELEASE.
(1)
QUICK RELEASE
The harness is equipped with a "QUICK RELEASE"devise.
To release the machine from the harness in emergency
situations, please follow the procedure as explained
below.
WARNING
Make sure to check proper working of the QUICK RE-
LEASE device BEFORE operating the machine.
Make sure to hold the unit securely when using the
QUICK RELEASE.
While holding the unit by your right
hand securely, press both sides of
the buckle. sides of the buckle.
(1) Buckle
HARNESS