Figure 14, See figure 13a, Figure 13 – Yard-Man 5KL User Manual
Page 15: Auger belt, Drive belt
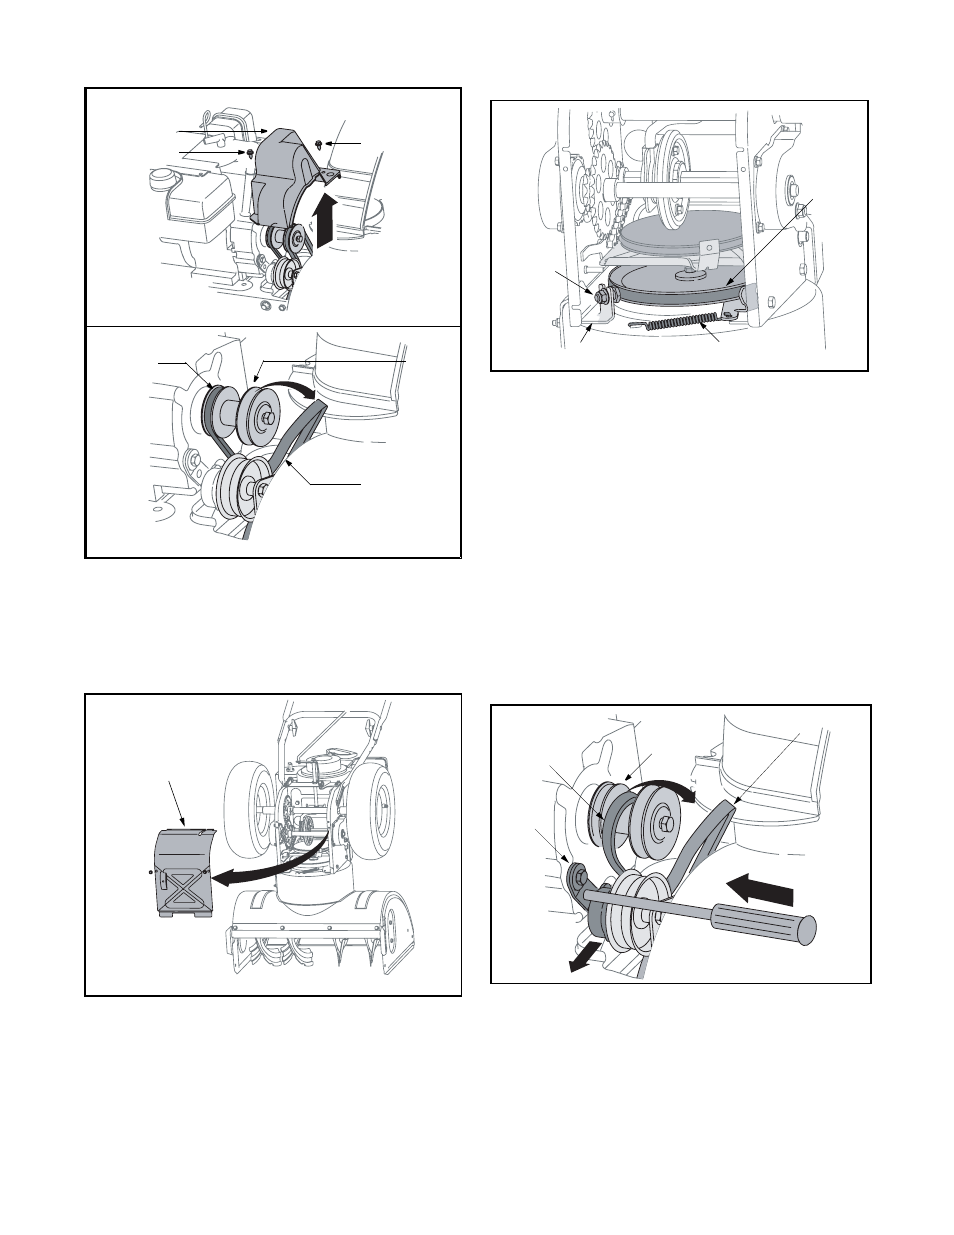
15
Figure 13
Auger Belt
1.
Tip the snow thrower up and forward, so that it rests
on the housing. Remove the self-tapping screws
from the frame cover underneath the snow thrower
and move the frame cover away. See Figure 14.
Figure 14
2.
Turn the shoulder screw a half a turn and slide it out
of the mounting bracket. See Figure 15.
3.
Unhook spring to release tension on the auger belt.
Remove old belt and replace with new belt,
installing it on the pulley. See Figure 15.
Figure 15
4.
Wrap auger belt around the auger pulley. See
Figure 15.
5.
Re-insert shoulder screw into the mounting bracket
and tighten to secure.
6.
Wrap auger belt behind the idler. Reattach the
spring to the bolt where it was earlier secured.
7.
Re-install frame cover and flip the snow thrower
back to the operating position.
8.
Wrap auger belt around the engine pulley.
9.
Re-install belt cover with the self-tapping screws
removed earlier.
Drive Belt
1.
Push idler counter-clockwise and insert a Phillips
head screwdriver in the hole on the idler as shown
in Figure 16. This will release tension on drive belt.
Figure 16
2.
Pull drive belt out and away from the engine pulley
to remove. See Figure 16.
3.
Tip the snow thrower up and forward, so that it rests
on the housing. Remove the self-tapping screws
from frame cover underneath the snow thrower and
move the frame cover away. Refer to Figure 14.
A
B
Belt Cover
Self-Tapping
Screw
Self-Tapping
Screw
Auger Belt
Pulley
Engine
Drive Belt
Frame Cover
Shoulder
Screw
Spring
Auger
Pulley
Mounting Bracket
Engine
Pulley
Idler
Drive Belt
Auger Belt