Cable assembl y – Weider WESY86301 User Manual
Page 12
12
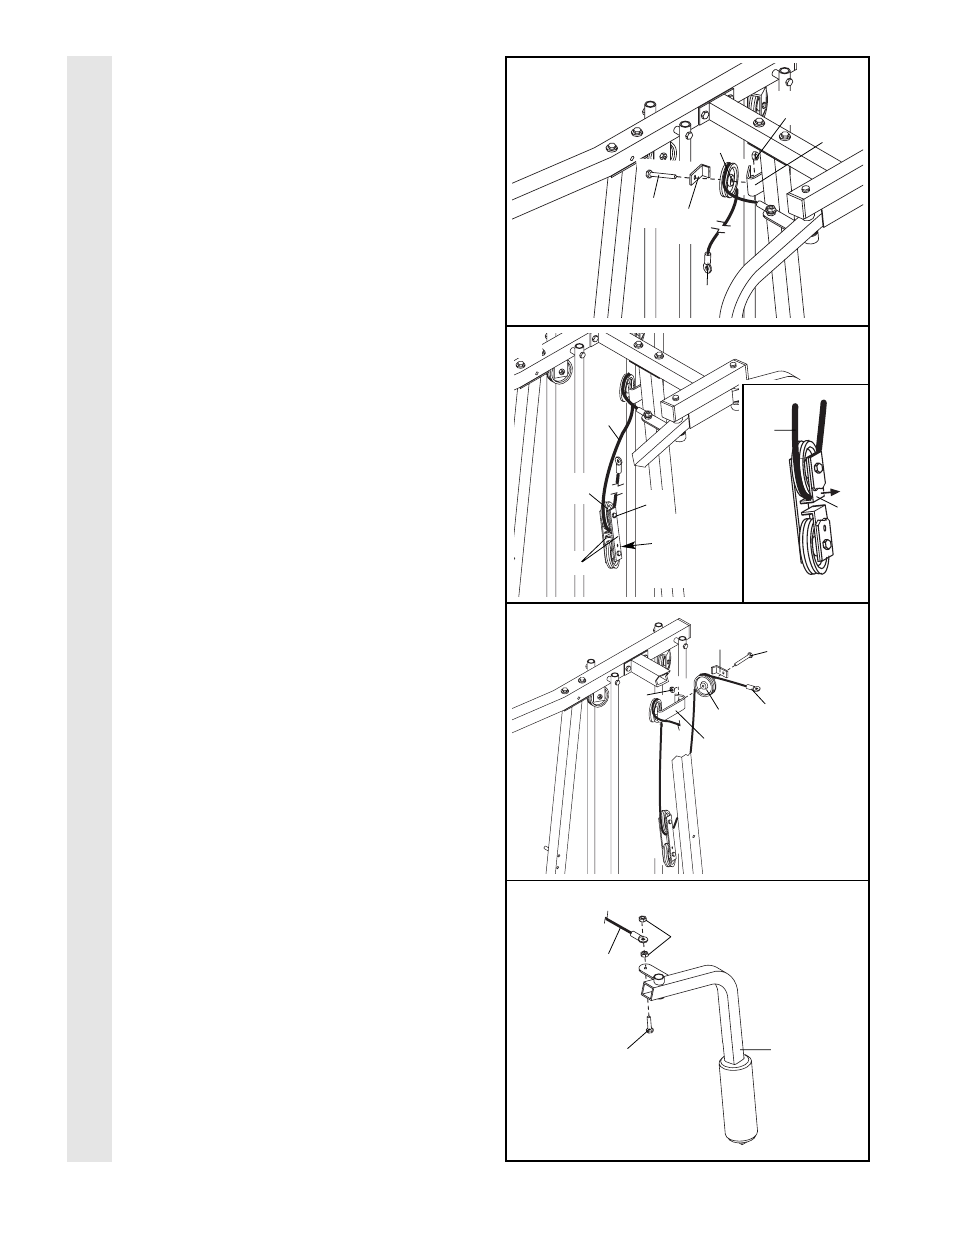
21. Wrap the Butterfly Cable (89) around a 3 1/2”
Pulley (82) as shown. Attach the Pulley and a
Cable Trap (80) to the bracket on the Leg
Press Upright (4) with a 3/8” x 2” Bolt (50)
and a 3/8” Nylon Locknut (42).
The Cable
Trap must be oriented as shown and be
positioned to hold the Cable in the groove
of the Pulley.
22.
Locate one of the preassembled pairs of
Pulley Plates (31) and 3 1/2” Pulleys (82).
Route the Butterfly Cable (89) under the indi-
cated 3 1/2” Pulley (82). The end of the Pulley
Plates (31) with two holes should be down-
ward. Refer to the inset drawing.
Be sure
that the Cable is between the Cable Trap
(80) and the Pulley, and that the Cable Trap
is positioned to hold the Cable in place.
Tighten the 3/8” x 2” Bolt (50) and the 3/8”
Nylon Locknut (not shown).
23. Wrap the Butterfly Cable (89) around a 3 1/2”
Pulley (82) as shown. Attach the Pulley and a
Cable Trap (80) to the other side of the bracket
on the Leg Press Upright (4) with a 3/8” x 2”
Bolt (50) and a 3/8” Nylon Locknut (42).
The
Cable Trap must be oriented as shown and
be positioned to hold the Cable in the
groove of the Pulley.
24.
Note: The Left Arm (6) is shown removed
for easier part identification. Insert a 5/16” x
1” Bolt (97) through the bracket on the Left
Arm. Fully tighten a 5/16” Nylon Jam Nut (91)
onto the Bolt.
Slide the free end of the Butterfly Cable (89)
onto the 5/16” x 1” Bolt (97). Thread another
5/16” Nylon Jam Nut (91) onto the Bolt,
but
do not fully tighten it. Leave enough room
between the two Jam Nuts for the Cable to
pivot.
24
21
22
23
CABLE ASSEMBL
Y
6
End with
two holes
should be
down
82
31
4
89
82
50
80
4
42
89
82
50
80
89
89
50
80
97
91
89
42