Assembly – Weider WEMC0942.1 User Manual
Page 4
4
ASSEMBLY
1
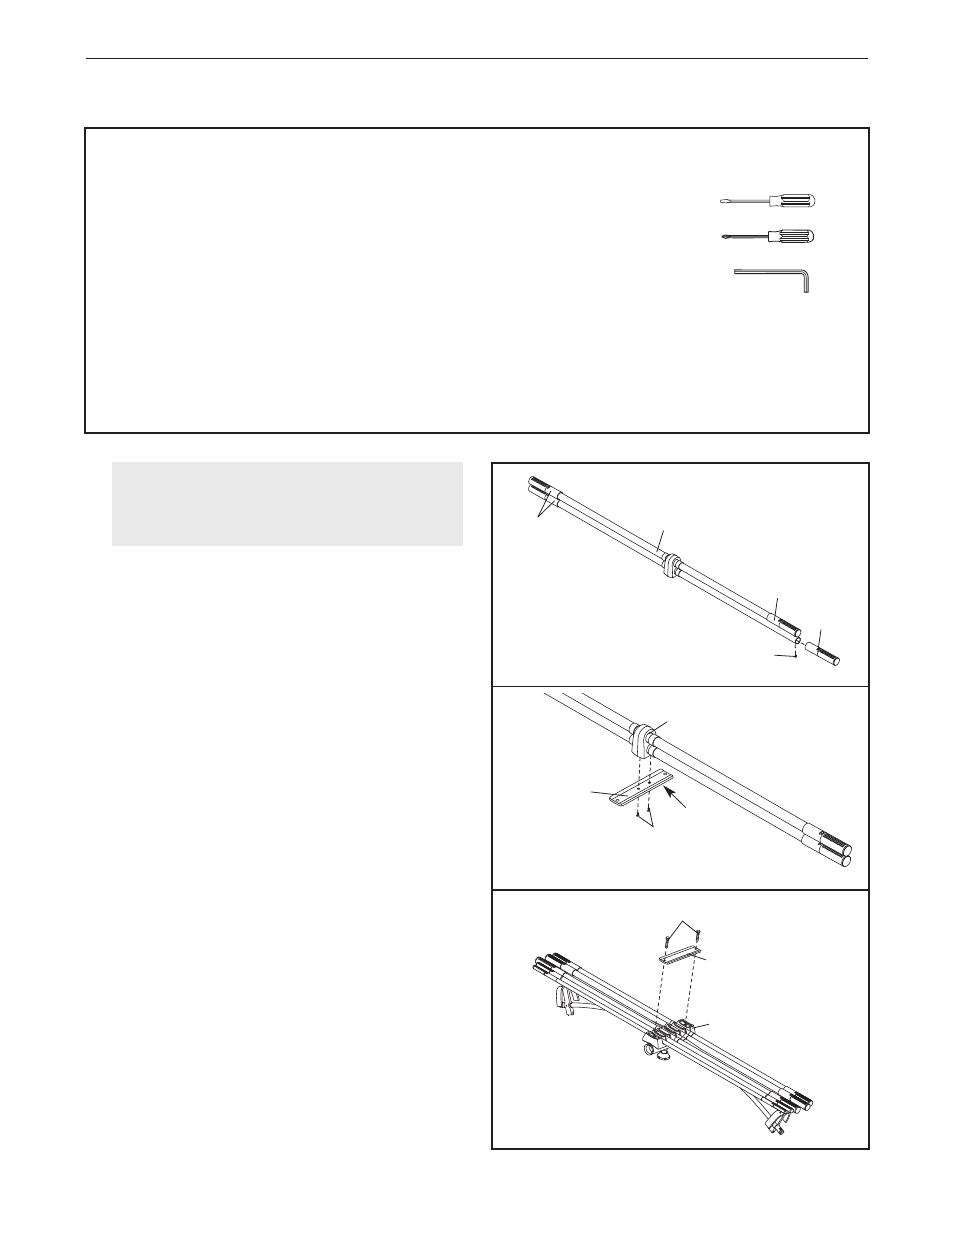
1.
Attach a Cap (2) to one end of the Resistance
Bars (1) with an M4 x 12mm Flat Head Screw (5).
Attach the other Caps in the same manner.
2.
Attach the Cover Plate (3) to the Resistance Bars
(1) with two 1/4" x 25mm Flat Head Screws (6).
Make sure the Cover Plate is oriented with the
edges up.
3.
Locate the Tray (B) on the resistance system.
Remove the two indicated Button Head Screws
(C) and the Cover Plate (A) from the Tray. Set the
Cover Plate aside.
Note: The resistance bar
assembly is shown removed from the resis-
tance system for clarity.
Before beginning assembly, make sure that
you have read and understand the informa-
tion in the box above.
1
5
3
Edges
Up
3
2
2
2
2
1
C
B
6
A
Before beginning assembly, carefully read the
following information and instructions:
• Assembly requires two people.
• Tighten all parts as you assemble them, unless
instructed to do otherwise.
• Make sure all parts are oriented as shown in the
drawings.
• Place all parts in a cleared area and remove the
packing materials. Do not dispose of the packing
materials until assembly is completed.
The following tools (not included) are required
for assembly:
• One standard screwdriver
• One Phillips screwdriver
• One Allen wrench (included
with the MAX by WEIDER
resistance system)
Assembly will be more convenient if you have a
socket set, a set of open-end or closed-end
wrenches, or a set of ratchet wrenches.