Repair parts, Workbench mounting only - for edge sanding, Edge sanding – Wolfcraft 4525 User Manual
Page 6
6
FIG 13
1
10
11
11
3
4
3
8
9
13
14
13
5
5
2
6
20
12
17
16
17
18
18
21
21
15
7
19
21
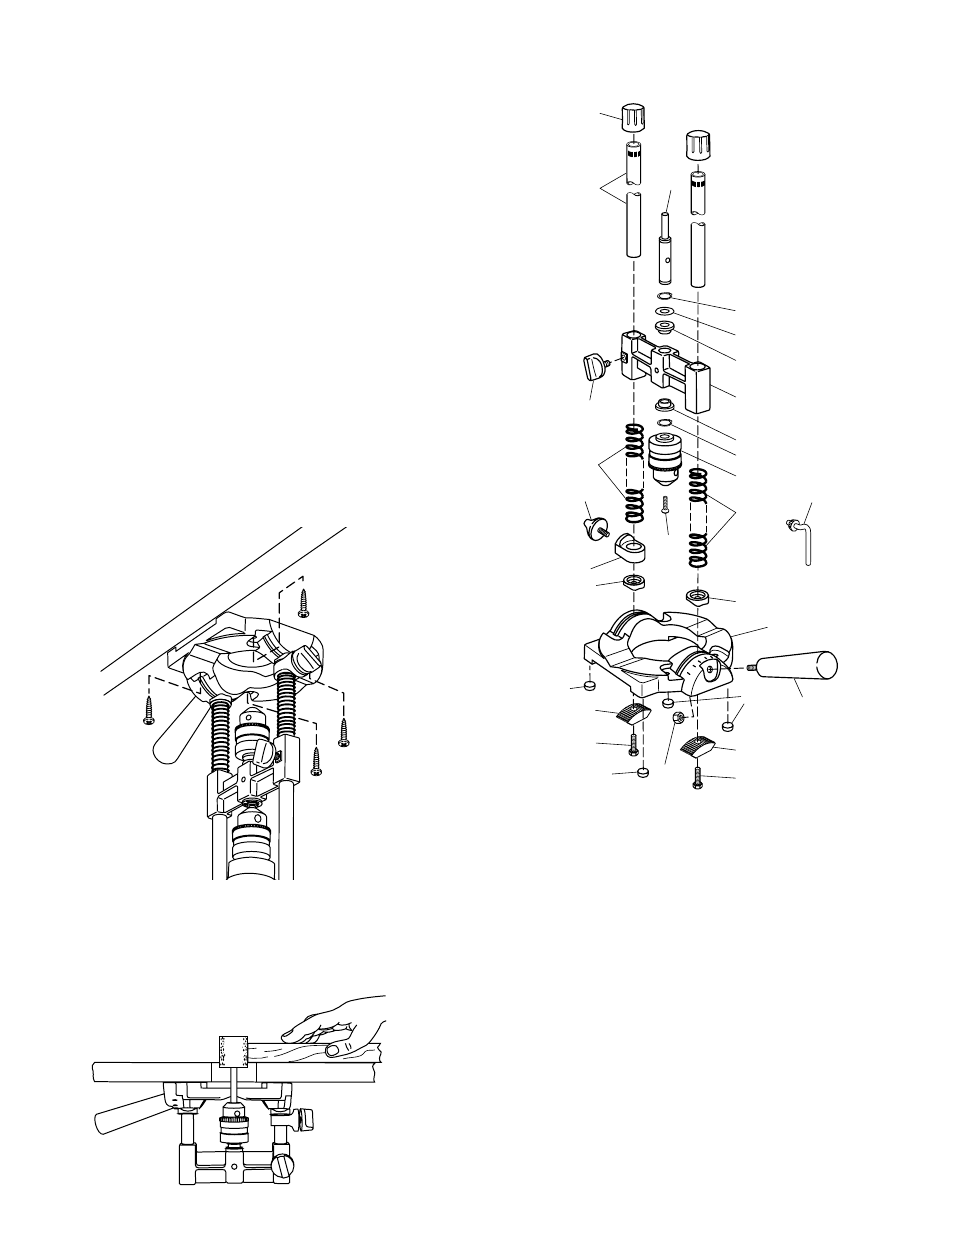
Figure 13
Repair Parts
KEY
NO.
PART NO.
DESCRIPTION
QTY
1
116600036
Rod Cap
2
2
117220130
Shaft
1
3
116700029
Retaining Ring
2
4
116710120
Washer
1
5
117110002
Sleeve Bushing
2
6
116710067
Thumb Screw M6 x 16
1
7
116410022
Cross Guide
1
8
015100033
Chuck
1
9
116800011
Countersunk Screw
1
10
117200008
Guide Bar
2
11
117610002
Spring
2
12
116600085
Depth Stop
1
13
116600034
Bar Holder
2
14
116430120
Base Plate
1
15
116610051
Handle
1
16
116700023
Hex Nut
1
17
116600033
Support
2
18
116700055
Hex Screw
2
19
015100034
Chuck Key
1
20
116620052
Thumb Screw M6 x 10
1
21
117720017
Rubber Stop
4
Workbench Mounting Only -
for Edge Sanding
1. Use a hole saw to cut a hole no larger than
2 1/4" in the top of your workbench.
2. Center the Drill Guide base around the hole
on the underside of the bench. Push rubber
stopper pieces out. Secure base to the
bench using four 1/4" flat head screws
through holes provided in base (screws not
included). (See Figure 11.)
3. To keep the bit locked in place, adjust the bit
above the bench surface to the desired
position. Tighten the thumb screw in the
cross guide/chuck assembly.
NOTE: With this type of mounting, it is recom-
mended having a material guide or
straight edge secured to the top the
bench.
Figure 11
Edge Sanding
For edge sanding, the Drill Guide can either
be handheld or mounted under the
workbench. (See Figure 12.)
Figure 12