Western Digital WD ShareSpace User Manual
Page 6
WD ShareSpace | 4
Step 2: Access WD ShareSpace on the Network
Follow the steps below to configure your network
storage system and map a network drive in
Windows 2000/XP/Vista using
WD Discovery™. Skip to page 5 for Macintosh
Leopard instructions
or page 6 for Macintosh
Tiger instructions.
Note: The WD Discovery application on the
included CD should be installed on every PC in
the local area network (LAN) from which you
intend to access your WD ShareSpace.
Windows 2000/XP/Vista
1. Turn on your computer and wait for the
operating system to load.
2. Insert the software CD into the CD or
DVD ROM drive.
Note: If AutoPlay is disabled on your
computer, you must install the utilities
manually. Click Start>Computer (Windows
Vista) or My Computer, and then double-
click Setup.exe in the root directory of the
CD.
3. Windows Vista: Click Run setup.exe, and
then click Allow.
4. Click Accept in the Terms of Agreement
screen.
5. If you have connected the device properly as
shown in the Connect screen, click Next.
6. The Application Installer screen displays a list
of options including software, documentation,
and a registration link. Click WD Discovery
Tool.
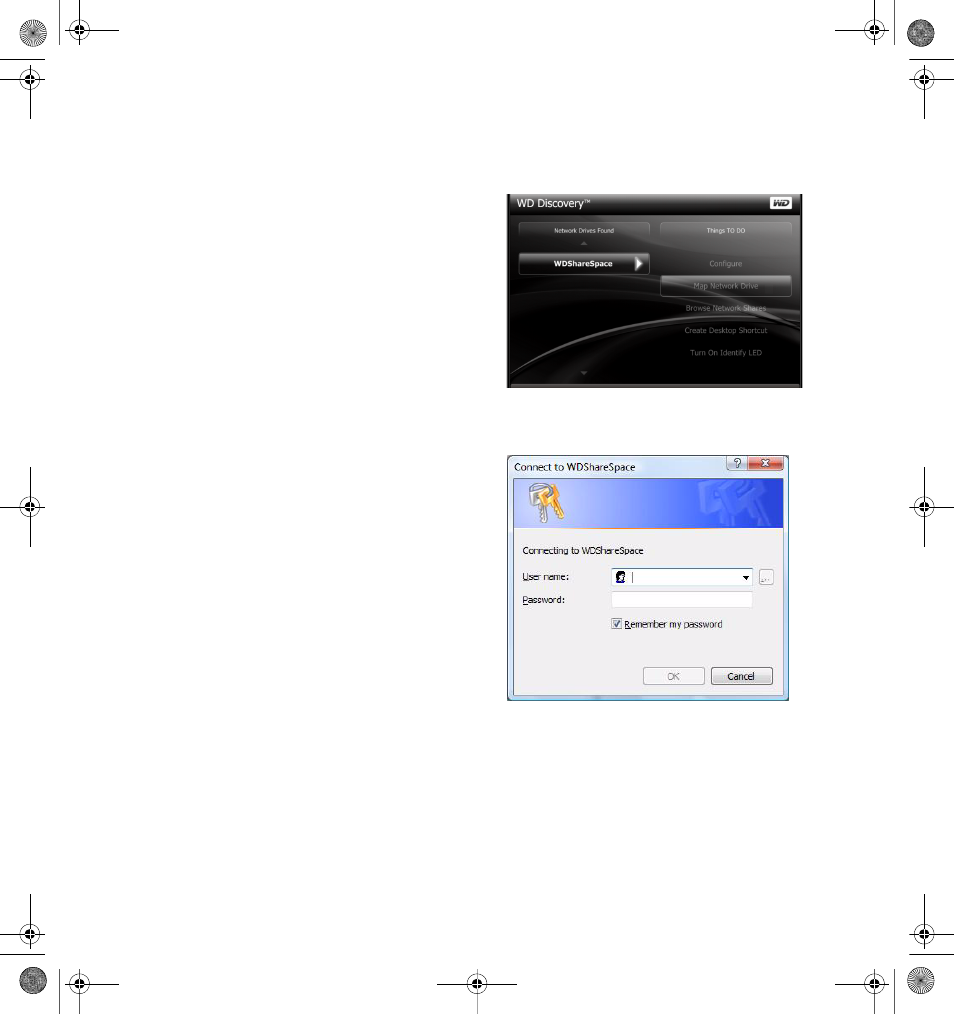
7. Click Map Network Drive in the Things To
Do list.
8. In the authentication screen, enter your User
Name and Password. The default for both is
“admin.”
9. When a message appears asking whether
you want to map the drive automatically,
click Yes.
WD_ShareSpaceQIG.book Page 4 Tuesday, March 31, 2009 12:02 PM