Weider WEBE19200 User Manual
Page 9
9
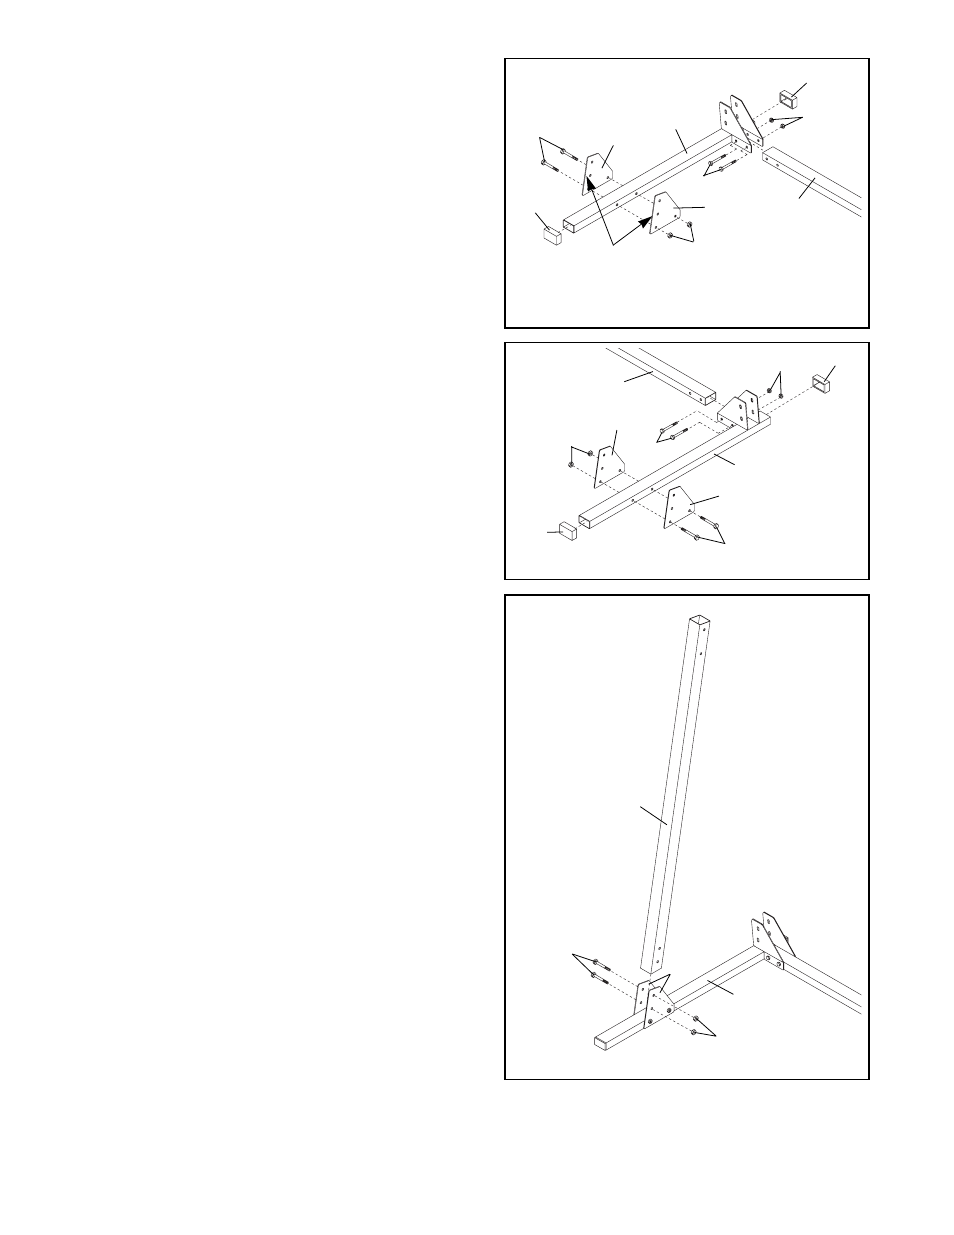
12. Press a 30mm x 60mm Outer Cap (40) onto each
end of the Left Base (2). Attach the Rear Base (8)
to the Left Base with two M10 x 78mm Bolts (33)
and two M10 Nylon Locknuts (11). Do not tighten
the Nylon Locknuts yet.
Attach two Lower Support Plates (13) to the Left
Base (2) with two M10 x 78mm Bolts (33) and two
M10 Nylon Locknuts (11). Do not tighten the
Nylon Locknuts yet.
12
11. Press a 30mm x 60mm Outer Cap (40) onto each
end of the Right Base (7). Attach the Rear Base (8)
to the Right Base with two M10 x 78mm Bolts (33)
and two M10 Nylon Locknuts (11). Do not tighten
the Nylon Locknuts yet.
Attach two Lower Support Plates (13) to the Right
Base (7) with two M10 x 78mm Bolts (33) and two
M10 Nylon Locknuts (11). Do not tighten the
Nylon Locknuts yet. Note: Do not confuse the
Lower Support Plates with the Upper Support
Plates (not shown); when the Lower Support
Plates are attached to the Right Base, the edges
with three holes will slant backward slightly.
11
8
2
33
13
13
33
11
40
40
11
8
33
11
13
These edges
should slant
backward
slightly.
13
33
7
40
11
40
13. Attach one of the Front Uprights (1) to the Lower
Support Plates (13) on the Right Base (7) with two
M10 x 78mm Bolts (33) and two M10 Nylon
Locknuts (11). Do not tighten the Nylon Locknuts
yet. Note: The Front Upright will slant backward
slightly.
Attach the other Front Upright (1) to the Left Base
(2, not shown) in the same manner.
13
1
33
7
13
11