Assembly – Weed Eater 530086743 User Manual
Page 4
4
ASSEMBLY
WARNING:
If received assembled,
review all assembly steps to ensure your unit
is properly assembled and all fasteners are
secure.
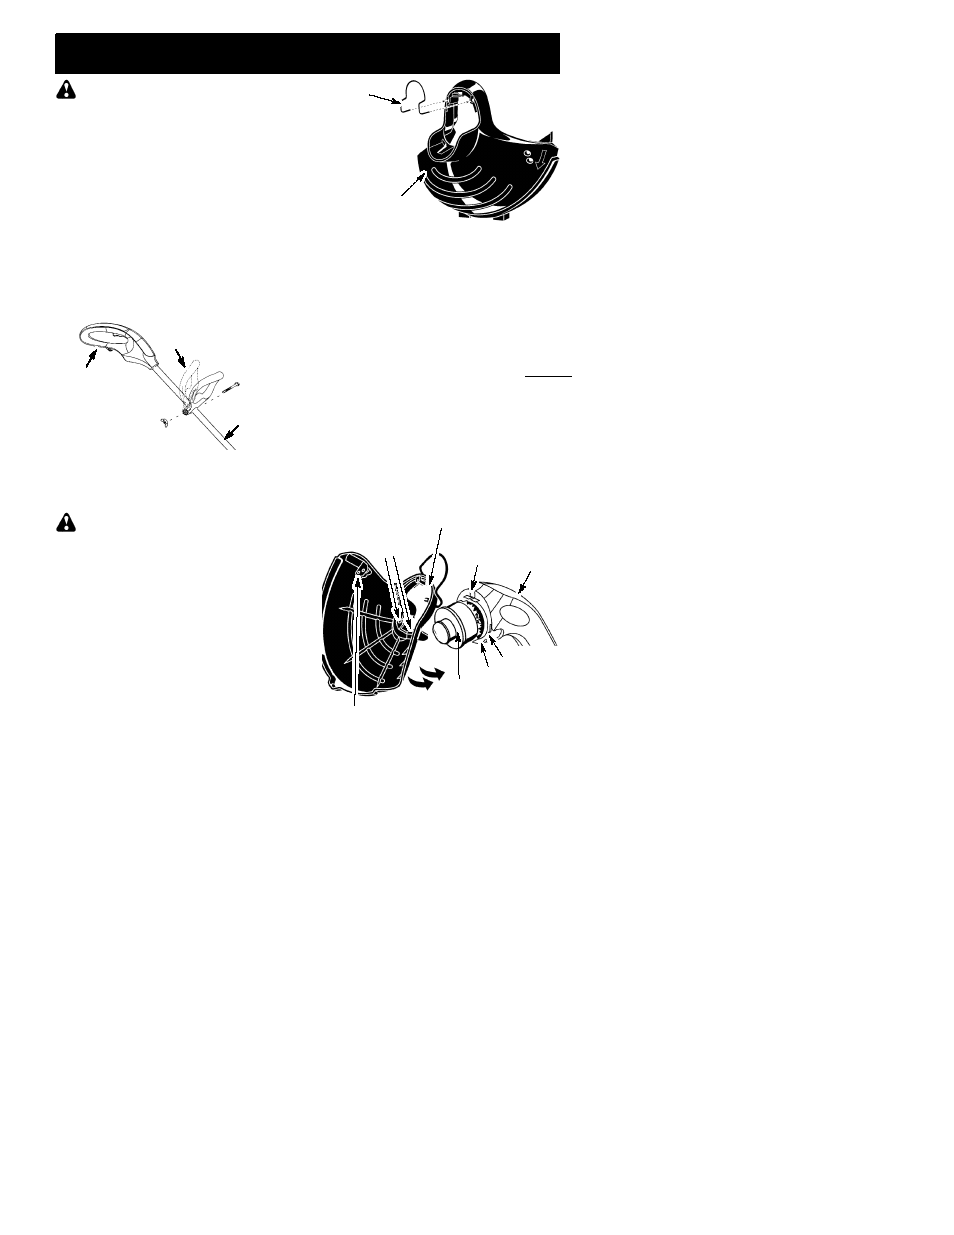
ADJUSTING ASSIST HANDLE
1. Place unit on a flat surface.
2. Loosen and remove wing nut and bolt
from assist handle.
3. Firmly push the assist handle over the
tube. To make installation easier, tilt han-
dle toward trigger housing while pushing
down (see illustration).
4. Reinstall bolt in handle. Thread wing nut
onto bolt.
5. Adjust the handle up or down the tube to a
comfortable position; tighten wing nut se-
curely.
Assist handle
Tube
Trigger
Housing
ATTACHING THE SHIELD
WARNING:
The shield must be prop-
erly installed. If shield is not properly installed,
damage to unit (including motor failure) will re-
sult. The shield provides partial protection to
the operator and others from the risk of
thrown objects. Your unit is equipped with a
line limiter blade, which cuts excess line to the
proper length while running. The line limiter
blade (on underside of shield) is sharp and
can cut you.
NOTE:
If shield is not properly installed, dam-
age to unit (including motor failure) will result.
Edge guide must be positioned on shield prior
to installation on motor housing (see following il-
lustration).
Edge Guide
Shield
1. Hold shield at angle to the trimmer motor
housing. Align the front locking tab of the
shield with the front notch of the motor
housing (see illustration below).
2. Move shield toward motor housing, en-
suring trimmer head passes through
opening in shield without catching on
shield locking tabs.
3. Tilt front of the shield towards front notch
of motor housing. Push front locking tab
of the shield into the front notch of the mo-
tor housing. An audible snap must be
heard. Ensure the cutting head remains
free to rotate and the line is not caught be-
tween the shield and the motor housing.
4. Push back of the shield toward the motor
housing as illustrated until the rear locking
tabs snap securely into the rear notches.
Make sure the shield is assembled to the
unit as shown in the illustration below and
in the KNOW YOUR UNIT section of this
manual.
CAUTION
:
Sharp line limiter blade
Front
Notch
Rear
Notches
Rear
Locking
Tabs
Front Locking Tab
Trimmer
Head
Trimmer
Motor
Housing