Check thermostat operation – White Rodgers EMERSON 1.00E+78 User Manual
Page 3
3
NOTE
To prevent static discharge problems, touch side of
thermostat to release static build-up before touching
any keys.
If at any time during testing your system does not operate
properly, contact a qualified service person.
Heating System
1. Move SYSTEM switch to
HEAT position. If the heating system
has a standing pilot, be sure to light it.
2. Press
to adjust thermostat setting above room tem-
perature. The heating system should begin to operate.
3. Press
to adjust temperature setting below room tem-
perature. The heating system should stop operating.
Before you begin using your thermostat, you should be familiar
with its features and with the display and the location and op-
eration of the thermostat buttons. Your thermostat consists of
two parts: the
thermostat body and the base. To remove the
body, gently pull it straight out from the base. To replace the
body, line up the body with the base and press gently until the
body snaps onto the base.
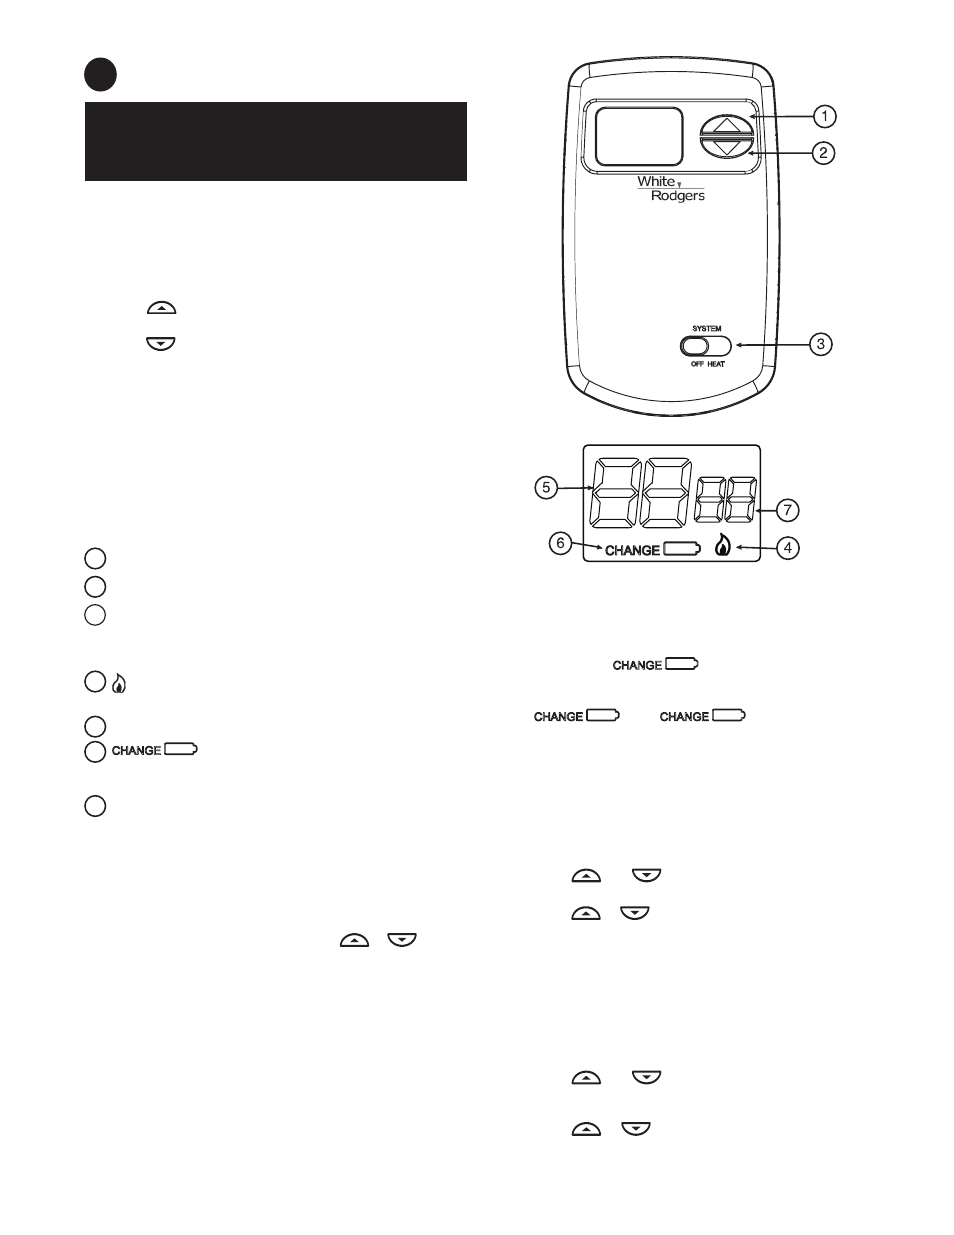
The Thermostat Buttons and Switches
1 (Up arrow) Raises temperature setting.
2 (Down arrow) Lowers temperature setting.
3 SYSTEM switch (OFF, HEAT).
The Display
4 is displayed when the SYSTEM switch is in the HEAT
position.
5 Displays current temperature.
6
is displayed when the 2 “AAA” batteries are
low and should be replaced. Nothing else will be displayed.
Earlier models display "
LO BATTERY". Refer to 37-7006.
7 Displays currently set temperature (this is blank when
SYSTEM switch is in the
OFF position).
Operating Features
Now that you are familiar with the thermostat buttons and display,
read the following information to learn about the many features
of the thermostat.
•
TEMPERATURE SETTING — Press
or
until the
display shows the temperature you want. The thermostat will
keep the room temperature at the selected temperature.
•
°F/°C CONVERTIBILITY — The factory default setting is
Fahrenheit. Clipping W904 jumper on the circuit board (see
fig. 1) will alter this feature to Celsius temperature setting.
Figure 3. Thermostat display, buttons and switches
•
LOW BATTERY INDICATOR — If the 2 “AAA” alkaline bat-
teries are low and should be replaced, the display will be
blank except for
. When the batteries are low,
pressing any button will cause the display to operate for ten
seconds. After ten seconds, the display will be blank except
for
. After
has been displayed
for 4 weeks, the thermostat will drop the temperature 10°
below your setpoint in
HEAT mode. You cannot program with
low batteries but you can override setpoint temperature.
•
TEMPERATURE DISPLAY ADJUSTMENT — Your new
thermostat has been accurately set in our factory. However,
if you wish, you may adjust your new thermostat temperature
display to match your old thermostat. This can be accom-
plished (within a ±3° range) as follows:
1. Press
and
at the same time for two seconds
with the SYSTEM switch in
OFF position.
2. Press
or
to adjust the displayed temperature
to your desired setting.
3. Move SYSTEM switch from
OFF to exit the feature.
•
DISPLAY BACKLIGHT— The display backlight improves
display contrast in low lighting conditions. Selecting backlight
ON will turn the light on for a short period of time after any
button is pressed. Selecting backlight OFF (default) will
keep the light off. Turn the display backlight feature ON as
follows:
1. Press
and
at the same time for two seconds
with the SYSTEM switch in
HEAT position. The display
will alternately show
“-L” AND “FF” (off).
2. Press
or
to change
“FF” to “ON”.
3. Move SYSTEM switch to
OFF to exit the feature.
Figure 3. Thermostat display buttons and switches
5
CHECK THERMOSTAT OPERATION