Operation, Installation, Continued) – Wayne FloodAlert 370700-001 User Manual
Page 2
2
Operating Instructions and Parts Manual
www.waynepumps.com
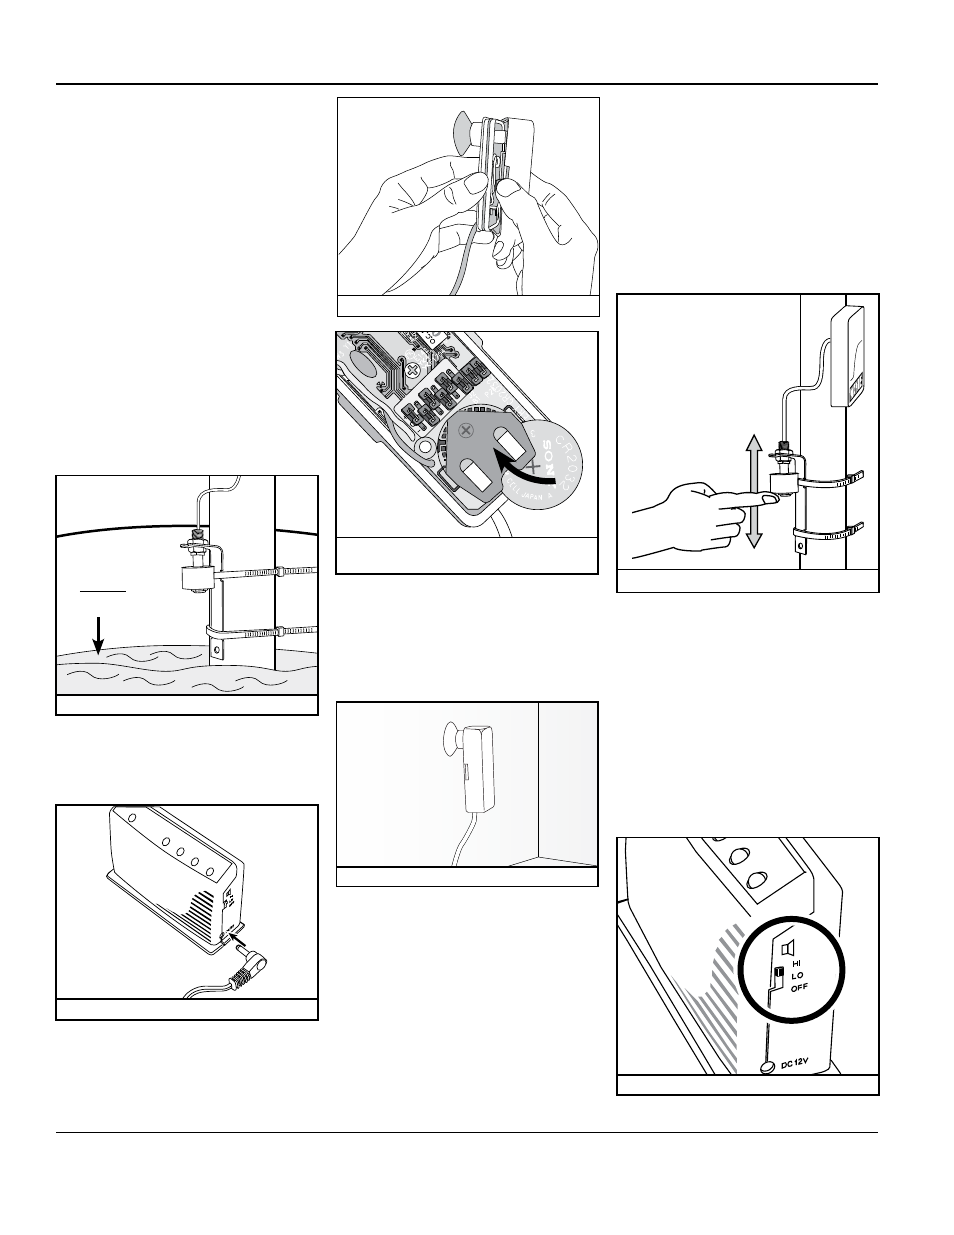
5. Tighten the nut against the float
switch bracket by hand.
6. next, remove the twist tie holding
the wire bundle together. Stretch
out the wire and do not allow the
transmitter to fall into the sump pit.
7. The float switch should be placed just
above the normal maximum water
level in the sump pit. Use the existing
water level marks as a guide.
NOTE: the alarm will sound
when the float rises on the float
stem. make certain the float is
positioned above the normal
“on” level for the sump pump.
8. The float switch must be mounted with
the wire pointing up.
9. Use two Zip ties to secure the float switch
to the pumps discharge pipe (Fig. 2).
10. now plug in the aC adapter to the
receiver (Fig. 3) and plug the trans-
former into a 120 VAC outlet and
uncoil antenna wire.
11. The green LeD will flash since there
is no active transmitter. Remove the
top cover of the transmitter with a
coin or screwdriver (Fig. 4) and insert
the 3V lithium battery (Fig. 5).
12. after inserting the battery to the
water sensor, the receiver will beep
and the green LeD on the receiver
will stop flashing and stay on.
NOTE: if the liGht continuees to
flash, lift up the float to reset
the sYstem
13. next mount the transmitter on a
smooth flat surface (Fig. 6).
NOTE: it is beneficial to mount the
transmitter as hiGh as possible
to improve ranGe. attach the
transmitter with the suction
cup provided on the back of the
transmitter. if necessarY, the
suction cup can be Glued directlY
to the pump discharGe pipe bY
usinG pvc cement. if this is done, be
sure to locate the transmitter at
a location above the sump pit lid.
Operation
tEStING
The Flood alert™ Wireless Sump Pump
Monitoring System should be tested by
lifting the float switch (Fig. 7.)
It should beep and the LED should
illuminate. Only the float switch portion
is waterproof, the transmitter portion
should never be submerged in water.
When the float switch becomes
submerged in water the receiver will
beep and flash. The beeping will
continue until float switch drops back
down to its normal position. The
receiver can now be placed in another
area of the house. Have an assistant
lift the float switch to verify the system
is working. If the green light is flashing
the transmitter is no longer being
detected. The receiver is equipped
with a volume control on the side of
the unit (Fig. 8).
Installation
(continued)
figure 2: Attach zip ties to float switch
1
2
3
4
figure 3: Connect adapter to receiver
figure 4: Open transmitter top cover
figure 6: Mount transmitter
figure 7: test sensor manually
1
2
3
4
figure 8: Side volume control
1
2
3
4
5
6
figure 5: Insert lithium ion battery into
the transmitter
Maximum
normal
water level