As se mb ly gu id e, Parts box, Orange bag blue bag – Vision Fitness T9200 User Manual
Page 2: Step 3, Model configuration & auto-calibra tion
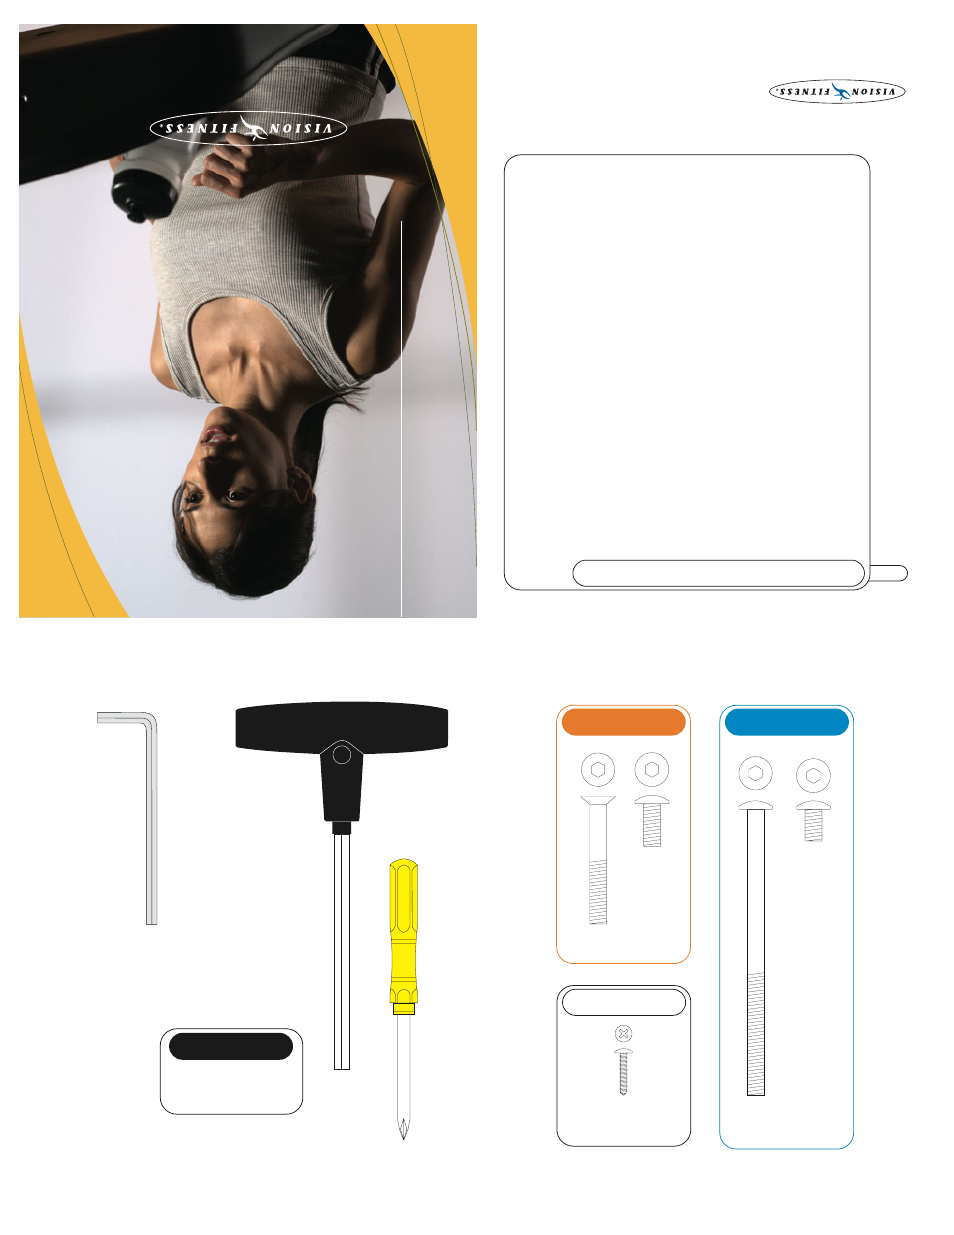
HARDWARE INCLUDED
Screwdriver
TOOLS, HARDWARE, & PARTS INCLUDED
PARTS BOX
Water Bottle, Qty: 1
Safety Magnet Key, Qty: 1 (except
T9700)
Color-coded Hardware Bags
Console Mast Covers, Qty: 2
8mm Allen Wrench
ORANGE BAG
BLUE BAG
M8 x 135L Bolt
Quantity: 4
M8 x 15L Bolt
Quantity: 4
500 South CP Avenue • P
.O. Box 280 • Lake Mills, WI 53551
toll free 800.335.4348 • phone 920.648.4090 • fax 920.648.3373
www.visionfitness.com
©2006 V
ision Fitness. All Rights Reser
ved. 8.06
AG18.12PRD
REV11
M8 x 55L Flathead Bolt
Quantity: 4
STEP 3
M4 x 20L Panhead Screw
Quantity: 6
(Installed in Motor Cover)
M8 x 20L Bolt
Quantity: 2
5mm L-Shaped Wrench
4
STEP
Once the Treadmill is plugged in, you need to configure the T
readmill and per
form
an auto-calibration to assure maximum
perfor
mance.
T9700S & T9700HRT CONSOLES:
DO NOT STAND ON THE BEL
T WHEN PERFORMING THE AUTO-CALIBRA
TION
Once the treadmill is plugged in, you will need to configure and run auto-calibration. With the safety key in place, turn the
treadmill on. A setup screen should appear on the console. Set your treadmill to the correct model number (9700S or
9700HRT) using the ELEV
ATION arrow keys and the correct units (MI [miles]/ KM [kilometers]) using the SPEED arrow keys.
If you are unsure of the model number, you can locate the number on the front of the console. Once you have located the
model number and units with the arrow keys, press and hold ENTER. Now you can perfor
m auto-calibration by pressing
STAR
T.
The treadmill will run through minimum and maximum speed and elevation. This will take 3 to 5 minutes. Let the treadmill
perfor
m this complete function. “END” will appear when auto-calibration is complete. When auto-calibration is complete, the
treadmill will reboot and return to the star
t-up screen.
PREMIER andDELUXE CONSOLE:
DO NOT STAND ON THE BEL
T WHEN PERFORMING THE AUTO-CALIBRA
TION
Once the treadmill is plugged in, you will need to configure and run auto-calibration. With the safety key in place, turn the
treadmill on. A setup screen should appear on the console. Set your treadmill to the correct model number (9200, 9500, or
9600) using the ELEVAT
ION arrow keys and the correct units (MI [miles]/KM [kilometers]) using the SPEED arrow keys. If you
are unsure of the model number, you can locate the number on the console masts. Once you have located the model number
and units with the arrow keys, press and hold ENTER. Now you can perfor
m auto-calibration by pressing ST
ART.
The treadmill will run through minimum and maximum speed and elevation. This will take 3 to 5 minutes. Let the treadmill
perfor
m this complete function. “END” will appear when auto-calibration is complete. When auto-calibration is complete, the
treadmill will reboot and return to the star
t-up screen.
SIMPLE CONSOLE:
DO NOT STAND ON THE BEL
T WHEN PERFORMING THE AUTO-CALIBRA
TION
Once the treadmill is plugged in, you will need to configure and run auto-calibration. With the safety key in place, turn the
treadmill on. A setup screen should appear on the console. The large LED window displays the model number and the small
LED window displays the units. Set your treadmill to the correct model number (9200, 9500, or 9600) using the ELEVATION
arrow keys and the correct units (0 for miles and 1 for kilometers) using the SPEED arrow keys. If you are unsure of the model
number, you can locate the number on the console masts. Once you have located the model number and units with the arrow
keys, press and hold ENTER. Now you can perfor
m auto-calibration by pressing ST
ART.
The treadmill will run through minimum and maximum speed and elevation. This will take 3 to 5 minutes. Let the treadmill
perfor
m this complete function. “END” will appear in the window when auto-calibration is complete. When auto-calibration
is complete, the treadmill will reboot and return to the star
t-up screen.
MODEL CONFIGURATION & AUTO-CALIBRA
TION
As
se
mb
ly
Gu
id
e
T9200, T9500, T9600,
AND
T9700
PLATFORM TREADMILLS