Pg 07 front description.pdf, Front panel descriptions – VocoPro Cassette Deck User Manual
Page 9
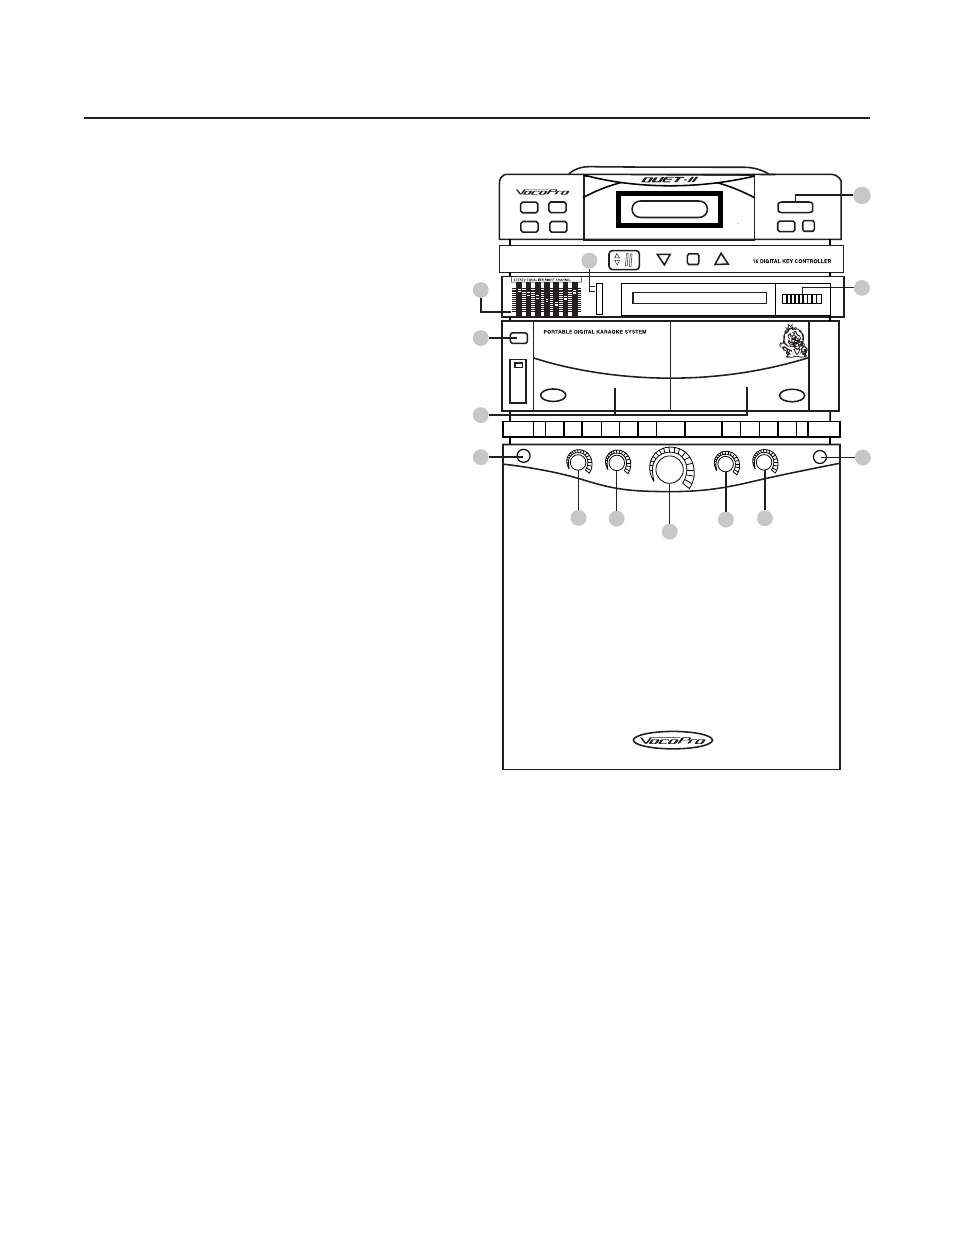
Front Panel Descriptions
7
1
3
2
4
5
1. POWER -
Press to turn the system ON, press again
and release to turn the system OFF.
2. CASSETTE CONTROLS.
RECORD -
Press to RECORD. Refer to "Recording
Cassettes".
Play –
Press to PLAY tape. Refer to "Playing
Cassettes".
REW/REV –
Press to REWIND tape.
FF/CUE –
Press to rapidly ADVANCE tape.
STOP/EJECT –
Press to STOP cassette. (Cancels
any depressed cassette button except PAUSE).
Press again to OPEN cassette door.
PAUSE –
Press to temporarily PAUSE the tape
movement in PLAY or RECORD MODE. Press
and release to start the tape moving again.
3. GRAPHIC EQUALIZER -
Adjust these controls to
provide the sound quality that you prefer. Refer to
"Audio Controls".
4. FUNCTION SELECTIONS –
Select the INPUT
source by sliding knob to choose the desired function.
AM –
for AM reception.
FM –
for FM reception.
TAPE –
for cassette operation.
CD/CDG –
for CD operation.
5. TUNING –
Turn the knob to choose the AM or FM
station you want.
6. MIC 1 –
Connect MICROPHONE for singing.
7. CD/TAPE PITCH –
Adjust the TEMPO of music played
from the CD and TAPE decks. TEMPO can be adjusted
10% faster/slower. (Turn clockwise from middle position to increase pitch and counter-clockwise to decrease pitch.)
8. MIC 1-2 VOL–
Adjust the VOLUME levels for MIC 1-2 channels separately. Outer control for MIC-1 and
inner control for MIC-2. (Turn clockwise to increase volume control and counter-clockwise to decrease.)
9. VOLUME –
Adjust the control for desired VOLUME level. (Turn clockwise to increase and counter-clockwise
to decrease.)
10. ECHO –
Adjust the control for desired ECHO volume level. (Turn clockwise to increase and
counter-clockwise to decrease.)
11. BALANCE –
Adjust the control for desired MUSIC and song balance level. (Turn clockwise to increase and
counter-clockwise to decrease.)
12. MIC 2 –
Connect the MICROPHONE for singing.
13. PLAY/PAUSE –
Press and release the PLAY/PAUSE button to start a CD playing from track number 1. The
LCD track indicator will display “1” and the elapsed time indicating that track number 1 is playing. Press
PLAY/PAUSE button to stop for a moment during play, the LCD display “PAUSE”. To resume playing the CD,
press the PLAY/PAUSE button again.
POWER
1
2
6
11
12
10
8
7
9
13