Installation – TOA Electronics F-1300B User Manual
Page 7
7
8. INSTALLATION
8.1. Using the Supplied Brackets
The speaker system is supplied with the following brackets. Use these brackets properly depending on the
installation location and intended application.
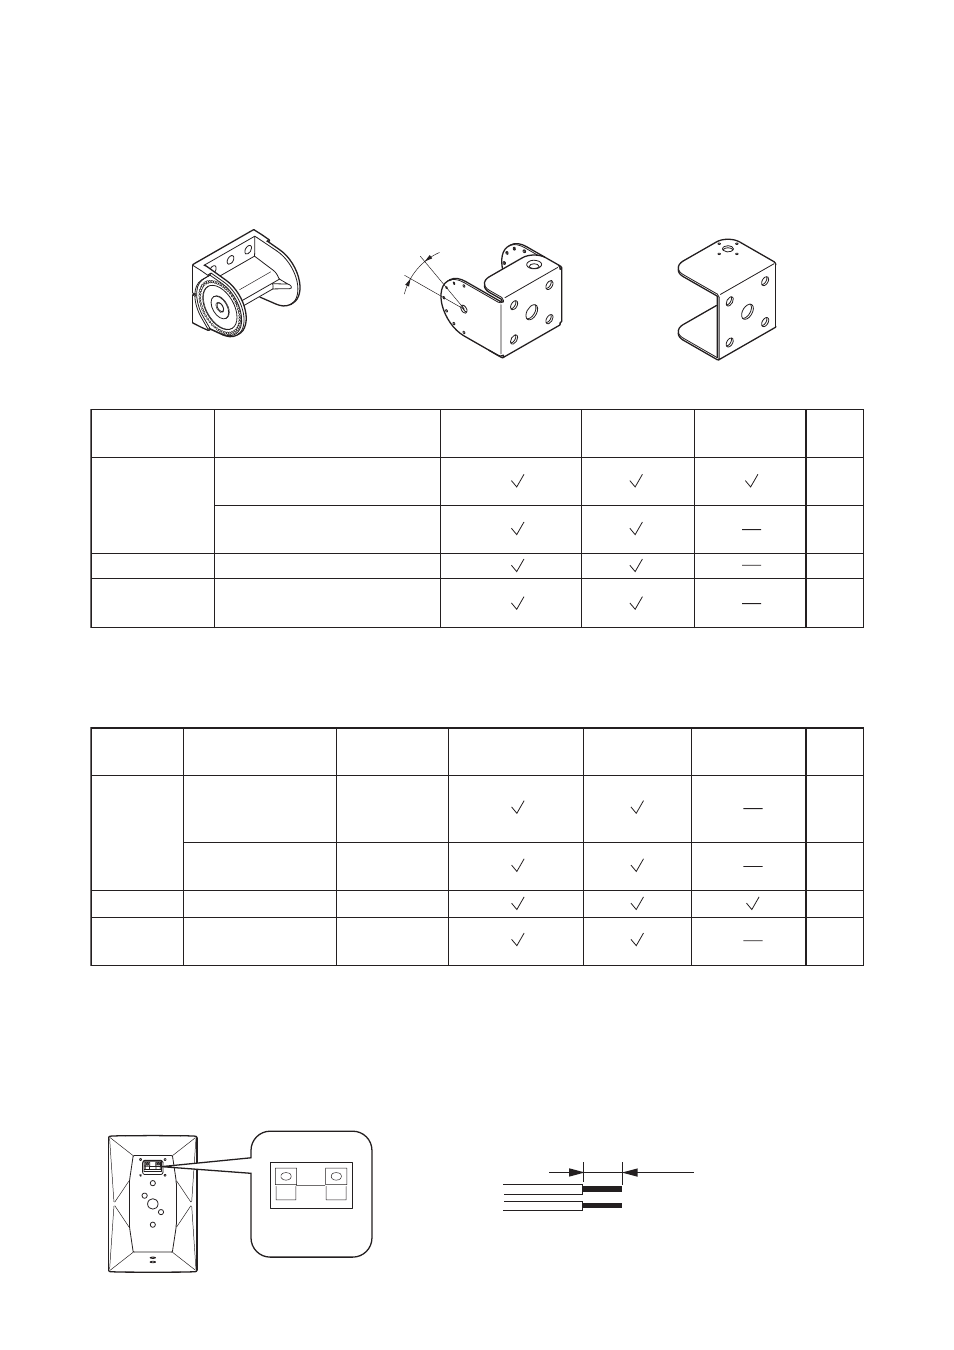
30º
[Wall bracket]
[Joint bracket]
[Speaker bracket]
8.1.1. When using only the supplied brackets
Wall
Ceiling
Speaker Stand
(Option)
When horizontal and vertical
angle adjustability is desired.
* Speaker coverage angles can only be adjusted in the vertical direction.
When close wall surface
mounting is desired*.
Vertical speaker mounting*
P. 8
P. 9
P. 10
P. 12
Mounting to the optional
ST-16A Speaker Stand
Installation
Location
Application
Wall bracket
Joint bracket
Speaker bracket
Page
8.1.2. When using both the supplied and optional mounting brackets
Ceiling
Pole
Partition
board
Horizontal speaker
mounting
Mounting to a
partition board
* Speaker coverage angles can only be adjusted in the vertical direction.
Suspended speaker
cluster mounting*
Mounting to a pole
HY-CM10B or
HY-CM10W
HY-CL10B
YS-60B
P. 11
P. 11
P. 13
Installation
Location
Application
Option
Wall bracket
Joint bracket
Speaker bracket
Page
HY-BH10B
P. 14
8.2. Speaker Cable Connections
[Input terminal polarity]
[Stripped conductor of cable]
Sperker unit (rear)
Input terminal
(–)
BLACK
(+)
RED
(0.39’’ )
10 mm