Configuration – Tripp Lite NetCommander B070-008-19 User Manual
Page 4
4
1
2
3
4
5
6
7
8
9
10
11
12
13
Configuration
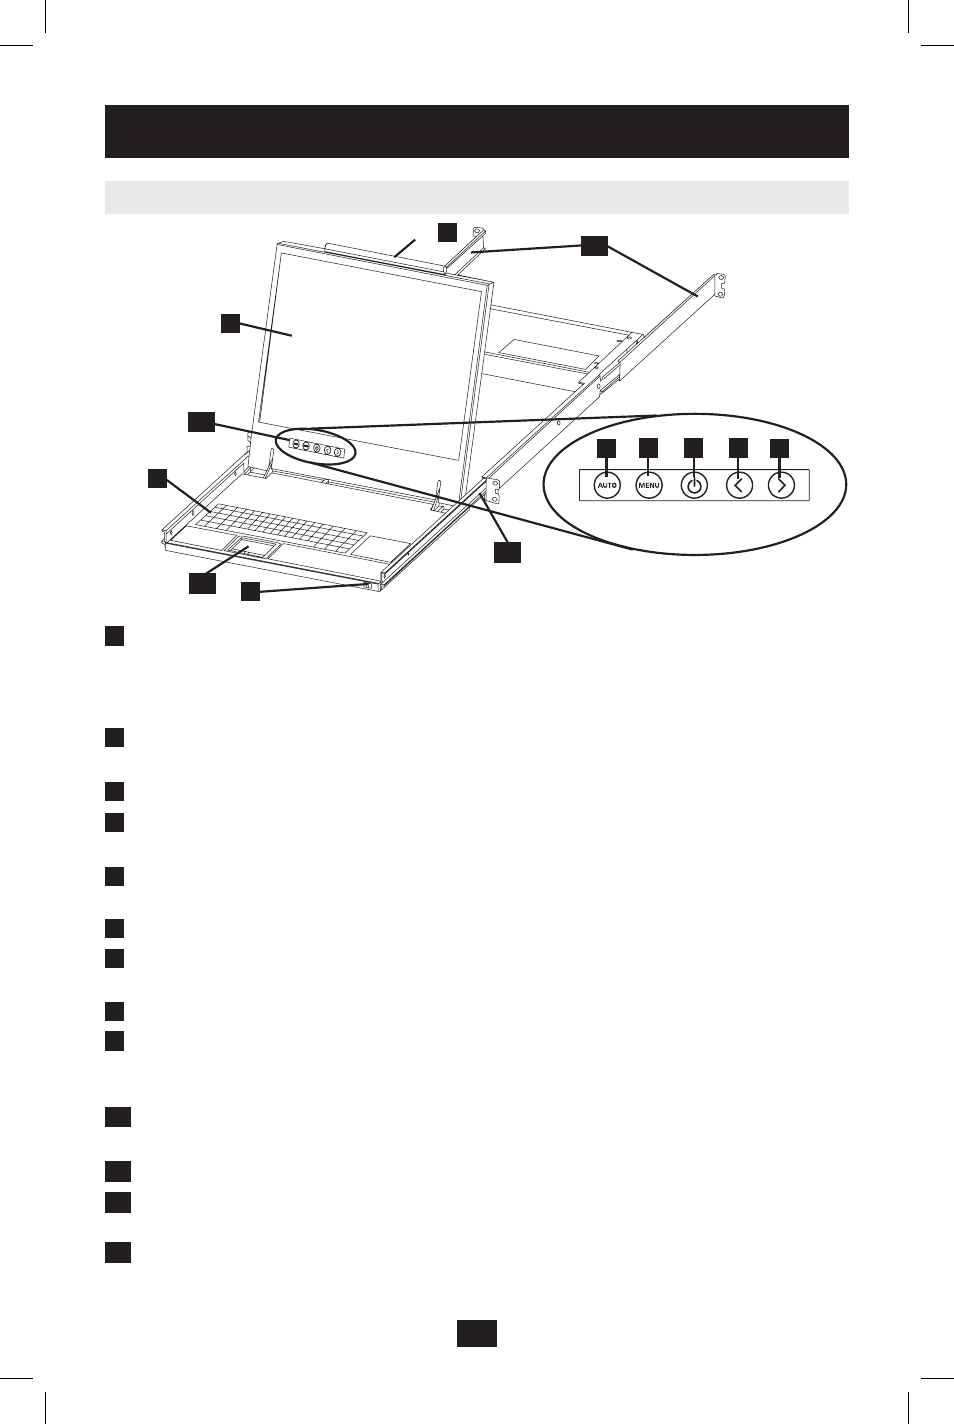
Figure 1 NetCommander KVM front panel
Front View
Figure 2 NetCommander KVM Buttons
Auto:
When the LCD Menu is closed, pressing the AUTO button will perform an Auto
Adjust on the monitor screen. When the LCD Menu is open, pressing the AUTO button
will bring you back to the previous screen/selection. If the LCD Menu cannot go back
any further, the AUTO button will close down the menu.
Menu:
When the LCD Menu is closed, pressing the MENU button will open it. When
the LCD Menu is open, pressing the MENU button will select a highlighted option.
On/Off Button: Pressing this button will turn the monitor screen on or off.
< :
When the LCD Menu is open, pressing the < button will move the highlight bar to the
left. When modifying a selected option, pressing the < button will decrease the option.
> :
When the LCD Menu is open, pressing the > button will move the highlight bar to the
right. When modifying a selected option, pressing the > button will increase the option.
Handle:
Pull to slide the module out; push to slide the module in.
19" LCD Monitor:
After sliding the module out, flip up the cover to access the LCD
monitor, keyboard and touch pad.
Keyboard
Slide Release: Mechanism to lock the drawer closed when the console is not in use.
Prevents it from accidentally sliding open. To slide the console out, you must first release
it by moving the tab sideways.
Rackmounting Brackets: There are rackmount brackets to secure the chassis to a
system rack located at each corner of the unit.
2-Button Touch Pad:
Left button is left click, right is right click.
LCD Display Controls: The LCD OSD controls located here control the position and
picture settings of the LCD display. See LCD OSD configuration for details.
Railway Release Tabs:
When the drawer is completely pulled out to the end, the railway
system will lock. Push the release tabs on both sides to release the drawer so that it can
be pushed back in.
1
2
3
4
5
6
7
8
9
10
11
12
13
201002116 93-2925.indd 4
3/15/2010 11:48:41 AM